Tuesday, June 12, 2012

Adventure of the Week: Nancy Drew - The Haunting of Castle Malloy (2008)

I am violating my self-imposed five-year rule here, as I happened to start playing Nancy Drew Adventures #19: The Haunting of Castle Malloy over the Memorial Day weekend, before realizing it came out in 2008.  So if that matters to you, dear reader, please return in 2013!  This entry in Her Interactive's popular and long-running series based on Carolyn Keene's plucky girl detective (up to 26 titles at last count) was designed by Cathy Roiter and written by Anne Collins-Ludwick, with Kyle Jones as art director.  The title screen features a mysterious wraithlike figure:


To quote the official marketing copy:

"Touted as the most romantic event to grace the ruined halls of Ireland's Castle Malloy, the Simmons-Mallory wedding was supposed to be a fairytale beginning, but now the groom is missing! Did a banshee crash the wedding or is this a case of cold feet? Can you, as Nancy Drew, unravel the knot of scattered clues and scary superstitions? You'll need to catch more than a bridal bouquet to make this a happily ever after!"


The Nancy Drew series has always had to fight certain perception issues about its intended audience; I was a bit apprehensive myself, as one of the game's advertised features is that we get to "help make bouquets and seating charts for the wedding."  But I've played a few of these before, so I was optimistic that these activities would tie into Ms. Drew's crime-solving efforts.  There are two difficulty levels - Junior and Senior Detective; I chose to play on the Senior level, because I am old.  Erm, and because I hoped there would be more challenge and content at this level.  As it turned out, I was very grateful to the fine walkthrough published at www.gamesover.com -- this is actually not an overly easy adventure to complete, and I would have been stuck on numerous occasions without some help.

I always encourage interested readers to tackle the Adventure of the Week independently before proceeding with the commentary below.  This one is still in commercial distribution and is readily available for purchase, at publisher Her Interactive's own website or digitally via Steam, among other outlets.  In the interest of documenting the adventure game genre, I will be discussing everything I experienced while investigating The Haunting of Castle Malloy.  And, inevitably, there will be...

***** SPOILERS AHEAD! *****


The opening seems a little more standardized than in the last Nancy Drew game I blogged about, #8: The Haunted Carousel -- we start out at our heroine's home desk, with memorabilia from notable earlier cases available for examination.  A "How to be a Detective" handbook serves as online documentation for those new to the genre.  This tutorial mode is worth exploring for its comedy value, as Nancy explains how the conversation interface works by playing both sides of a chat with her teddy bear, Mr. Woogle Wogle, and thereby makes us fear for her sanity.  There's also a scrapbook which serves as a promotion for the earlier Nancy Drew games, #1-#18, continuing an age-old adventure game tradition.  And we can click on a hula girl doll on her desk to watch it wiggle. 

Specific to this game is Nancy's Leprecom Telephone Service phone card for use in Ireland (leprechauns, see, not leper colonies).  We can examine this game's specific Case File, and then click on the plane ticket to begin the adventure proper.

It seems Nancy Drew has been summoned to Ireland to be a maid of honor by an exchange student she used to know, one Kyler Mallory.  (Ms. Mallory, we suspect, knows something weird and/or mysterious may happen, and so is taking advantage of Nancy's friendship.)  The castle is apparently in a state of disrepair, as is often the case with Nancy's destinations in this series; it makes for more naturalistic puzzles when the environment is broken down.

As the story gets underway, Nancy is talking on her cell phone while driving down a deserted Irish road, when suddenly a white shape flits across the road.  Nancy loses control and runs into a tree, delivering the first of many moral lessons for young players.  Fortunately, our heroine is okay -- she can't see much on the foggy, dark rural road though, and she has lost her cell phone and disabled her car, so we have to walk her through the murk to the gates of Castle Malloy.  The interface here is a bit different from earlier games I've played in this series -- moving the site map and navigation into 2-D instead of 3-D solves some of the occasional confusion produced by the other titles' use of still images with navigational arrows.  Now we can see Nancy from an overhead, slightly isometric perspective, making it a bit easier to get a sense of the game world's layout.  Nancy's available paths are initially constrained, so we can't explore as much as we might like, but the map will open up later.
Near the gates is an odd doll which Nancy can pick up; perhaps it was dropped by Tim Burton:


An odd digitized/animated sheep walks by as well, looking like something out of The Seventh Guest.  The gate itself contains a sliding-tile puzzle.  I used to enjoy these as a kid, so I spent some time getting everything in place, but the puzzle doesn't seem to be "solved" for real until we find a missing piece to put into the final open space.  And if we exit and come back in, the puzzle is reset, so my first attempt was wasted.

Nancy can advance to the castle door and knock using the heavy knocker.   The castle's cantankerous elderly caretaker, Donal, opens the door, but instead of letting her in, he sends Nancy off to the local Inn -- he's not inclined to be very helpful, it seems, and Kyler is asleep. 

So this presents a minor puzzle to get the story moving.  We can examine a formation of rocks on the ground in front of the castle, and select one to throw at the window, presumably in an effort to rouse Kyler from her sleep.  This works -- once we aim properly, we don't need to click on the window but below it so the arc works out -- and Kyler comes down to meet Nancy.

The character acting and animation is more elaborate and expressive than the earlier Nancy Drew games I've played, though still simplified -- each character has a fixed repertoire of gestures, with lip-synched facial animation.  The pre-rendered video technology works fine on PCs with a wide range of capabilities, but it has the unfortunate side effect of anchoring most characters in place.  Kyler, for example, is always sitting in this chair, reading until Nancy interrupts her:


We learn that Kyler's fiance, Matt, has disappeared.  Donal would rather the wedding be called off, as he hates the British and claims her pending marriage to Matt will upset the "fairy people"  (the supernatural kind, we presume.)  Kyler claims that she still hears Matt's voice, muffled, and believes he is just teasing her, playing a practical joke by vanishing.  We can talk to Kyler about a number of other things -- the apparition on the road, and where Mr. Delany lives.  Nancy shows Kyler the doll, and she says it looks like Matt and is wearing his ring; Nancy didn't get a good look at the person who dropped it, but Kyler thinks it was probably Matt.  She also says she is hearing his voice in many places, not just in her room.  We also learn that Matt's best friend, Kit Foley, is here.

Nancy's interactive conversation with Kyler can go on for quite a while, with lots of little details that may or may not prove important.  Donal reportedly spends most of his off hours down the road at the Screaming Banshee Inn.  Kyler's family name is Mallory, not Malloy, apparently due to her grandfather's changing his name to prevent association with a brother, Brendan Malloy, who was rumored to be working for the Axis during World War II.  He was apparently an inventor, and if I know how these narratives usually develop, we will find ourselves working to restore his good name.

Getting down to practical matters, Kyler asks Nancy to finish printing the wedding programs on the old press downstairs.  One of the things I like about this series is that many of the puzzles require players to gain a passing acquaintance with esoteric real-world skills; unfortunately, this one also forces us to play some old -fashioned puzzles that don't necessarily fit logically into the story, though they do provide plenty of challenge.

On a shelf behind Kyler we can acquire a book called The Zodiac Constellations.  An old knight's helmet contains an interlocking gear puzzle that requires us to build a chain of gears -- they can only be placed in specific places in the mechanism, and there are lots of possibilities, so it's a fairly challenging puzzle.  I decided to come back to this one later, after I wrestled unsuccessfully with it for a while.

A workbench contains another puzzle, featuring weights marked with symbols, detailed on an alchemist's simple element chart, and a computer coding chart involving binary numbers and ASCII characters (which seems a bit out of place in the creaky old Castle Malloy; I doubt Donal is developing software during his off hours.)

Another shelf contains a Towers of Hanoi puzzle, apparently wired into electricity.  Solving it lights a lantern sitting nearby, which should be handy for later exploration.

Another abstract puzzle is in a back room, requiring the player to replace missing gems stolen by a bird.  A broken pair of eyeglasses lying near the fireplace nearby is a potential clue about Matt's disappearance.

In the nursery, a child's tea party set lies broken on a low table.  A book called Le Lapin Bleu is on a dresser, with the cover art presenting the word LAPIN set on rotating letter-dials like a combination lock -- probably a clue -- and cryptic homilies abound, like "Truth Speaks Even Though The Tongue Were Dead."  These sayings seem to refer to senses or facial features -- tongues, eyes, and ears -- but I never found a direct tie-in to these clues, if such they are meant to be.  A puzzle here features odd dolls in the style of the Matt doll found earlier, and requires us to place each doll according to relationship rules, like "the pig doll can only be placed directly next to a rocking horse."   The correct solution yields a coin, or token, really; we can collect another by playing with the real rocking horse on the floor nearby.

Another puzzle is a shape/color matching puzzle, which requires us to match up colored cartoon weasels by rearranging and rotating tiles, each containing 4 shapes (top or bottom of a weasel, in red, purple, blue or green). The center tile (in a grid of 9) cannot be moved so this shouldn't be too hard to solve, but there are a lot of possibilities and it's easy to get close to a solution before realizing that we're not really close at all.  There are the fewest possible placements for the blue / head combination, so if we start with that in mind we can minimize the solution set.  No piece contains duplicates, so that also provides some constraint, but this was the most difficult puzzle in the game for me and I had to return to it several times.


We can ascend a tower staircase, but there's a gap in the stair that Nancy feels is "a little too far to jump."  A visit to Kyler tells us the glasses Nancy found belong to Matt, who can't see well at all without them.  His luggage has gone missing too, apparently.

Finding our way downstairs -- the traditionally clumsy Nancy Drew game navigation is back inside the castle, with somewhat limited abilities to rotate and turn around based on pre-rendered stills, though these indoor areas aren't too hard to make sense of -- we find the old printing press.  It's not really as old as all that -- it's an offset system, not a platen press, it uses CMYK inks, and Nancy tells us we should use the black ink, K.  We put black ink onto the printing plate -- not hand-typeset -- and put some paper on top, then run it through the press and dry it off before putting it in the basket.  Reviewing her handiwork, Nancy notes that the invitations say the best man is one "Alan Paine," not Kit Foley, which strikes her as odd.  We have to print three invitations -- the process as depicted is correct, but it skips over some of the details about how inked vs. non-inked portions of the plate really work -- and we can get through this "puzzle" easily, as the interface ensures we can only execute the steps in the proper order, so random clicking will eventually find the right process.


Stepping outside the castle, we can see odd lights in the tower.  Kit Foley is hanging around the lower floor, sporting a shiner of a black eye.  Kit believes (or claims) that Matt has gotten cold feet and fled, and that Kyler is in denial.  Kit is American -- his father is an executive living in London -- and he is designing projects for a real estate development company.  He mentions that developing residential units on the site of Castle Malloy would "sell like lightning," so perhaps there's a Scooby Doo scenario in the making.  Nancy can't snoop in the immediate area while Kit is around.

For some reason, there's a Madame Isibeal fortune-telling automaton sitting in the castle:


It appears to be inoperable at the moment; there's a number 3 above the coin slot, so maybe it needs 3 coins, and we are one short at the moment.  We can pick up a missing element weight for the alchemy puzzle on a desk in this area too.

Going outside with the lantern allows Nancy to see many things she could not make out while wandering around in the dark earlier.   An area to the west of Nancy's crashed car appears devoid of interesting details, at least at the time I visited.  A gated archway leads to a collection of leprechaun statues, and a crow that harasses Nancy briefly.  Each of the jaunty little Irish stereotypes has a clover leaf on its chest with one or two leaves highlighted; we can rotate the statues in place, but there isn't an obvious pattern, so this is probably another one to come back to with a clue in hand.  We can also pick up a draft of Kyler's vows on a bench; if this is Kyler's handwriting, she seems to have cold feet herself!  So we may want to confront her, gently, at some point.

Contrary to my uninformed expectations, there are deaths in these games -- we can direct Nancy off the cliffs behind the castle, for example, but we can also retry after any fatal mistake.  These are accompanied by humorous "Good News/Bad News" displays; e.g., there are only two rocks in the water below the cliff; Nancy managed to hit both of them.

There's a strange mound to the west of the castle, and a shoreline where we can hear a strange, banshee-like cry.  Nancy can't successfully cross the swamp -- there aren't enough stepping stones, and she drowns surprisingly easily in only a few feet of bogwater.

We can travel east down the road outside the castle to the Screaming Banshee Inn, now that we have a lantern.  There's a Leprecom pay phone, where we can use Nancy's phone card, handy since her cell phone is missing; fortunately she still has phone numbers for her friends Ned and Bess handy.  Bess and Nancy's other girlfriend George are at a pool party, but Ned was expected and hasn't arrived; the girls are distracted by some dude's washboard abs, and don't have any new information for Nancy, though they do agree that Kyler's vow notes sound fishy.  Ned is worried about Nancy too, and reinforces her suspicions about a few things, suggesting she check out the fireplace where she found Matt's glasses.  This is, essentially, the game's hint system -- a way to focus the player's attention on open puzzles via conversation, but it's handled rather subtly and can of course be left alone; I like this approach.

There are no vacancies at the Screaming Banshee Inn (the No Vacancy sign is complete with a charming cartoon leprechaun saying "Better Luck Next Time!") but we can talk to Donal, who is sitting by himself and having an after-hours mope.  Nancy has to play barmaid for a bit to get him a Crow's Nest before he'll talk; I was rather surprised, given this game's primary audience, that Nancy has to serve beer!  But it wouldn't seem right to be in Ireland serving soda and milk, and there's no hard liquor involved, just beer and mixed fruit drinks.  This is a time management mini-game -- we have multiple drink recipes and serving glasses to deal with.  If we succeed at filling all six orders quickly enough, Donal will tell us about the Sidhe - the Good People, he doesn't call them "fairies" though he indicates that other people apparently do. 

We can use the tokens we picked up earlier to play some arcade games here -- "Difference Detective" is a spot-the-difference game, and "Darts Away!" is a dart game that requires the player to reduce a starting score to zero by hitting precise score values with a limited supply of darts.  These games appear to be optional, as are (I think!) the puzzles that allow us to earn the tokens in the first place. 
Nancy can also earn tokens as tips from tending bar.


Further conversation with Donal reveals that he blames the Brendan Malloy explosion on the Good People, who had taken a shine to the Malloys' little girl, Fiona.  He says the banshee is also one of the Good People, and disagrees with Nancy's critical thinking skills when she mentions the sound she heard and suggests it might be mechanical.  We also learn that Donal likes Kit Foley, despite his obvious American/Brit roots, because (Donal thinks) he has Irish in his blood.  He also says that he didn't see a banshee until he was 54, so Nancy is special.

Returning to the castle and taking to Kyler yields erstwhile best-man Alan's phone number.  But we can't confront Kyler about her questionable notes on her handwritten vows.  There's a picture of Kit Foley and Kyler lying near the fireplace where we found Matt's glasses, so this seems like it could be a fruitful line of inquiry, but we aren't getting anywhere so we'd better go solve some more puzzles.

A wall outside the castle is covered with symbol blocks, which makes for some sort of puzzle, it appears.  Returning to the weasel puzzle, I tried to reduce the number of possibilities by starting with some obvious choices and looking for dead-ends in the solution.  But this "strategy" wasn't quite working for me -- I kept losing track of which pieces I had already placed and which were still available, and often found that the perfect piece I thought I needed was already in its optimal position.  I worked from the inside out, and from the outside in, and finally checked the walkthrough to realize that I had made a bad assumption about which pieces could go into the initial position.  Finally solving this puzzle yields a gear -- which may make it easier to complete that other frustrating puzzle... nope, it doesn't.  We may need another gear or two.


Three large celtic crosses can be visited southwest of the castle.  They are dated 1801, 1916, and 1845, but there doesn't seem to be anything we can do here. 

So we might as well phone Alan from the Screaming Banshee... he's not in on Matt's joke, but tells Nancy there was tension and fighting amongst Matt, Kit and Kyler before he left.  So something must be up.  I called Bess again, and she suggests that mixing drinks at the local pub is less than maid-of-honor-able, but offers no real ideas.

For the princely sum of three tokens, Nancy can get a fortune from Madame Isibeal -- and another weight for the scale puzzle.  The first fortune reads, "Even the longest day has its end"; the second suggests that Nancy brush up on her history.  These are puzzle hints, I think, but they are rather vague and not worth the effort it takes to earn the tokens.

Confronting Kit about his fight with Matt leads to a casual dismissal -- they were just goofing around -- but Kit enlists Nancy to put the seating chart together for the wedding.  This puzzle has some basis in reality, and while it's not difficult to parse the eleven rules and arrange the seats accordingly, it's fun to do.  Now Kit will talk to Nancy, and he gives her a book called "Brehon Law: Social Class at a Glance," which provides the key to the leprechaun puzzle out in the garden.

Do we actually need to win the games at the Screaming Banshee Inn?   Winning at Difference Detective yields... a token.  And just playing the dart game yields... a token.  Ah, we can use these tokens to buy gifts from the PRIZE! machine located between the two games.  The first use yields a whistle; it doesn't go into inventory, but becomes part of the interface so that the player can click on it to play a short tune.  It's easy to fake out Difference Detective by running the game in a window and shifting focus away, freezing the in-game time so that we can pause and look for the differences.  Winning Difference Detective a second time yields two tokens but no prize.  I did not do well enough at Darts Away! to make anything interesting happen.

Back to the Leprechaun puzzle to see if we can make sense of it now, using the book Kit gave us.  We can't move the leprechauns, so the order must have something to do with their rotation?  Seven levels of society are defined in the book, and illuminated letters F/R/B/L begin each stanza and tie a forward/right/backward/left position to each leprechaun's clover design.  Solving this puzzle yields a bird's nest, where we find a doll and the other three gems for the gem puzzle. 

We can place the gems in the empty slots, but nothing seems to happen.  Do we have to match these up with each other or the bands of color above the puzzle somehow?  We can't switch them around once they are in place, and clicking on them doesn't activate anything.  But clicking the colored gems in the order of the rainbow (ROYGBIV) opens up a secret passage.  We hear the "banshee" again, and can pick up a plank that might be useful for crossing the bog.

After doing this, when we return to the room, a bird is flying around -- and then an apparition of a Banshee actually shows up outside the window.  Kyler screams, and Nancy (clear-headed and skeptical as always) promises she will figure out what is going on.  I have a hard time believing this vision is supernatural in origin -- could it have been a balloon/automaton of some kind?

We can use the plank to cross the bog, and we can progress into its interior, seeing piles of stones along the way.  Three are stacked in a column, and then... Nancy drowns again.  Oops!  Going a different way, we pass four stones stacked up, and another drowning.  This seems to be a trial-and-error maze, and some "dead end" locations prove fatal no matter which way we go.  Forward, right, forward... nope.  AH!  Thanks, walkthrough -- I missed an important clue in the secret passage.  There's a code to the rock piles, telling us which way to go, except the details provided in the clue don't completely correspond to the actual piles we find.  In some places there are multiple piles to deal with, so we have to calculate some different directions and sequences to make sense of the clues.

If we manage to decode the maze -- ignoring the red herring stones between actual codes we need to interpret -- we arrive at an isolated cottage.  Inside we find a number of herb bowls, and a mortar-and-pestle, as well as a book of Herbs and Remedies.  Insects buzz around inside an empty birdcage.  A box on the workbench requires a key.  And there's a second ruleset for the dollhouse puzzle, with different placement rules and a need for some additional dolls.  There doesn't seem to be anything we can do here at the moment besides observing, but at least we can now go straight to the cottage without having to navigate the bog maze.

Can we make sense of the wall puzzle yet?  Some buttons make different clicking sounds when we first press them.  But these don't seem to be consistent.

Back to the cottage.  There are some wicker baskets I didn't pay attention to before, and one has a gadget in it... a jetpack?!?  Maybe this is how the banshee works.  Nancy won't mess with it indoors.  The Herbs and Remedies book has a safety charm... oh, and an insect repellent recipe!  Tansy, pennyroyal, wormwood, thyme and catnip are to be blended in equal proportions.  (Actually, if we have randomly mixed something using the herbs, mortar and pestle already, Nancy refers to whatever we put together as "bug repellent" even if it doesn't work, which kind of gives away the puzzle.) 
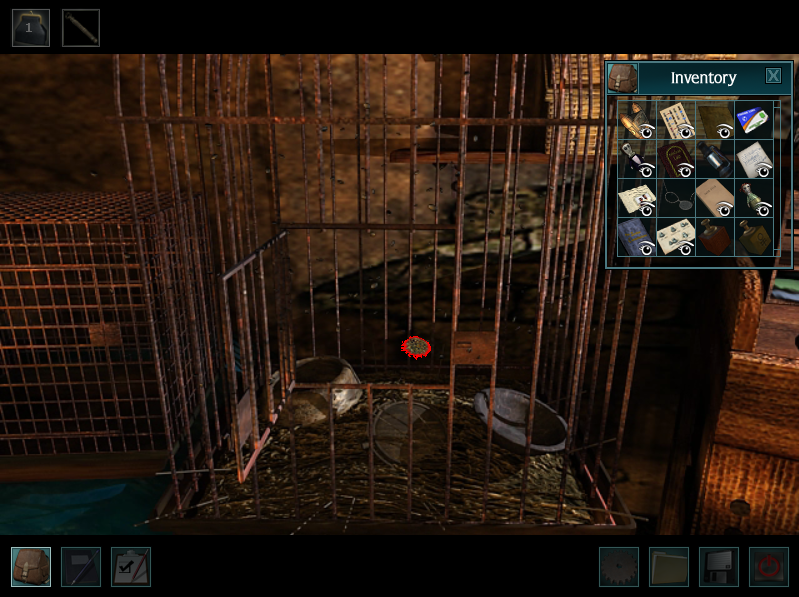


The right combination dispels the flies, and we can retrieve something from the cage bottom -- not anything dead or messily organic, fortunately, but a magnifying lens of some kind, with 4 protruding connectors suggesting it is to be mounted somewhere.

Being outside the cottage is not sufficiently "out in the open" for Nancy to try out the jetpack.  That large circular area outdoors looks suspiciously like a landing pad.  But she won't try it there either.

AH!  The lens fits into the Celtic crosses and associates the dates with specific symbols, visible through the lens on the wall some distance away.  We can't remove the lens once placed manually, but when we back out of each close-up on a cross Nancy automatically retrieves the lens.  Pressing these three symbols in numerical date order opens the wall, allowing access to a field where a lone sheep wanders around.  Actually, there are a lot of sheep here -- Nancy can harass them by running into them, causing the wooly creatures to run away a lot faster than one would think possible. 

To the east we find a suspicious area where a diagram lies on a rock -- it appears to represent plans for developing the Malloy Castle site with condos, a golf course, and parking lots.  Kit appears to be the bad person!  Especially because his name is on the stationery used to draw up the notes!  And it looks like the same bird we have seen earlier is hanging out here -- could the bird be trained to harass anyone who gets too nosy?

We can also investigate an old barn -- we can collect a gear from the wind chimes outside, so we'll have to try the gear puzzle again soon.  Inside the barn we find a complicated sheep-herding puzzle -- the sheep have chips implanted, and we need to group them by color and emotional state, guiding them into the Wallace & Gromit-esque Wooly-No-More v.6 machine to shear them.  We don't seem to have any sheep lined up for shearing, and Nancy can chase them around but not really steer them effectively -- they run off screen out of range and cannot be nudged where we want them to go. 
The whistle seems to help round up the sheep -- if we approach one and play the whistle, off it runs.  But I still don't see them in the barn, so this will take some more work also.

The whistle produces no reaction from the bird.  Let's go talk to Kit and see if we can confront him.  He says he was just messing around, daydreaming with his site plan.  We'll see what happens on this front later.   At least the photo we found earlier of Kyler and Kit now makes sense -- they used to date, but decided to be friends instead.  And we learn -- or are told by Kit, anyway -- that Kit was asking Matt if he had really thought about this marriage and what life with Kyler would be like, provoking the fight.

We've picked up some extra gears, so we can we do anything with the gears puzzle?  Yes, we can finish the chain now, and get... another doll puzzle ruleset.  Some of the most difficult puzzles yield the smallest rewards, but I suppose we will have to solve all of these in due course.

Kyler isn't terribly upset about Kit's development drawing, but she does ask Nancy to gather some herbs for her, providing a basket and a shopping list.  Are any of these herbs available in the bog cottage?  There's some lavender, but it's dried and I suspect she wants fresh flowers.  We can find all of these around the various locations on the map -- we don't have to identify them, as Nancy seems to know what they are and checks them off as we go.  The flowers are all brightly colored against the backgrounds, so they're not hard to spot, but I only found a few at first, many locations had no pickable flowers.


There's a ring of standing stones in the sheep pasture.  Another puzzle?  We can freely rotate each stone tower's three layers -- the center one is clearly seasonal, the top represents constellations, and the bottom is some sort of hash-mark code.  As I was messing around with the tiers trying to figure out what I was looking at, I accidentally hit upon the right combination (1 out of 12) and the puzzle was solved.  This yielded what seemed to be a key to a more complex puzzle -- shamrock algebra, let's call it, where differently shaded shamrocks participate in equations.  The math isn't hard to do -- three shamrocks are given to us as constants, and we can readily derive the other values.  But it's not clear what we are supposed to do with these values; at least we can also pick up some flowers for Kyler's bouquet here.

Back to the sheep shearing?  We can talk to Donal some more at the Screaming Banshee.  He tells us more about the runes on the stone pillars, but won't lend us his book about the Ogham Runes unless we sit in and play drums with his favorite band.  This is a simple music rhythm game, using four arrow keys and the spacebar to thump the drums as the notes scroll along.  Unfortunately, the patterns provided fit very poorly with the Irish folk tune the band is playing, so poor Nancy makes horrible, ugly music even if we hit the timing dead on.  This seems like a wasted opportunity to create a little appreciation for Irish music, but we do get the book, and we can also ask Donal about the other side of the bog, but he doesn't tell us anything we haven't already figured out.

What about the scale puzzle?  We have acquired a couple of additional weights to try out.  Balancing requires moving heavy and light weights around on three counterbalanced platforms, until everything is even.  This yields the missing tile from the sliding-tile puzzle on the entrance arch we encountered way back at the beginning of the game.  Solving it, and replacing the missing tile after the others are in place, yields a printing plate.  Hmmmmm.  Each plate is identified with a binary code.  We can also pick up some vervain flowers on the other side of the archway.

What else?  We still have to find some more flowers: sage, larkspur, vervain and rose.  There is sage hanging in the bog cottage.  That otherwise purposeless area at the west end of the road outside the castle grounds has larkspur, and we can pick some roses near the leprechaun puzzle.  Now the basket appears as a lovely bouquet in inventory, and is presumably ready to give to Kyler.  While we're in the cottage, we notice that the sheep doll in progress needs to be stuffed, and we will need more wool for the job.  That would explain the need for shearing some sheep.

When we attempt to take the bouquet to Kyler, we hear voices arguing before we reach the door.  It's Kit, defending his land development sketches, and Kyler, who thinks Kit refuses to acknowledge that it's over between them and has scared Matt away somehow.  Nancy opts not to enter the room, as the voices fade into muffled conversation; we can make out some of what they're talking about, even without any subtitles, including lines like "he has eaten a lot of vegetables since he's been here" and "he does love his pizza," which makes neither Kyler nor Kit sound particularly concerned about Matt's fate.

While he is suitably distracted, Nancy can go through Kit's things... except from the tags on the luggage under his bed, they appear to be Matt's things.  Hmmmm.  Ned seems to agree if we call him; Nancy also discusses the "banshee" apparition with him, and indicates she thinks this is a real woman who might live in the hut in the bog.  We might suspect that the "unearthly howling sound" has something do with the jetpack Nancy found there.

We can blow the whistle in the sheep barn, and Nancy says, "Any of you sheep want a haircut?"  But we're still not getting any volunteers.

The argument is over, so now we can confront Kit about Matt's luggage.  Kit claims ignorance, then says he thinks Kyler is right and Matt might still be here.  He confirms that his discussion with Kyler did not go as he had hoped, and he seems depressed that the wedding might actually go through as planned.  Kyler, meanwhile, is happy that Nancy has picked the flowers -- of course, she's been sitting on her bride-to-be's bottom reading a book all this time, while Nancy drowns and falls off cliffs and has to mix bad drinks and embarrass herself playing the drums.  Kyler doesn't suspect Kit, and hopes Matt is still around somewhere.

We have more dolls and patterns for the dollhouse puzzle now.  But we don't have some of the dolls shown on the patterns -- a sheep, and maybe a mouse doll?  Back at the inn, Donal admits that he put Matt's luggage where Nancy found it, so Kit is probably in the clear for now.  Donal gives Nancy a key to the sheep pen and asks her to round them up for shearing -- "With that lantern of yours, you'll be done before you know it."  You'd think the man had never seen an electric flashlight before.

Now we can officially do some shepherding -- we have a sheep counter onscreen, and when we blow the whistle and a sheep runs off, the count goes up.  In my playthrough I still had one in the pen from playing around earlier, but now we can secure them inside after ten sheep are rounded up.  Nancy has to walk fairly slowly to avoid scaring the sheep away, and they'll only go to the pen if they're well within her lantern's glow.  Some of them also get bored and leave the pen as time goes on, so we have to work fairly quickly.  I was up to 10 at one point, but didn't get to the pen fast enough, and ended up back down at 5 before I finally got them all locked up.  Whew!

Donal is happy the sheep are put away -- he seems remarkably coherent considering he's been drinking at the Screaming Banshee for several hours at this point -- and Nancy asks if it would be okay for her to shear one of them tonight, so we can get some wool to finish the lamb doll.  Donal agrees, but insists she fill three bags, in keeping with the old nursery rhyme, I suppose.  He gives her a simple tune to play on the whistle to bring the sheep in for shearing.

Now we can actually work on the sheep-shearing equipment puzzle.  The sheep are nicely animated as each one walks in and demonstrates its emotional state.  A happy sheep jumps up and down, eager to be sheared, for example, and this visual interpretation challenge makes for a nice modern-adventure puzzle.  We have to sum up each sheep's reported color, name, and emotional state, punching the resulting code into the control panel.  The sheep-shearer machinery itself is far from realistic -- it's a huge, alien-looking device that uses a suction tube and rotary shears to do the work; very Wallace-like indeed!  We can only blow the whistle to summon a new sheep while in the "pulled back" view, which is a bit inconvenient, and we have to shear six sheep to fill three bags.  I misjudged one behavior -- I think it was meant to be panicked, but I took it to be "bleating."  Calm is easy to recognize, as the sheep just stands still.  Each successfully sheared heep gets a bizarre hairstyle, otherwise the poor animal is left ragged and half-naked, and the wool apparently vanishes into thin air and doesn't count toward Nancy's goal.  With three bags done, Nancy grabs a little bit of wool for her own purposes.  We can sheer a few extra sheep if we want to, but there's no reason to do so.  A quick trip back to the cottage to finish off the sheep doll wraps up this complicated quest.

The open field allows us to play with the rocketpack, apparently counting as outdoors.  But the system is fairly complicated -- it looks like we'll need some documentation to figure out how to start it up.

We're still missing one doll for the dollhouse puzzle's second and third patterns.  We need to win the darts game at the Inn to win a dog doll, according to a walkthrough.  This is not easy to do -- Nancy's aim is shaky and drifty -- but as it turns out, if we play five times in a row without winning, we still earn the doll as a consolation prize.  Whew!

Now we can go back and try to solve this placement puzzle.  Round 2 produces a token, nothing special there.  Round 3 isn't too difficult, though there are few fixed relationships; fitting everything into place yields another printing plate.  We can read enough detail on this one to see that it's meant to be used with black ink to produce some jet-pack instructions; the other plates must fill in the colors.

So we'd better figure out how to use the printing press.  It looks like we have to make multiple passes with the paper.  I'll start with the black.  It has a binary code of 01001011, or 75 decimal.  These certainly look like jet-pack instructions.  But how do we figure out which color goes with the other plates?  It looks like we have to finish the whole job with all the plates before drying the paper, and we can shred unsuccessful attempts if we make a mistake.  Looking at the binary values on the plates, we can see that 01001101 = 77, and 01000011 = 67.  This is odd, but ASCII 67 = C, 75 = K, and 77 = M.  So that all jives, at least.  I haven't used the Yellow ink, but let's go outside and see how we're doing with the jetpack at this point.

Clearly, I'm missing a plate -- there is no white button to press, but there's a yellow button, so there must be a missing plate corresponding to decimal 89.  This one (thanks, walkthrough!) comes from the standing stone pillars, a puzzle I thought I had solved.  The real solution to the standing stones is a pretty complicated puzzle.  We have to set the four stones to correspond to seasons and constellations -- the first one is tied into Kyler's wedding on June 1st, and the others follow in seasonal order, going clockwise.  We have to decode the Primitive Irish alphabet, used between the 4th and 6th centuries, to figure out which of 4 Sabbat celebrations -- Samhain, Imbolc, Beltaine and Lughnasa -- corresponds to each season, using the Ogham Runes book obtained from Donal.  Beltaine is a precursor of May Day, so it's closest to the wedding, and the others follow suit in order, starting with the pillar with the stone disc below it where we earlier found the shamrock algebra page (a red herring, in hindsight.)  We also have to reference the book of astrological symbols to align the constellations properly, but only four symbols appear on the stones, so this part isn't as difficult as it might be.  To its credit, the in-game Zodiac book correctly explains that the actual constellations are now out of synch with the astrological interpretations, which have remained tied to a fixed Earth-based calendar instead of adjusting with the actual positions of the constellations at those times of year as they exist today -- in case anyone needs more evidence that astrology does not really work as astrologers claim it does.

Returning to the printing press with all four plates in hand, we come up with jet-pack instructions that ought to work.  "Oh my gosh!  I'm flying!  Woo-hoo!" Nancy exclaims with uncharacteristic glee as we get off the ground -- and now we can fly her into the uppermost window of the castle tower we have otherwise been unable to access.

Of course, nobody is in the room, but there are some new puzzles to work on.  Above a writing desk is a raven puzzle (another video game reference to Lewis Carroll's Alice books?)  Entering the right combination on the desk -- LAPIN, based on the book we found in the nursery earlier -- yields a fourth dollhouse ruleset.  This comes from a drawer below the desk, though, and the desk hasn't actually been opened.  The raven diagram above isn't actually a puzzle, it seems, just a family tree of sorts, with some handwritten annotations adding a bottom row with last names only.  It correctly notes the change in Kyler's father's name to "John Mallory," as she mentioned earlier.  Another drawer contains a list of books referring to nautical mapping, animal movement, hydroponics and erudite knowledge, with humorous titles. 

There are also some landmarks drawn on the book list.  The circle pattern (that I thought was a jetpack landing pad) is one we've already visited, but one doesn't look familiar.  Fortunately Nancy can still use the jetpack -- though if we fly out of bounds, it sputters and she crashes fatally into the water.  But we can fly beyond the cliff's edge to find an odd little rock outcropping in the middle of the water.  N5 is written on the rock, and that clue seems to be the only item of interest here.

Returning to report Matt's continued absence to Kyler doesn't yield any new conversations, but the shelves of books behind her yield the books on the list we found in the tower.  We can't take them with us, nor can we page through them to any depth -- we just see the title page and gift dedications.  The first two books' messages contain "Two simple" and "One year"; are these clues to go with N5?  YS__N doesn't seem promising.  Here's a "Three years" reference --  YSY_N?  The fourth reads "on legs of four, they spin" - 4T or 4L?  YSYLN sounds more like something that might be an Olde Irish word or name.

Returning to the castle tower to try our luck with the desk lock, we see the "banshee" again, hovering by the window and then zooming around.   Clearly Nancy's jetpack isn't the mechanism here.  Hey!  The desk lock has no Y's in it.  Are there other clues?  I really needed the walkthrough here -- each dedication is a word puzzle in and of itself, and I really wasn't getting anywhere trying to figure out two of the four.  The code is actually CQLXN -- not a word at all -- and opening the desk yields a creepy Nancy Drew doll.

There's also a book here -- a diary, apparently kept by Brendan Malloy's wife. She recounts his liquid propellant work and his jetpack development -- the jetpack dates from World War II! -- and her travails keeping up with their young daughter after Dad gives her a jetpack of her own.  Mrs. Malloy worked evenings at the Screaming Banshee Inn at the time, and to keep her husband's activities confidential she attributed the strange goings-on up there to fairies, inadvertently creating local legends.  There's also a picture of Fiona, and a little sign reading "Waverly Academy for Girls."  And a key!

Doing the final dollhouse puzzle requires the Nancy Drew doll, and this round is the trickiest -- there are no fixed landmarks on the diagram or "directly next to" connections, so there are few constraints to anchor the solution.  And some of the rules seem self-contradictory on the face of it.  But it can be done, yielding a... blue egg?  This is probably a bonus item, and not germaine to the plot.

So now what?  Maybe the key will work on the lockbox in the bog cottage.  It does, and we discover that the box contains a Happy Sixth Birthday card to Fiona from -- well, there's no name, but it looks like her mother's handwriting as seen in the diary.  Maybe we can... ah, as we put the box away, the Banshee herself shows up.  She -- Fiona, we may presume -- looks much more normal up close, but she has wild long white hair, seems mute, and is clearly a bit feral.  She pushes Nancy down a trap door, and after a brief bit of canned video, it seems that now that we have figured a few things out, we will still have to fight our way back to the surface to resume our mystery solving.

Trying to take a seemingly handy elevator up reveals that Matt is also down here -- probably a victim of Fiona's fear.  We're trapped on opposite sides of a wall, but Nancy can engage him in conversation to fill in most of the remaining plot details.  Matt indicates that Fiona has been feeding him... vegetables, which he claims to hate.  I don't think Kit and Kyler were aware of this, or at least we weren't supposed to hear anything about it earlier.  This underground area is Brendan Malloy's lab; Matt fell down here through a secret hole in the nursery floor when a crow attacked him, after he found a secret passage and planned to use it to prank Kyler.  We also learn that Kit got his black eye when a branch whacked him while he and Matt were rigging a leprechaun gag to fool Donal. 

Nancy explains that young Fiona was thought to have been killed in the lab explosion, but wasn't, and that she has been wandering around unseen in the bog for most of her life.  Matt is suitably distraught over the consequences of his joking around, in case anyone needs a moral to the story.  Getting Nancy and Matt out of the basement lab will apparently comprise the rest of the adventure.

We find some oddly shaped pieces of metal that look puzzle-ish in the lab.  There's a bulletin board with sketches and a child's drawings; I wish Nancy would comment more on these things, as they are sweet but eerie, now that we know what Fiona has been through, but she just looks at them without saying a word.  There's a periodic table of elements on the wall, and it's historically accurate, only covering the elements up through 92, Uranium, the last one known at the time of World War II.  There's also a table of incompatible chemicals, not a standard feature of the table but a clue for a puzzle down here.

We also find a checklist for a rocket launch, presumably left over from Mr. Malloy's work, and a workbook with specific instructions.  Perhaps we can blast our way out of here.  There's a button to be pressed in case of emergency lockdown -- Matt couldn't read it, having lost his glasses -- and it opens up a puzzle requiring us to sort chemicals in various categories into three bins, being careful, of course, not to combine anything incompatible.  The overhead view makes the chemicals look like pucks, but they are actually flasks, and if we forget to open the claw wide enough, or we bump them accidentally, we can spill them, gassing Nancy for good.  We can manipulate the claw with a mouse interface, or more quickly with the keyboard.

I thought we had to sort all of the flasks out, but what we really need to do is clear a path to reach the key sitting by the Category 3 bin at the top of the screen.  The Category 3 chemicals are very difficult to handle, it seems -- even touching them seems to blow Nancy up?  No, it's just an implementation oddity -- the puzzle won't let us pick a flask up if we can't successfully reach the appropriate disposal bin, so we can't just move things around to make space -- they will explode if we touch them too early.  This puzzle is a bit tedious and doesn't really teach us much about chemistry, and the design really is a bit sloppy -- if we grab the key clumsily, it also blows up!

Now we encounter a puzzle where we have to assemble a staircase out of geometric shapes.  This seems less than realistic but is straightforward to finish, getting us access to the rocket's nosecone piece stored on a high shelf.  We can put the nosecone on the rocket -- it's not a large rocket, maybe about 10 feet tall, so we clearly won't be riding in it, just launching it to either open the lab up or perhaps send up a distress signal.

The rocket launching console is next to a diagram of the rocket.  We have to fix some wiring at the base of the rocket first, connecting wires at one end of a tangled mess to -- not matching colors, but complementary colors?  The appropriate combinations are noted in Malloy's workbook, assuming the colors haven't faded over more than fifty years in storage.  We have to hit the three launch panel switches in order, left to right, but if something's wrong it won't fire up.  I was missing Fin 1, one of the metal "puzzle pieces" in the lab, and had to attach it to the rocket based on Malloy's blueprint.  We don't actually have to do things in exactly the order specified by the launch instructions; as long as we get everything put together, the rocket will launch.

The finale is non-interactive -- all the characters watch as the rocket goes up, except for old Donal, who is apparently sleeping off his drunken night at the Screaming Banshee -- and everything wraps up in short order.  Kyler and Matt marry happily ever after, and Kit meets a real live girl, that is, not modeled using CG like everybody else in Nancy's world:


Poor Fiona is taken into custody; we learn that she was raised by a hermit who didn't speak, hence her emotional and mental stunting, but with some proper care and therapy, she should be able to live out her days reasonably happily:


The jet packs are confiscated by the military, and most likely the writers, so as not be a complicating factor in future Nancy Drew adventures.  Nancy never gets a happy ending herself, but she's generally pretty happy anyway, and takes her satisfaction from a job well done.  There's a brief trivia quiz on story details at the end of the game, a preview of the next game in the series, and then the credits roll.  It's nice to confirm that the music was performed live, not MIDIfied, and there are some staged bloopers at the end, which aren't as funny as real ones might have been but make for a nice little bonus.


Contrary to first impressions, the Nancy Drew games can actually be fairly lengthy and challenging.  The puzzles in The Haunting of Castle Malloy aren't as well-integrated into the story as I would have liked -- only a few of them really make sense in context, and some of the ones that do are just needlessly complicated fetch quests.  But the story has a nice sense of atmosphere, and Her Interactive is one of the few companies publishing commercially successful adventure games today, long past the genre's heyday.  The Nancy Drew games vary in quality and difficulty, but they are definitely NOT casual adventure games, and players looking for a solid puzzle challenge are advised to check this one out.


Monday, June 11, 2012

Kickstarting a Genre

(UPDATE: The Two Guys from Andromeda (aka Guys from Andromeda LLC) have achieved their funding goal with hours to spare!)

There's something really interesting going on in the adventure game world these days, and it's largely thanks to the innovative Internet funding mechanism pioneered by Kickstarter.  Quite a few new adventure titles are being proposed and funded this way; if you're reading this blog, you've probably heard about the headline-making, as-yet-untitled Double Fine Adventure project from Tim Schafer, which aimed to raise $400K and came up with more than $3 million.  In the wake of that success, other big names have gotten involved -- Sierra On-Line stalwarts Jane Jensen and The Two Guys from Andromeda (Scott Murphy and Mark Crowe) have launched new projects this way as well.  There are also a number of modestly-budgeted independent adventure games like Lilly Looking Through, The Curse of Shadow House and HeXit being pitched and very often fully funded via Kickstarter.

Now, I'm not discounting the financial and creative risks undertaken in recent years by more traditional publishers like Telltale Games and Her Interactive, or indie adventure companies like Wadjet Eye Games; their hard work has kept the genre vital, retaining and expanding the adventure game audience and paving the way for this new wave of titles.  And gaming today benefits across the board from the advent of digital distribution over the Internet, taking a healthy chunk of manufacturing and advertising cost out of the publishing equation and making a number of genres commercially viable again in the process.

What's exciting about Kickstarter is that it takes the next step, going beyond inventory and marketing risk to reduce the financial risk of creating new adventures in the first place.  By appealing directly to fans, publishers are essentially funding new efforts based on committed pre-orders.  But Kickstarter's true genius may lie in its tiered buy-in system -- info-hungry gamers appear to be ready and willing to pay extra for "inside" previews and premium content, like downloadable soundtracks and beta testing access.  And if more money is raised than is requested, so much the better -- more funding often means additional platforms and languages can be supported, gameplay can be expanded, and overall quality can be improved.

This approach truly democratizes the domain of the venture capitalist and angel investor -- anyone willing to pony up the cash can feel like a part of the game development process.  And, judging from the different rates of progress seen in the current crop of Kickstarter projects seeking money, fans and gamers recognize that they are taking a risk too -- after all, if the money goes out but the project fails to materialize anyway, that investment is lost.  There are no guarantees that any of these funded projects will fulfill their early promise, or that the budget targets floated on Kickstarter will prove adequate.

But this isn't a bad thing -- making this whole process more public provides better information for everyone.  After all, if a project can't get its Kickstarter listing funded, perhaps it's time to go back to the drawing board and come up with a better idea, instead of investing somebody else's cash in a product that may not find a receptive audience.  (The Two Guys from Andromeda are facing this possibility as I write this, as they have not quite hit their $500K funding goal with less than 24 hours of the standard 30-day window to go; one factor may be that they do not have rights to the Space Quest series they created at Sierra, and so are trying to do something similar called SpaceVenture, starring a new hero character.)

The bottom line is that pre-funding a project adequately, if not extravagantly, allows development to proceed with a measure of safety.  Game development is traditionally funded by big publishers, who have largely abandoned the adventure genre because it's not an easy sell in the 3-D Call of Duty: Modern Warfare era.  But that doesn't mean that there aren't fans out there who are willing to chip in to help a worthy project reach fruition.  It's a gamble, but a rational one -- and even if you don't have any skin in the game, the horse race at Kickstarter is always fun to watch.

Personally, I hope that most of these projects meet their funding goals, and that many of them go on to meet their creative goals.  The Internet's raw power lies in making connections, and I think that hooking talented designers up with a multitude of fans has great potential.  If a team's project gets made with Kickstarter money, turns out well and sells beyond its initial committed fanbase, then another project may very well get funded.  It may even get funded through Kickstarter.


Friday, June 8, 2012

East vs. West: KLAX (1990)

It's been a while since I've done any import gaming coverage, so this week I'm tackling an easy one, and an old favorite of mine: KLAX, published in 1990 by Tengen in both Japan and the USA, based on Atari's coin-up arcade game.  There's not much difference between the two versions -- most of the English text remains in Japan, and there are only slight differences in the copyright notice on the title screens.  The Japanese PC Engine edition had to credit the local division, Tengen Ltd.:


While in the US, where it was Tengen's one and only release on the TurboGrafx-16, the legal credits were slightly simpler:


KLAX was one of the many action puzzle games that followed in the successful footsteps of TETRIS, but to the credit of Atari Games designers Dave Akers and Mark Pierce, it's a different and more intense experience.

The player has a small collection of 25 slots to work with, and must stack colored tiles to create horizontal, vertical and diagonal rows of matching tiles.  The player must actively catch and flip the incoming tiles into place -- no just letting them fall, as there's a drop meter and too many fumbles result in a lost credit.  We can also accelerate the movement of the tiles to speed up play when we think we can take it, and we can stack the tiles in last-in-first-out order on the "catcher" to make adjustments on the fly, up to a point.  Scores correspond to the difficulty of the row formed -- verticals are easy, as we can just dump the tiles into the same column; horizontals are more difficult as we have to plan ahead a bit; and diagonals are the most difficult, especially when we have to form a number of them in a Diagonal Wave.

The Japanese version is largely in English, but the key instructions are presented in Japanese:


KLAX was simple enough in concept that it was ported to most of the platforms viable at the time, including the aging Atari 2600, the Game Boy (two different versions, both using patterns instead of colors), the Atari Lynx and the NES among many others.  The PC Engine/TurboGrafx version is one of the closest to the arcade -- the digitized audio doesn't sound as clean and the effects sound like they were re-recorded, but the look and feel of the game are pretty spot-on.  The voice that announces each wave is slightly higher-pitched than in the original arcade version, and the end-of-wave applause is augmented by cheering gentlemen in the background, making both sound effects sound slightly more Japanese.  After we've exhausted our three credits, the game even retains its original ADD COINS display, even though we have absolutely no way to do so:


The Japanese version retains the Western alphabet for entering the initials on the high score board, so our old friend Alphonse S. Snodgrass can still put in an appearance if we want to rock the arcade 80s style.


KLAX holds up remarkably well two decades on -- it has a stronger sense of risk and reward than the comparatively sedate TETRIS, and while it hasn't survived nearly as long as its presumable inspiration, it's still good for a quick round every once in a while.  Maybe the fact it hasn't been updated to death as KLAX Party or KLAXORAMA means Atari got it right the first time.


This one's not hard to find in either territory, and for a near-arcade-perfect experience I would recommend picking up the coin-op version in one of the Midway / Atari / Williams collections where it has turned up in recent years.  But if you're looking for the PC Engine edition, it might be available here.

Thursday, June 7, 2012

The LoadDown: 06/07/2012

This week's roundup is seriously overdue due to a busy schedule of late, so I'm playing catchup from the last several weeks.  Here's what's newish during that timeframe... there's been quite a lot of retro material lately!  Maybe summertime is the season to bring back the back catalogs and save the new titles for fall.


WiiWare -- Once again this platform is quiet.  Oddly, its sibling has been more active again.  Wii U's a comin', boys.

Wii Virtual Console --  A couple of Neo*Geo titles were released, courtesy of SNK Playmore.  Metal Slug 3, already available on Wii as part of the Metal Slug Anthology released on disc a few years back, is still a worthy entry in this popular Neo*Geo series, with fluid, arcade-quality cartoon animation.  The Last Blade does what the Neo*Geo often did best, presenting a fluid one-on-one fighting game inspired by feudal Japan.

DSiWare --  Several new titles arrived.  99Seconds is a sequel to 99Bullets, an abstract arcade-style shooter with a time slow/rewind mechanic.  Kakuro by Nikoli collects 50 of these Sudoku-esque number deduction puzzles.  Curling Super Championship is one of the few videogames focused on this ice-bowling sport, with stylus-controlled sweeping action.  Cat Frenzy is a match-3 puzzle game with feline artwork.  And the bootleg-sounding Snakenoid borrows heavily from Taito's Arkanoid, with the player controlling a snake instead of a paddle.

3DS eShop --  A number of titles debuted, though few -- wait, NONE of them is truly new.  One notable name is Rayman, a classic platformer with colorful, detailed animation; unfortunately, it's not a 3DS remake, but an old Game Boy Color port that manages a credible imitation of the original but could be so much better on the 3DS.  The same goes for Prince of Persia -- brand name, version lame.  At least there's Game & Watch Gallery 2, Game Boy Color versions of 5 classic Nintendo LCD-based handhelds with simulated original and updated color graphics.  Art of Balance TOUCH! brings the WiiWare physics puzzler to the 3DS.  There's also a demo version of time-management restaurant game Order Up!!, and a demo of retail title LEGO Batman 2: DC Super Heroes.

XBox Live Arcade -- Lots of vintage content here.  Digital Leisure has released the classic Don Bluth laserdisc game, Dragon's Lair, yet again.  Four Sega Vintage Collections have arrived, presenting classic games from the Sega Master System and Genesis -- one featuring Alex Kidd in Miracle World, Super Hang-On and The Revenge of Shinobi; one compiling Wonder Boy in Monster Land, Wonder Boy in Monster World, and the never-before-released-in-America Monster Land IV; the trilogy combo of Streets of Rage 1-3; and another set featuring the Golden Axe trilogy.  Oddly, XBLA has seen a trilogy of racers -- Joy Ride Turbo, Mad Riders and Bang Bang Racing.  And Sega's sequel, Virtua Fighter 5 Final Showdown, a port of the latest iteration of its long-running coin-op franchise.  Sega has been doing this recently, creating new coin-op arcade games with plans for downloadable porting to home consoles -- oh, how the mighty arcades have fallen!

PS3 on PSN --  I'll start with the PS3-only items.  Pure Chess is a chess game with player-vs.-CPU and player-vs.-player online play.  Doctor Who: The Eternity Clock, based on the extremely long-running BBC sci-fi series, features voice work by current Doctor Matt Smith, Alex Kingston and Nicholas Briggs; unfortunately the gameplay seems to consist of awkward platforming and occasional puzzles, when fans might have preferred a proper adventure game.  Dungeons & Dragons: Daggerdale finally makes it to the PS3; it's a hack-and-slash action/RPG that received middling reviews on other platforms.  Virtua Fighter 5 Final Showdown and Mad Riders are on the PS3 too, as well as individually-packaged Sega Vintage titles Alex Kidd in Miracle World, Super Hang-On, The Revenge of Shinobi, Wonder Boy in Monster Land, Wonder Boy in Monster World, and Monster Land IV

PSOne Classics --  Classic survival horror adventure Alone in the Dark: The New Nightmare is now available.

Notable on Steam -- XSEED has begun releasing some Japanese PC games in the US via Steam, with Falcom's Ys Origins arriving recently - an Ys series game previously unreleased in America.  A computer version of the board game Ticket to Ride also makes it to Steam, following console releases a while back.

Tuesday, June 5, 2012

Adventure of the Week: Mission Asteroid (1981)

Sierra On-Line's Hi-Res Adventure #0: Mission Asteroid was published after #1: Mystery House, and #2, The Wizard and the Princess, but as it was intended as an easier game aimed at younger players, Sierra retro-assigned it to number zero.  It benefits from the improved graphics engine introduced with adventure #2, allowing color fills as well as vectors, allowing for much more colorful graphics than Sierra's pioneering first effort.  Mission Asteroid was released on the Apple II, Commodore 64, and Atari 400/800 computers but apparently retired from Sierra's active catalog lineup fairly early.  It's difficult to find accurate credits for this one; programming is credited to Chris Iden by some sources, and it seems stylistically different from Roberta Williams' games, but it was included in Sierra's 1997 Roberta Williams Anthology, so she must have had a hand in its creation as she did in most of Sierra's early adventure products.

We'll be playing the Apple II edition here.  The only version I was able to track down is a pirated copy -- another reminder that, for better or worse, today's online archives benefit from rampant software theft via BBS bulletin boards back in the day.  This one is particularly egregious, as the pirates' hacked-in title screen removes any reference to On-Line Systems and the game's actual authorship: 


As always, I suggest that interested gamers tackle Mission Asteroid before proceeding here; it's fairly brief and most of the puzzles are so straightforward they scarcely count as such, though efficient execution is a must.  This one requires a separate save disk, but provides 15 save slots, and it's important to use this feature as timing is of the essence and there are many ways to slip up.  It's too bad the game doesn't recognize multiple disk drives, though, as accidentally saving to the original game disk is not prevented, and doing so corrupts the data, rendering the game unplayable!  It took me a number of tries to get everything right, and you can learn about my travails if you're willing to suffer the...


**** SPOILERS AHEAD! ****


The player begins standing in front of a nondescript building, with a "BEEP, BEEP, BEEP!" noise coming from somewhere.  We have a watch in inventory, which closer examination establishes as a BEEPER WATCH with a switch on it and the time 12:05.  Five minutes pass for each move we make, so it appears we will have to deal with some time pressure; we are apparently one of the slowest human beings on earth, taking a solid five minutes to open a door, ten minutes if we plan to walk through it afterwards.

As in the opening of Mystery House, we can't GO BUILDING or navigate by compass direction, but have to OPEN DOOR and GO DOOR to enter.  The Apple ][ graphics do the poor secretary no favors, saddling her with two phones of different sizes and serious hat hair:


We can TALK SECRETARY, but all she says is "HELLO" until we try to go north, prompting her to be slightly more verbal with"PASSWORD, PLEASE."  Going east puts us back outside; if we PUSH SWITCH on the watch, we are told that we need to REPORT TO THE BRIEFING ROOM AT ONCE. THE PASSWORD IS STARSTRUCK.  This is a handy reminder, as our character is (as usual in adventure games) a complete amnesiac about his or her own history and circumstances, and as an added bonus the incessant beeping now stops.  SAY STARSTRUCK and the secretary says, "YOU MAY NOW PASS."  The parser expects 8 characters, so we can't SAY STARBUCKS, or SAY STARSKY AND HUTCH, or suggest we will do ANYTHING to meet Mick Jagger to fake our way past the front desk.

The map has consistent geography for the most part, befitting the game's introductory nature.  The COMPUTER ROOM contains an APPLE ][ computer and a diskette, making for a bit of a meta moment.  The diskette is unlabeled and the computer reveals nothing special, but if we INSERT DISKETTE -- PUT DISKETTE INTO WHAT? (ANSWER QUESTION) -- COMPUTER, then... I DON'T KNOW HOW TO COMPUTER SOMETHINGINTO COMPUTER works better, or at least reveals that SORRY, THE GENERAL HAS NOT AUTHORIZED YOUR ACCESS TO THIS COMPUTER.  That's a pretty secure Apple ][!  They must have some sort of top-secret military network in place.

To the east of the computer room is a supply room containing EXPLOSIVES, which we can casually carry around.  The explosives have a timer, which will probably come in handy at some point.

A long tunnel leads north to the PRE-FLIGHT CHECKOUT ROOM, where a rather skeevy-looking doctor will check us out prior to takeoff. 


If we try to proceed to the west, we are informed that THE DOCTOR WILL NOT LET YOU PAST UNTIL YOU ARE IN BETTER SHAPE AND GET RID OF THAT AWFUL SMELL.  Getting a little personal there, aren't we, Doc Zombie?  Maybe you should lay off the booze.

There's a GYM to the east of the long tunnel.  We can't WORK OUT, but if we EXERCISE then we are told, OK. YOU NEEDED A GOOD WORKOUT.  The doctor doesn't seem convinced that we are in better shape yet, though.  Further east is a SHOWER ROOM, which should help with the smell... I hope... and yes, after we also TAKE SHOWER, we can get past the doctor to reach the AIRFIELD, with a rocket visible in the distance.

Going north takes us to the rocket, with a ladder going up -- no fancy launch tower elevators for us!  But we'd better go back inside and finish mapping and preparing, before we just head into space with no clear idea of why we want to go there.  And we should also visit the briefing room as instructed earlier; we haven't exactly done so "AT ONCE."


Going west from the starting area leads us to a briefing room and the aforementioned general, and we are advised that I THINK YOU HAD BETTER SALUTE.  The general appears to be about 12 years old as depicted here, but none of the human beings in these early Sierra games come off very well; my understanding is that Ken Williams did the artwork himself using an early graphics tablet, so we aren't seeing anything close to the art quality most people associate with Sierra's later graphic adventures. 

SALUTE yields the basic mission information we will need -- we have to fly to an incoming asteroid, blow it up, and return before it hits the Earth at "7:15 TONIGHT."  It is presumably a large enough asteroid that this will be a bad thing.  Having issued these orders, the general just leaves, presumably to go do something fun or otherwise prepare for the end of the world while we deal with the situation.  And -- yowch, our watch says it's already 04:45!  Too much exploration makes Jack a... MY GOD! WE'RE ALL GOING TO DIE! ... but not just yet, so let's see what else we can learn before the proverbial (and actual) game is over.

INTO COMPUTER now yields a flight plan -- we are instructed to go right for 10 minutes, up for 5 minutes, left for 15 minutes, down for 5 minutes, left for 5 minutes and up for 10 minutes.  It's a good thing our watch works in 5-minute increments, and that our rocket navigation works in a fuel-wasting two-dimensional right-angle fashion like an adventure game map, or we'd be even more doomed than we likely already are.

We make it back to the rocket at 5:55 -- it's going to be close, as we have to fly for 50 minutes just to reach the asteroid, according to the plan -- and CLIMB LADDER, PUSH BUTTON and GO DOOR to enter the ship.  We find ourselves in the VACUUM LOCK ROOM, and can push a blue button to purge the lock, change the doors and roll up the ladder.  We can now enter the rocket proper and take charge of the CONTROL ROOM.


We've apparently been given no training beyond a workout and a shower, so it's a good thing there's a SIGN on the console providing basic operating instructions.  We can PUSH VIOLET to close the door, though this isn't actually necessary.  LOOK CONSOLE reveals four buttons and a throttle; we can PUSH THROTTLE to lift off, PULL it to land, and use color-coded buttons to navigate left (white), right (black), up (orange) and down (blue).  Apparently these directions remain relative to a static frame of orientation back on Earth; at least we'd better hope they do, or we will be hopelessly lost as soon as we take off.

And on this first try, I didn't make it anywhere close to the goal... if we don't accomplish our mission in time, THE ASTEROID HAS JUST STRUCK THE EARTH DESTROYING ALL LIFE and the game is over.

On a second try, I make it to the rocket by... whoops, my SAVE GAME damaged this diskette because I did not put another one into the drive as prompted, so the game is now unplayable.  On the third try, with a fresh copy, I arrive at the rocket by 2:00 and should have time to make it to the asteroid.  Funny how no matter what time we take off, we use the same directions to reach the asteroid... must be that Einsteinian relativity stuff.  Or the complete absence of it.

I hadn't run into many deaths yet in my playthrough, but there are a number of fatal scenarios possible.  I learned that if we slip up and PUSH THROTTLE instead of PULLing it to take off, it breaks off, THEREBYE [sic] RUINING YOUR CHANCES TO GET BACK TO EARTH.  YOU ARE DEAD.  But I didn't even take off yet!  Can't I just step outside and get a replacement for this cheap piece of junk?  The game is over, in any case.

Fourth try... we are in the control room at 3:00 and ready to take off.  At 4:15 we have landed on the asteroid.  But THE ATMOSPHERE IS NOT SUITABLE FOR BREATHING. YOU ARE DEAD.  I thought I might be less than prepared.  So what have we missed?  A spacesuit, presumably.  HOLD BREATH certainly doesn't do the trick, so it's time to hunt around a bit. 

Back near the start, I discover that I didn't visit the PRESS ROOM west of the briefing room to TALK to the REPORTERS there... but that just gets us KICKED OUT OF THE AIR FORCE FOR DIVULGING TOP SECRET INFORMATION, ending the game Apparently the government thinks nobody else has noticed the earth-destroying asteroid primed for collision later today, and also has someone else they can send to accomplish this crucial mission.  This event also confirms that the mission is being run by the United States Air Force, and not, say, NASA, which may explain the apparently improvisational nature of the operation.

It doesn't seem I've missed any rooms now in the base, and the doctor is of no help.  Ah!  There is a storage room aboard the rocket, west of the control room -- an exit not mentioned in the room description -- that contains a spacesuit.  We WEAR SPACESUIT... but we still die when we open the airlock?  Ah - there is a dial on the suit, and if we TURN DIAL then THE AIR IS ON.  But it doesn't last very long, as it turns out.

Exploring the surface of the asteroid, we find a small cave with a tunnel leading to a VERY DEEP PIT.  This seems like a good place to put the explosives, and DROP EXPLOSIVES gives us a choice -- IN THE PIT OR ON THE FLOOR? -- and it seems best to go with IN THE PIT, although that doesn't quite work as advertised; we have to use two words: IN PIT.  Except... I forgot to SET TIMER before dumping it into the deep pit, way out of reach.  And besides, I am running out of air!

Trying again, we are informed that we have to decide how many minutes to put on the timer: 90, 120, 150 or 180.  It's already 6:30 in my attempt... so I'm already too late!  Too much dilly-dallying yet again.  Why did they make this timer so limited?  Another try gets me here at 5:35, just in time.  Of course, we can't just walk back to our rocket the way we came, because the map here is slightly inconsistent.  And I ran out of air again, and died just as I was about to reenter the rocket ship.

Being slightly more efficient gets us in the door in time -- fortunately we don't have to take off the spacesuit, as we can breathe normally even if we have it on and it runs out of air; this is a good thing, because we are only allowed to drop it in the storage room.  But I restored from a save where I had set the timer too late, and the asteroid slammed into the earth well before it was due to blow up.

While most of the puzzles are very simple, timing is the primary challenge presented by Mission Asteroid, and frankly the USAF seems guilty of abysmal planning.  They've built a rocket capable of carrying enough fuel to travel to the asteroid and back, but designed a space suit with barely enough air to support exploration of said asteroid, an unmapped hunk of rock that just conveniently has a cave with a pit near our landing site.  The powers-that-be seem to have very short notice about the impending near-Earth object collision, yet they've sent the player on this mission, a slothlike character who requires five minutes to look at his/her watch or pick up an object. 

This realization leads us to reconsider the convoluted flight plan, generated on the USAF's Apple ][ instead of one of those fancy NASA computers.  If we map the flight plan out on graph paper -- again, the rocket uses a 2-D navigation system, so it's not hard to deal with -- we spot some possible shortcuts.  It looks like we can just go left for two moves and up for two moves, or up, left twice, and up again, traveling for 20 minutes instead of 50.  Does this work?  The former does, though the latter just brings us back to Earth -- this is apparently a bit of a maze.  So we actually need to map out the space area, based on the unique visual displays in each location.  This allows us to arrive on the asteroid in fewer moves, so we now have more time to finish our mission successfully.

Setting 90 minutes on the timer proves to be insufficient -- I am not far enough away from the asteroid when it blows up, so HUGH CHUNKS OF THE EXPLODED ASTEROID HIT YOUR ROCKET AND DESTROY IT.  Poor Hugh!  Sorry, dude, we didn't know anybody was living on the asteroid.  And in this situation we get no credit for our noble self-sacrifice while saving the Earth; we are just dead and the adventure is over.

On the next try, I go for 120 minutes -- which is still cutting it close.  We can't return to Earth exactly the way we came -- it takes longer to return than it did to go there, for some reason, but we can make it in five moves.  And we don't have to disembark -- as long as we land safely on our home planet, and the timer goes off before the asteroid impacts, we are victorious!


Oddly, after this display and the "GOOD BYE..." message, control is given back to the player at a prompt.  And if we choose to wander around some more instead of just turning off our own Apple ][, then at 7:05 PM, we learn to our dismay that THE ASTEROID HAS JUST STRUCK THE EARTH DESTROYING ALL LIFE!


I'm pretty sure this is just a programming oversight, but it gives the impression that blowing the asteroid into lots of smaller pieces didn't really save the Earth, after all.  It suggests that the bulk of the asteroid's lethal mass continued hurtling towards us, and our "successful" mission just gave the doofuses at the USAF a final self-congratulatory 30 minutes of existence before dying along with the populace they worked so hard to keep in the dark.  Our failed mission also seems to have accelerated the fatal impact, as the General's briefing told us it was expected at 7:15 and it came in at 7:05.  (Though given the fictional USAF's track record on planning as evidenced by this episode, that might just have been due to poor calculations.)

I thought Mission Asteroid was a fun little adventure, and a bit more challenging than I had expected due to the time factor.  It's a brief and simple story, but sometimes that's exactly what I'm in the mood for, especially when I'm on deadline.  I will eventually have to tackle the rest of the pre-King's Quest Sierra adventures, but next week I'll be reporting on something else.  I think.


Tuesday, May 29, 2012

Adventure of the Week: Mystery House (1980)

I've put this venerable title off for much too long, so this week I'm finally playing through Mystery House, reputedly the first ever illustrated adventure game, on the Apple II.  It was created by the husband-and-wife team of Ken and Roberta Williams in 1980, and was the first game published by their legendary company, On-Line Systems, later known as Sierra On-Line.  The game was released to the public domain in 1987 to commemorate Sierra's seventh anniversary, and disk images can easily be found online; I will be playing via the AppleWin emulator here.  The released public domain version features an updated title screen, though the original On-Line Systems title can be briefly glimpsed as the game starts up.


The illustrations are fairly crude, and the parser is primitive too -- we are warned that the computer can't tell one note from another and will arbitrarily choose which one to read or drop.  Seven other characters are simply defined by name, occupation and hair color -- Tom the Blond Plumber and Sally the Redhead Seamstress, for example.  We won't really get to know them, nor do we need to memorize their details.  There wasn't a lot of memory to work with on the Apple II, or disk space -- Ken Williams innovated here, defining a vector-based graphics scheme for compression.  In this generation, unlike the later Sierra Hi-Res Adventures, his system did not support pattern or color fills, just white outlines (and the famous Apple II TV display red/blue artifact colors seen on thin vertical lines, whether the designer wanted colors or not.)


Ken Williams' artwork leaves something to be desired, but his display engine is fairly fast, though we can still see the lines being drawn.  Play is slowed somewhat because the display has to redraw every time we issue a recognized command, but we can hit ENTER at any prompt to toggle the graphics on and off (at least temporarily; examining certain objects forces graphics mode back on.)


I always encourage interested readers to play these games before reading my commentary below, and as this one is officially in the public domain lo these 25 years, it's not hard to track down.  But one of the reasons I document these early adventure games in detail is so that not everyone who wants to know something about them actually has to play through them.  So while the joy of discovering this game's secrets may be forever damaged if you continue, I certainly won't be offended if you opt to march straight into the...

***** SPOILERS AHEAD! *****


We begin in the front yard of a LARGE ABANDONED VICTORIAN HOUSE.  Why everyone is gathering at an abandoned house remains unclear; there doesn't seem to be a will reading in the works, so couldn't we have gotten a conference room at a Holiday Inn or something?  We can't navigate anywhere else, but we can GO STEPS to find ourselves standing on the porch.

If we have nothing in inventory, INVENTORY just redraws the current room.  This early illustrated game was already breaking away from strict text adventure conventions -- many items are depicted but not described, probably because the Apple II's 4-line text window made for a tight squeeze.  Movable objects are drawn onscreen, and we can see why many later graphic adventures did not try to do this -- most objects are drawn the same way wherever they are dropped, leading to weird placements and proportions.

On the porch we see a welcome mat, but we can't LOOK MAT or LIFT MAT or TAKE MAT; we can try to LIFT or TAKE WELCOME, which the parser does recognize (IT DOESNT [sic] MOVE, though.)  I was looking for a key when trying this, but we can simply OPEN DOOR; it closes and locks behind us after we enter the house.  Inside, we find a number of crudely drawn, suspiciously similar-looking individuals.  Again, just having graphics at all was pretty amazing in 1980!


There's also a NOTE visible on the floor.  We can take and READ NOTE to learn that VALUABLE JEWELS ARE HIDDEN IN THIS HOUSE. FINDERS-KEEPERS.  So this will be a treasure hunt, with competition, it appears.

The kitchen contains a refrigerator, stove and cabinet.  We also start to be warned that IT IS GETTING DARK as we consume moves.  The cabinet contains some matches, and the refrigerator presents an empty pitcher.  Soon IT IS DARK, YOU CAN'T SEE; a match will give us light for a few turns, but it's not clear how many we have so finding a more permanent source of light is in order.

Going west from the kitchen through a door leads us into a forest maze; in the early going, I didn't have enough inventory objects to map it out, so I had to restore and do some more investigation indoors.

East of the entry hall is a library, containing a note reading, "7 - 6 = 1 THEN I AM DONE!"  So one of the 7 guests intends to kill the other 6.  Somehow we are not surprised.  We can try to GET BOOK but IT DOES NOT REMOVE, making this a sorry excuse for a library.

Beyond the library is a fenced side yard, where we discover... a corpse!  You can tell he is dead by the lump, the X'd out eyes, and the cartoon pain lines coming off of his head.  It is SAM, THE MECHANIC, killed by some sort of blunt object.  One down!


South of the entry hall is a dining room, with a candle on the table. However, in my second attempt it was already too dark to find the matches after I got to the kitchen, so even though I could see and open the cabinet, I could not LOOK or FEEL around in there after darkness fell like a rock.  So we'll have to do this more efficiently.

The lit candle (successfully collected on my third try) proves helpful for finding our way around in the dark.  We can SAVE GAME to a single slot, and this seems like a good time to do that before we explore the upstairs.  There are several doorways along an east-west hallway, and we can access the attic where a ladder and sledgehammer are available.  These seem like good adventurous artifacts to have with us, so we'll take them along; except we can't TAKE LADDER, as it as another object that does not remove.  Nor can we CLIMB LADDER -- YOU CLIMB UP BUMP YOUR HEAD ON THE CEILING AND FALL, DAZED BUT ALIVE.  Was there a question about whether we would still be alive?  The ladder shouldn't have presented a serious risk, as it appears to be about five feet tall.

We can GO DOOR (a rectangular shape just behind the ladder) to find a storage room with some boxes that the parser does not recognize and a chest, locked of course. 

The hallway leads to a BOYS [sic] BEDROOM (the game's engine appears unable to render single quote marks in text) containing a note reading, "YOU WILL NEVER FIND IT! IT'S ALL MINE!"  Typical greedy villain stuff.  The nursery further down the hallway contains another dead body -- IT IS DR. GREEN. IT APPEARS HE HAS BEEN STABBED.  Zoiks!


As we try to enter the LARGE BEDROOM, a dagger is thrown at us, but misses; we can collect it and take it along.  The SMALL BEDROOM nearby contains the corpse of SALLY THE SEAMSTRESS, also killed with a blunt object; there is a blond hair on her dress, which would suggest that Tom the Plumber, Bill the Butcher or Daisy the Cook was involved somehow.  Interestingly, LOOK WINDOW here (or anywhere other than the attic) mentions that the attic window is not boarded up. 

We can see the forest from the attic window -- and if we GO WINDOW, we fall, sustaining potentially fatal injuries whose potential is fulfilled as UNFORTUNATELY THE AMBULANCE DRIVER SMASHS [sic] INTO A VOLKWAGEN [sic]. NO SURVIVORS.  So that's not a good idea.  At least we can RESTORE GAME; at least I had thought it best to SAVE before diving recklessly through the window.

We might have enough inventory items to map out the forest now, so it seems we should try that again.  I had a little trouble with the parser on the way -- if we OPEN DOOR while we are looking in the refrigerator, the game seems to think we are referring to the refrigerator door, so I had to leave the room and come back in order to open the door on the kitchen's west wall.  (We can LOOK ROOM to reset the perspective, also.)

There still seem to be more rooms in the forest than we have unique items available (using the NOTE only once to avoid confusion), so I restored back to the house to snoop around a bit more.  We can trip over the rug in the dining room and start a fire with the lit candle if we try to OPEN DOOR (or do just about anything else in this room).  In one move, THE FIRE IS OUT OF CONTROL. YOU ARE DEAD.  Trying again before dark (restart #4!) we learn that the doors just lead to the back yard we have already visited, so if there's a point to the fire, it is not to prevent us from reaching any particular location.

I did notice that there's a gate in the back yard, and we can open it to reach a small cemetery wtih six newly dug graves.  There's also a person here, apparently male, with a shovel; it is JOE THE GRAVEDIGGER, who has just finished digging the six graves.  He won't talk; his main purpose is to prevent us from GETting the SHOVEL.  If we try to GO GRAVE, YOU FALL IN ONE AND JOE BURIES YOU.  He is very dedicated to his work, it seems, but not very bright or empathetic.

LOOK SINK in the kitchen reveals a butterknife, which should help us map the forest a little.  But we still need more -- there are at least 8 unique locations in the forest, and the map is not at all geographically consistent.

Can we break the locked chest open with the sledgehammer?  HAMMER CHEST, USE SLEDGEHAMMER and SMASH CHEST all fail.  Is there anything we missed in the library?  LOOK SHELVES reveals that THERE ARE NOT MANY BOOKS LEFT, but the sofa, table and fireplace reveal nothing new.

We can go back to the cemetery and KILL JOE -- WITH WHAT? -- WITH DAGGER -- he becomes a dead body, depicted with the same graphic as living Joe except his eyes are X'd out.  Now we can TAKE SHOVELLOOK JOE at this point still says he has just finished digging six graves -- without acknowledging that he is unlikely to be digging any more -- and LOOK BODY just tells us it's JOE THE GRAVEDIGGER.  We can GO GRAVE and climb out again now, but that doesn't help us at all, and we can't BURY JOE as I DON'T KNOW HOW TO BURY SOMETHING.  The shovel is useful for mapping, but we can't DIG anywhere, so I'm not sure we needed to do this.

Hmmm.  At this point it seems I have the whole forest mapped out, but there doesn't seem to be anywhere to go and CLIMB TREE in every location I've reached doesn't reveal anything special.  So we're still looking for clues elsewhere.  There's something odd and triangular-shaped in the dining room -- a ceiling lamp, I think?  We can't do anything with it, or unscrew the bulb.  If we try to GET LAMP we're told IT'S FASTENED DOWN, and we have the candle anyway.

I did a full reboot to check the introductory list of characters and instructions for any hints.  The opening instructions suggest that in the kitchen we can turn the WATER ON -- which is true; we can't FILL PITCHER, but we can GET WATER.  Maybe we can put out the fire in the dining room after we "accidentally" start it, now?  Yes -- this empties the pitcher, and leaves a puddle on the floor.  Except the vaguely circular object shown is not meant to be a puddle - it's a HOLE burned in the floor!  But we can't GO HOLE; we can LOOK HOLE, though, to find a key.  Maybe the fires just burned through the rug in the most convenient possible location.

Now we can UNLOCK CHEST in the attic; it contains a gun, which may come in handy given the mortality rate we're seeing around here.  We have a few more items to map with -- the KEY looks horribly out of proportion in the forest, but again I haven't found any new locations here.

Walkthrough time?  Graeme Cree's walkthrough at the CASA Solution Archive suggests that I'm missing a bathroom somewhere.  Aha!  I didn't realize we can go N again when we encounter the stairs to the attic, the drawing led me to believe this was a dead end, but we can actually reach a study.  A window here is said to be boarded up, though we can see a house outside.  Aha #2!  It's a PICTURE!  If we try to TAKE PICTURE, IT IS FASTENED TO THE WALL WITH FOUR BOLTS, and we can UNSCREW BOLTS -- WITH WHAT? -- WITH BUTTERKNIFE (I've used that trick a lot myself in the real world) to loosen it.  Behind the picture we find a button on the wall.

I'm going to check out some doors here before I push the button -- in the bathroom, we find a dead chef, except it's actually BILL THE BUTCHER sporting inappropriate headwear.  He's been strangled with a pair of pantyhose.  A rectangle by the sink is apparently a TOWEL, and the odd little enclosure in the corner is meant to be a SHOWER.  We can TAKE SHOWER, making us clean and happy though there seems to be no reason to do so; perhaps we are just washing off the blood spatter from our earlier murder of Joe the Gravedigger.

Now I am ready to PUSH BUTTON -- except the parser doesn't comprehend my meaning.  PRESS BUTTON is what it wants to hear, and a secret panel opens.  This permits a one-way trip into a musty crawlspace, which leads down some stairs to a basement where another dead body lies on the floor.  There's a gigantic key on the table -- two-thirds as large as the corpse lying nearby, who is TOM THE PLUMBER, holding a daisy in his hand.  So it looks like our lead suspect is DAISY THE BLOND COOK; the evidence is highly circumstantial, but there aren't many people left.  The walls are covered with algae, of no apparent value or import.

This room further leads to a couple of new locations -- a north-south corridor, and a tunnel in the rock.  The tunnel leads to a tall pine tree -- a useful forest location at last?  From the top of the tree we can see a telescope pointed at the house.  Somehow, this scope can see a trapdoor in the attic ceiling that LOOK UP does not reveal when we are standing right underneath it.  We can't go back the way we came here; we have to navigate the forest maze again and none of my landmarks are in place from previous attempts.  So I'll restore and explore the other option.

The north-south corridor leads to a small pantry.  There are some jars here, but they do not remove.  There's a hole in the wall, but GO HOLE just forces us to return to the pantry.

I'm stuck again; Mr. Cree's walkthrough indicates we can WIPE ALGAE (RUB ALGAE works too) with the towel to reveal a loose brick in the wall.  GET BRICK, and we have found the jewels!  Now perhaps it is finally time to deal with getting my bearings in the maze -- somehow UP from the very first forest maze room gets us back into the house via the kitchen we originally exited by going W, while CLIMB TREE does nothing of the sort.

LOOK GUN reveals we have a single bullet, so we'd better make it count if we are going to be the sole survivor (a distinction we are likely to have earned by killing two people, which makes us no better than Daisy, really; just slower.)  Now when we return to the attic, we can see the trapdoor that was formally completely invisible, even when we climbed the ladder and nearly knocked ourselves out bumping into it.  Roberta!!!

Up into the attic we go, to find Daisy holding a bloody knife, and sporting tiny little beady eyes of evil:


There's a note on the floor, but she won't let us read it.  LOOK DAISY indicates that SHE IS GOING TO KILL YOU, which is expected, but she's taking her time about it.  We can't verify whether she is missing a single hair, or her pantyhose, but we can look at the window, and SHOOT DAISY -- which doesn't work, but FIRE GUN does.  The prose here is understated, or perhaps written in lawyerese so as to prevent incriminating ourselves --  YOUR GUN IS EMPTY.  DAISY IS NOW DEAD.  Post hoc, your honor, not necessarily propter hoc?

The note here is the same one we saw earlier -- YOU WILL NEVER FIND IT! IT'S ALL MINE!  So what's left to do?  We can use the key we got from the basement to unlock the main door of the house, and (after we open it) we can go north to find ourselves back on the porch.  Then we just trot down the steps to victory!


Wow, I always wanted to be a GURU WIZARD!  We are NOT victorious if we haven't killed Daisy, and killing Joe ourselves doesn't seem to do us any harm, though we don't need his shovel for anything.  This whole situation seems to foreshadow Graham's lack of moral uncertainty in Ms. Williams' later King's Quest games; I have noted elsewhere that he seems happy to murder witches, Yetis and vampires without losing a wink of sleep over it.  There are alternate solutions available in this game too -- Mr. Cree's walkthrough indicates we can use the sledgehammer to break the wall in the kitchen in order to get into the pantry and pick up the front door key, though I just grabbed it while I was down there earlier.


Mystery House is a primitive game, but it was more challenging than I had expected -- the forest maze alone consumed quite a bit of playtime, and the innovative graphics presented their own variety of challenges.  It's certainly worth checking out for a look at the history of adventure games.

Tuesday, May 22, 2012

Adventure of the Week: Danger Is My Business (1983)

This week, I'm returning to another long-running series, with SoftSide Adventure #20 - Danger Is My Business, published in 1983 for the Atari 400/800.  (Frequent visitors may notice I've skipped over SoftSide Adventure #19, Alaskan Adventure, which I played quite a while back before I realized how many of these games were published and resolved to do them in order.)


It sounds like a noir crime drama, but this is actually an Indiana Jones-inspired jungle adventure starring the off-brand hero, Sarasota Sam, who seems to favor a gun instead of a whip.  He's also purportedly a U.S. Special Agent, but there's an air of Dr. Jones about him (or her, if our character is actually Sarasota Samantha.)

Usually I recommend that interested readers play the game before continuing, but this one seems to have a serious, game-breaking bug very near the dramatic conclusion.  I will provide a solution of sorts in the discussion and walkthrough below, but to see it you are likely to encounter other revelations.  So I won't insist that anyone else actually try to solve this one; feel free to wander into the...

***** SPOILERS AHEAD! *****


We begin standing in the jungles of India; a tall tree can be climbed, but there's nothing of use up there.  To the northwest of our starting point lies the American Embassy.  All we are carrying is a hat and a gun, and unlike his presumed inspiration, Sarasota Sam will happily DROP HAT and leave it behind, which is handy for mapping.  We can CLIMB TREE in any location, though most do not contain anything useful.  But one of the jungle trees has an apple in it, suggesting some strange biogenetics are at work, or else the designer just doesn't know his flora very well.

We can't get back inside the American Embassy -- the Ambassador asks, "have you my daughter?", and if we answer honestly with a NO, he tells us, "Then get her!", so clearly we're not welcome until our mission is accomplished.  YES prompts only, "Liar."  So why did he ask???

Ack!  Mapping the jungle is critical, as most of the time we are simply SOMEWHERE IN THE JUNGLES OF INDIA with a few distinguishing landmarks here and there.  But getting the map figured out is a major pain -- there aren't many items available, and if we DROP APPLE in the jungle, it gets stolen by a wild boar!  So we need to make a few educated guesses and confirm later when we have more items to work with.

There's a SLEEPING BEAR in the jungle -- LOOK BEAR reveals, helpfully, that He's sleeping on something you'll needWAKE BEAR doesn't work -- fortunately, perhaps -- and if we SHOOT GUN, Noise attracts angry natives - You're dead.

There's also a MONKEY in the jungle; He's playing with some shiny object.   Another tree has a BANANA up it.  The monkey will give us a SMALL KNIFE in exchange for the banana.

Another "room" features a creek, with a handy CANOE floating in it.  UNTIE CANOE yields a surprising limitation on the part of our hero -- I'm not very good at untying things.  We can CUT ROPE with the knife, and then GO CANOE.  But a few moves later, Your feet are getting wet; LOOK CANOE reveals a small round hole in the bottom of the hull.  We can PUT APPLE  -- In or on what? -- IN HOLE to plug it.

We can try to PADDLE in the canoe, but we're not getting anywhere yet.  Maybe that's what's under the sleeping bear?  Dropping the apple in the bear's location brings the wild boar whizzing through, but doesn't seem to disturb the bear one bit.  We can't TIE BEAR or PULL BEAR either.  We can THROW APPLE -- At what? -- AT BEAR, to get him to wake up and kill us, also not useful.  (THROW is otherwise a synonym for DROP, it seems, so this is special handling for the apple.)  If we try to climb the tree and then throw the apple at the bear, we are simply told, Better not.   LOOK TREE is more helpful -- There's a hornets' nest on a branch above the bear (though it's oddly invisible if we climb the tree and look at it from that vantage point.)  THROW APPLE / AT NEST sends the bear running off into the jungle, in the great adventure game tradition of random animal cruelty.

Under the bear we find a BOAT PADDLE, which was likely uncomfortable for the poor creature, though not nearly as uncomfortable as a swarm of angry hornets.  The apple is unrecoverable, so we have to go back to the apple tree and get another one.

Now we can paddle across the creek -- the apple plug fails, the canoe capsizes and we lose our gun in the process, but we make it to shore.  At least mapping becomes a little more straightforward here, with fewer "all directions" locations to deal with.

We encounter some MAD INDIAN HEADHUNTERS -- I presume this means angered and not loony -- and if we try go past them to the northeast, they give chase, throwing spears.  If we try to stop and GET SPEAR, the next one hits us and proves fatal.  So we should probably seek an alternate route.

To the southeast of the creek crossing is a bog, stretching from a nearby tree to another one in the distance.  We can't GO BOG -- not that we really want to -- and we can LOOK TREE to see that this one is an elm tree, which seems a bit out of place.  We can actually navigate the long way around, it appears, to get from one side of the bog to the other, so I'm not sure what purpose it really serves.  Unless... if we start moving and don't stop after we arouse the headhunters, maybe we can get them to fall into the bog... but simply climbing the tree doesn't manage it.

If we go back the way we came, we see a SPEAR LODGED IN TREE after the headhunters' first attack.  There's no time to GET SPEAR, though; if we stop moving at all, we get speared by their second try.  What we can do is climb the tree on the west side of the bog, and TIE BRANCH to affix the rope to  a strong branch; now we can SWING ROPE to get to the other side, and Headhunters topple single file into the quicksand

Now we can collect the natives' spear stuck in the tree -- actually, we can't just GET SPEAR, we need to PULL HARD -- and retrieve our rope.  Now we can reach a chasm with a tree on the other side, tie the rope to the spear, throw it at the tree, and... not CROSS CHASM or GO ROPE or... oh, wait, I didn't keep the other end of the rope handy on this side!  Tying it to the tree on this side first creates a taut rope we can use to gingerly cross the chasm.

On this side, we find more jungle, of course; the map here is a little more logical than elsewhere, but still difficult to navigate.   There aren't many landmarks -- just an OLD NATIVE; we can try to TALK NATIVE but he says, "Gimme something valuable first."  The knife isn't considered valuable, apparently; nor is the hat or the boat paddle.  So we probably need to find a treasure of some kind.  Nothing seems to be hidden up any of the trees... but LOOK SPEAR reveals that It's golden from stem to tip.  We have to cut the rope yet again, losing it into the chasm, in order to retrieve the spear.

Now we can learn something from the elderly gentlemen: "Three men and girl.  Look for oak tree.  Go southwest."  Until we know this, going SW from that location just takes us back to the chasm's edge, but now we can reach an area with a wall of fire near a waterfall.  GO WALL just burns us to cinders, but if we GO WATERFALL and get drenched first, then we can make it through.  It's another one-way trip, too -- this game is very episodic in nature.

On the other side of the firewall, we encounter an INJURED NATIVE.  The three men and the girl shot him and traveled northeast from here, he tells us, just before he becomes a DEAD NATIVE.  Following his directions, we find our rope again, or at least one very similar to it, and then we come upon a tent with whispering audible from inside.

We can LISTEN TENT to uncover a ransom plot -- someone is to go southwest and deliver the note.  Waiting to the southwest doesn't seem to move things along though, and there's no WAIT verb as such... but if we've heard this and return, we run into a SNEAKY BANDIT and we are caught, then dead.

To the southeast of the tent is an apparently infinite series of jungle locations; to the northwest we eventually come to a canyon spanned by a rope bridge.  We can cross it; there's a SKUNK lurking in the jungle beyond that point, as well as some more MAD NATIVES.  We can't GET SKUNK -- Phew! You drop him -- nor will the natives let us pass to the northwest.  But we can HOLD NOSE, and then drop him off to scatter the natives.  Except this just makes them very mad, and they return on the next turn to chase us.

They are gaining on us as we run in the only new direction available; a few moves later, we come upon another quicksand bog, with the natives gaining on us.  We can avoid the bog and keep running, but they do catch up with us, and we're dead again.  I had to cheat and look at the code, then wrestle with the parser -- we can't THROW HAT, or PUT HAT / IN BOG, but we can PUT HAT / ON SAND.  This causes the natives to assume we are done for, and they wander off.  We can't retrieve the hat, so perhaps that puts the nail in the coffin of my assumptions about this story's inspiration.

Returning the way we came, we run into the MAD NATIVES again and we are dead.  Oops!  Let's try going the other way this time.  We enter yet another jungle maze, and can find a MOUNTAIN, from the top of which we can see the American Embassy, due west from a cedar tree.  We can navigate through the jungle, then head due west a few moves to reach the embassy.

Of course, I have still failed to rescue the Ambassador's daughter at this point, so it's back to the bandit encampment to deal with the bad guys.  Being bold with a GO TENT proves fatal, as we face an EVIL CROOK, a FEROCIOUS OUTLAW, a SNEAKY BANDIT and the AMBASSADOR'S DAUGHTER!  We will assume she is not suffering Stockholm Syndrome and actually wants to be rescued, but we have to deal with the other three.

We can CLIMB TREE by the tent and wait a few turns -- now we can safely observe the sneaky bandit emerging, and JUMP BANDIT to knock him out.  Someone cries for "Help!" -- I hope it's the Ambassador's daughter and not the guy I thought was unconscious.  We can GO TENT now -- and untie the Ambassador's daughter, Messrs. Crook and Outlaw having gone to see what's keeping their friend, and apparently taking the very long way around.

The Ambassador's still-nameless daughter willingly follows us now -- we have to move quickly, exiting the tent and heading across the rope bridge as suspicious footsteps follow us.  And somehow, oddly, we're dragging the SNEAKY BANDIT along with us -- eventually, he wakes up and we're dead?  He must have followed us after waking up.  Hmmmm.  Perhaps we need to dispatch him more permanently?  But we can't successfully THROW KNIFE / AT BANDIT... the parser just tells us, Better not.  We can't seem to keep our gun with us by putting it under our hat when we cross the creek.  And we can't directly STAB or KNIFE or KILL BANDIT, either.  But we can use the long rope to TIE BANDIT -- actually, we have to be more specific, and TIE HANDS or TIE FEET.

I tried to TIE FEET, and he woke up, saying, "You don't tie me good enough" before killing us.  And the same happened after I opted to TIE HANDS instead.  We can't TIE BOTH, or TIE NECK, for that matter, and my attempts to tie him to the nearest tree also failed.  We can't search him for weapons, though he handily kills us if we don't keep him out of the way.  We can't GET BANDIT and toss him out of harm's way somewhere, either.  The parser seems to recognize TIE HANDS TO FEET, but he is still able to kill us; I think it's just echoing what we've typed, actually.

So what are we to do here?  I had to cheat again, which revealed something that should have helped but didn't -- we can CUT ROPE to produce two pieces of rope, and now, in theory, we can tie him up properly without him reviving as soon as we've tied one or the other.  Unfortunately, we are not allowed to CUT ROPE while we're in the tree, so we need to do it earlier.  But he still wakes up and kills us before we can get both hands and feet tied.

I was still having problems here, so I had to dissect the code more thoroughly.  Line 968 sees that he's knocked out and sets a Number of Turns counter, NT = 3; if it reaches 0, then he strikes, perhaps?  So we should not go into the tent and come back out before tying him up, and we should cut the rope before we try to jump him?  No... on line 410, when NT = 2, he announces he hasn't been tied up properly and kills us.  I am pretty sure this is an actual bug in the game -- these lines of code appear to be in the wrong order!


If I'm reading this right, it checks to see if we are trying to tie hands or feet individually before it checks to see if we have cut the rope in two -- so whichever one we try first, we end up dying as the bandit wakes up!  There's no way to reach the "good" TIE scenario as far as I can see -- it is preempted by the earlier lines, which do almost the same checks without paying any attention to the state of the rope.  My guess is that this map is so convoluted the unnamed author tested in pieces and never actually played the whole game through from start to finish.  We can do something similar here, by setting NT=3 and then doing a GOTO 300, which brings us back into the game with the bandit denatured.  This works -- and I think it confirms this as an actual bug, as clearly some other flag has been set that keeps him from attacking again -- but it completely breaks the reality of the game's world.  Curse you, unnamed author!

Anyway, with the bandit disabled (by whatever means necessary) we can now get across the rope bridge, with the other two bandits in hot pursuit -- we can CUT ROPE after we cross the bridge to strand them on the other side.  And now we can find our way back to the embassy as we figured out earlier, and return the Ambassador's daughter for victory!


I have enjoyed the SoftSide games in general -- this one was more difficult than most, due to the huge amount of mapping required; this game's world is pretty much a huge jungle maze with a handful of unique locations buried in it.  And that bandit-tying bug, if such it is, still has me feeling like I didn't truly finish the game.  But there are more playable adventures out there, and it's time for me to move on to one of them.

My walkthrough (complete with awkward patching around the bug) is below and should also be available at the CASA Solution Archive.


**** WALKTHROUGH ****

N
CLIMB TREE
GET APPLE
D, E, SW
LOOK TREE
THROW APPLE (at what?)
AT NEST (bear runs off)
GET PADDLE
NW
CLIMB TREE
GET APPLE
D, S, E
CLIMB TREE
GET BANANA
D, E, N
GIVE BANANA
GET KNIFE
S, E
CUT ROPE
CUT ROPE (again, frees it from tree)
GET ROPE
GO CANOE
PUT APPLE (in or on what?)
IN HOLE
PADDLE CANOE (canoe capsizes, but we make it to shore)

SE
CLIMB TREE
TIE BRANCH
D, NW, NE, E, NE (headhunters give chase)
W, SW, SE
SWING ROPE (we elude them)
NE, NW, W
GET SPEAR
PULL HARD
SW, SE
CLIMB TREE
CUT ROPE
D
GET ROPE
NW, NE, E, NE

TIE TREE
TIE SPEAR
THROW SPEAR (At what?)
AT TREE
CROSS ROPE

CUT ROPE
GET SPEAR
NE
TALK NATIVE
LOOK SPEAR
GIVE SPEAR (learn about the oak tree)
SE, SE
LOOK TREE (oak tree)
SW, E

GO WATERFALL
W
GO WALL

TALK NATIVE
NE
GET ROPE
NE
CUT ROPE (into two pieces)
LISTEN TENT (ransom plot!)

CLIMB TREE
LOOK (repeat until the sneaky bandit appears)
JUMP BANDIT (he's knocked out)
D

(there should be some way to disable the bandit for good by tying his hands and feet with the two pieces of rope, but I couldn't figure it out!  He always wakes up and kills us before we can finish the tie-up job.  I'm pretty sure this is a bug -- the critical check seems to be in a line of code that's actually inaccessible.  What did work for me was this:)

TIE HANDS

(bandit wakes up and kills us... the program exits, so at the prompt, we can type:

NT = 3
GOTO 300

This resumes the game with the bandit disabled)

GO TENT (others are away, we untie the Ambassador's daughter)


S

NW, NW (bandits give chase)
GO BRIDGE
CUT ROPE (bandits are stranded)
NW, NE
HOLD NOSE
GET SKUNK
NW, N
DROP SKUNK
NW (natives are angered)
NW, W
PUT HAT (on what?)
ON SAND
CLIMB TREE
LOOK (natives arrive, believe we've sunk in the quicksand)

D, SW, SW, SE
CLIMB MOUNTAIN (see embassy to west of a cedar tree)
D, NW, SW
W, W, W (the embassy!)
GO EMBASSY (Ambassador asks, "Have you my daughter?")
YES  (victory!)