Tuesday, April 29, 2014

Adventure of the Week: Nancy Drew #4: Treasure in the Royal Tower (2002)

This week, I'm returning to a more contemporary series, as we tackle Her Interactive's Nancy Drew: Treasure in the Royal Tower, fourth in the long-running series.  The point-and-click detective game was originally published in 2002 but has remained in circulation in budget compilations and still be purchased and downloaded at the Her Interactive website.


The Nancy Drew games are marketed as casual adventures, but in my experience they're usually fairly challenging and thematically adult without being unsuitable for a family audience. The technology hasn't changed much over the years -- the games use pre-rendered graphics with clickable hot spots for navigation and interaction, and limited animation for fully-voiced dialogue scenes and important moments.  The visuals are presented in first-person perspective, and we never see Nancy herself in this game.  All the spoken dialogue is also presented as onscreen text, along with dialogue response choices.  The game's illustrations are credible enough, in 640x480 resolution, though they tend toward the overly-clean, plastic look of early CG, and character animation is often stiff.

Of course, interested readers are encouraged to seek the Treasure in the Royal Tower firsthand before reading through my comments below.  I wouldn't advise using my notes as a guide to the game, as there are several more concise walkthroughs available online and I spent a lot of time beating my head against apparent dead ends until something shook loose.  But that's also part of being an adventure gamer -- just be aware that there will be comprehensive...
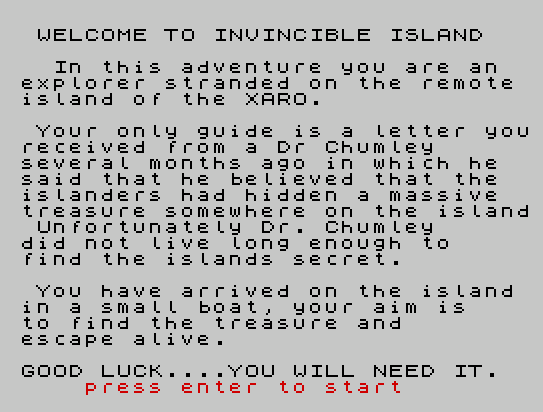
***** SPOILERS AHEAD! *****


The game offers two levels of difficulty, Junior and Senior Detective; we'll be playing on the Senior Detective level, which reportedly only affects the difficulty of the puzzles, not the plot.

The game begins with Nancy writing a letter to her (female) friend George -- Nancy is on vacation at a Wisconsin ski resort called Wickford Castle, but a bad storm means the hill is closed and few guests are present (both factors convenient for game design purposes!)  It's an effective intro, as photos of people and landmarks are displayed as Nancy discusses the situation.  Owner Christi Lane is a friend of Nancy's dad, though she never appears in this game; we also learn about caretaker Dexter Egan, the eccentric chocolate milk millionaire Ezra Wickford who built the "castle," and Jacques Brunais the ski instructor (and failed Olympian.)

Nancy needs to find a mailbox to send her letter out, which gives us a reason to go exploring, but before leaving the room, we should point at and click on everything of interest.  The desk contains a locker assignment -- locker #310, with combination 5-1-7, probably worth noting.  Nancy's card key is for her room, #205, so we should take that along.  There's a Wickford Castle brochure in Nancy's luggage, worth reading for some background -- the castle reportedly features a lot of dead ends and secret passages, in keeping with its original owner's mental state.  Ms. Lane is Ezra Wickford's great-niece, who inherited the castle and opened it to the public, except for the mysterious Royal Tower, which Wickford moved here from France and then sealed off.  Wickford also imported a library of antique books formerly belonging to a French revolutionary officer named Le Boeuf.

There's also a room service menu in Nancy's dresser -- the resort seems to have no actual dining room -- and a few detective magazines on a table, with instructions about dusting for fingerprints to extract an access code from a keypad, which we will probably need to do at some point.  The night table has an alarm we can set to move time forward, and a phone Nancy can use to call out to boyfriend Nick Nickerson and friends George and Bess, likely to be useful for recapping and seeking hints.  But nobody is answering the phone at this point, not even the operator, and the only voice mail left for Nancy is a hang-up... odd.  The closet door can't be opened, and the radiator near the window is actually broken -- I thought the constant hissing I was hearing was just poorly-compressed audio on the background music, but once we step out of the room, everything clears up nicely.

It seems a good idea to map out the castle before we get too deeply into the plot.  The castle's structure is a bit odd, and matters aren't helped by the pre-rendered point-and-click navigation approach -- there's a lot of awkward movement required to get ourselves pointed at something we want to see or interact with.  For example, we can only get back to Nancy's room by walking a bit past it and turning around, -- we can't turn to the door when we're standing directly in front of it but not facing it.  Long hallways also tend to be inconsistent about hot spot placement, making fast travel difficult to pull off in places.

But we can, with some patience, explore the top floor where the rooms are -- one staircase leading down is too dark to traverse, one door opens on a blank wall.  There are several ways down to the first floor -- elegant steps in the large entrance hall, and a vintage elevator mentioned in the resort's brochure, whose presence is revealed by banging noises as we pass by.  There are also a number of small alcoves decorated with stained glass and tapestries -- we can't interact with the decor, but these areas help provide castle atmosphere.

The whole second floor is built around the entrance hall, which stands two stories tall and cuts across the center of the building.  An interesting round room with portraits and potted plants abuts a staircase leading down to yet another dead end.  We can hear typing coming from somewhere in the vicinity of room #214, but a knock goes unanswered.

The elevator door can be opened -- it appears to be in need of some restoration, and there's a trap door in the ceiling we can open and climb through.  On top of the elevator we see the expected cables, and a wooden crate we can't interact with.  There's also an open ventilation shaft, its cover hanging askew, but we can't reach it or the ladder next to it from this location.  The elevator is in working order, so we can use it to go to the first floor or the basement.  It also has stop and alarm buttons, though I never had to use these.

I opted to explore the basement first, guessing it might be a smaller area to investigate.  An archway leads to circuit breaks and an elevator reset lever.  We can play with the breakers, even turning out the lights on ourselves, which makes it fun to hunt the switch down again, though it's the only active hotspot in the dark and we have to flip it back on before we can leave the circuit board.  A stone staircase leads up to the first floor, but is too dark to climb to the second -- probably the same staircase we found upstairs.

We also find a ski rental and locker room area, with a vending machine and displays of skiing equipment.  The rental office is closed and locked up at the moment, but we can acquire a paintbrush sitting on the counter.  This is apparently Jacques' office, but a knock on the door produces no response.

Trying the locker combination takes a little trial and error -- we can't see the locker numbers until we reach the one we can access, and once I found locker #310 I had to figure out how the lock works.  As it turns out, we don't have to turn the lock in any particular direction first -- we have to press a triangular button at the top of the lock for each digit.  And even when we get it figured out, Nancy's narration confirms that we've successfully entered 5-1-7 as the combination, but the lock still won't open.  So we'll have to talk to someone about that.

The elevator appears to have shut down -- maybe because I was playing with the buttons?  The elevator reset lever restores it to working order, so we'll go up to the first floor.

We land in front of a locked set of double doors, and I ran into a few dead ends before finally emerging at a pleasant sitting room with a fire in the fireplace.  A bookcase contains a few titles about the French Revolution -- the brief sections we can read include a brief biography of Marie Antoinette, from her marriage to the King of France until her execution by guillotine, after her capture by M. Le Boeuf.  Le Boeuf himself is detailed a bit in the second volume.

As we turn around after leaving the bookcase, we are surprised to see another human being, finally!  Lisa is a young photojournalist who tells us that someone broke into the library and vandalized it last night.  Dexter is assuming a guest is the culprit, and it's secured more heavily now until the police can arrive to investigate, though Lisa suggests Dexter probably has a key.  The only other guest, one Professor Hotchkiss, claims she has been robbed, though she won't tell anyone what was taken.  Lisa provides further exposition on another scandal -- that Jacque Brunais is "scandalously cute."  I'm not sure how sophisticated Lisa is supposed to be, but her voice acting and general demeanor don't create a great first impression.  At least she provides some unintentional adult humor, saying, "I wonder what we're going to do with ourselves" while the storm is in force.  But she knows nothing about the secret entrance to the French tower, and claims to speak minimal French and poor Spanish.

The large entrance hall features postcards and brochures for Wickford Castle and the neighboring Le Pierre Chateau in Lakepond, Wisconsin, but no obvious clues.  We also see the front desk, where Dexter Egan is busy coping with the storm -- and Resident Evil fans will have to accept that those tempting red herbs in the corner just cannot be acquired:


Conversation with Dexter allows Nancy to ask him how long he's been here -- "a while" -- and complain about her radiator, and ask for a stamp so she can mail her letter, though it won't go out any time soon with all the snow.  Dexter confirms that the "liberry" has been vandalized, though his pronunciation seems to improve later in the game; the vandal put a hole in the wall, and made a general mess of the place.  Dexter's very busy and can't look at the radiator yet, but Nancy can offer to help out by delivering Professor Hotchkiss' repaired ski boots from the rental office.  We can try to explore behind the front desk, but Nancy won't go there while Dexter is at his station.

Jacques is in the basement ski rental office now; he doesn't seem to like being in Wisconsin, but his fiancee is studying at UW-Madison, and he likes being close to the Queen's Tower, given its roots in his homeland's history and Marie Antoinette in particular.  He discourages Nancy from snooping around, and mentions that he crafts wooden hope boxes for keeping secrets.  Asked about the locker combination, he suggests that it's actually for locker #311.

With the boots in hand, we can talk to Professor Hotchkiss -- she seems hard of hearing, and suspicious of Nancy's motivies even though she can't get her name right.  She's not willing to talk about the robbery, and won't answer a second knock.

Exploring some more, Nancy gets stuck when the elevator jams between floors -- we have to go up through the trap door and stand on the crate to reach a door above, but it's not a secret door, just the normal first-floor elevator door.  Nothing seems different in Nancy's room -- there's a second hang-up call on the voicemail, and I took the opportunity to recap the story so far with George and Bess, though I saw no need to ask for any hints yet.

Returning to the basement, we open locker #311 -- yes, Jacques was right -- and find Lisa's camera bag... with extra passports and driver's licenses under a number of aliases.  A letter in Spanish is a mundane update from friends, but gives the lie to Lisa's earlier claims of ignorance about the language... a discrepancy that might be worth noting.  But she's no longer sitting by the fire, so we can't confront her about it. 

Character appearances seem to be clock-based, so sometimes we have to wait until someone is available or gone.  As it turns out, after we've failed to find Lisa we see that Dexter has stepped away, giving Nancy an opportunity to check his desk.  His to-do list suggests nothing sinister, though an item to "KEEP SEARCHING" is potentially interesting, and a note that he needs to change the alarm code on the library suggests more security than usual.  We can also steal a key from his desk drawer, just in case we need to open a locked door or anything.

We might as well try to open the library, and the key works, but the alarm goes off and before we can find a hiding place or examine anything of substance, Dexter arrives and throws Nancy off the premises.  Whether she simply can't continue investigating the case, or freezes to death outside the hotel with no hope of transportation, we'll never know -- but it's the end of the game, at any rate.  Fortunately there's a "Second Chance" option available, safely depositing us just before we tried to break into the library, so we can pretend it was just a passing thought and continue our efforts elsewhere.

Can we shut off the alarm with the circuit breaker?  It appears they're laid out by floor, looking at the scrawled notations on the breaker box, but I didn't succeed in doing so, though I did manage to turn the lights in the dark stairwell back on, between the first and second floors.  My attempts did, at least, establish that the alarm shuts off if we close the library doors without entering.  Looks like we'll need to find that keypad and the code.

Wandering around some more, I find that we can look down at the foot of Professor Hotchkiss' room door, and leave the boots there -- as we walk away, we can hear the door opening and closing, though we can't see her emerge under any circumstances I could find.   Returning to the dead-end staircase near the round room, we hear some banging noises that seem louder at the bottom of the stairs, but there are no clickable loose stones or anything we can interact with.

If we had some dust, and access to the library keypad, we could probably use the paintbrush to get a good guess at the code -- but we only have one of those three covered at the moment.  We no longer hear typing from Hotchkiss' room, but she doesn't answer the door either.  I made another attempt at entering the library -- the keypad is on the left, provided by "Achilles Security" for a little extra humor, but my attempts to punch in random codes were unsuccessful.

Playing around in the elevator shaft, I got Nancy to say that she sees something below the elevator, but I couldn't find it or get her to repeat the message.  The elevator doors are locked when the elevator isn't present, so we can't sneak in from another floor through the obvious route.

Stopping by Dexter's desk, Nancy complains about getting stuck in the elevator.  He admonishes her for climbing around in the dangerous shaft area, and asks her to help get the lights in the stairway on, which we've already done.  Next, he wants Nancy to get Prof. Hotchkiss' dinner order -- she wants couscous, and Dexter tells Nancy she needs to order from the menu.  After retrieving the menu from Nancy's room (I don't think we were allowed to put it in inventory earlier, but I might be mistaken) we get her real order -- fifty chicken drumsticks.  Nancy's next errand is to go downstairs and tell Jacques to get some more out of the freezer -- he complains but complies, and Dexter has promised he will fix Nancy's radiator as thanks for all the help.

So is Nancy's radiator still hissing?  The elevator needs to be reset again, so it's easier to get there via the stairs, and we find that it has indeed been repaired.  There's also an oil can left behind, which we'll put in inventory should we run into anything rusty and stuck.  I felt like I was running out of puzzles, and in need of a hint, so in the interest of staying within the game world I had Nancy call Ned Nickerson -- he suggests that there might be another entrance to the library. 

None of the castle's many dead ends seem pliable enough to grant entrance.  The professor will talk about her theory but won't leave her room; she wants information about the castle and asks Nancy to find out Marie Antoinette's age when she married King Louis.  This is easy enough to find out from the books in the sitting room -- it appears she would have been 14 or 15 when the wedding took place, as we have a date for her birthday but not for the wedding.  After doing this bit of research, we can talk to Lisa again -- she complains about the pay she earns as a photojournalist, and Nancy can ask her about the multiple identities, though Lisa says she just needs them for her work.

Hotchkiss wants the answer written down -- she slides a piece of paper under the door, and we can type our answer on it; I went with 15, which proves to be correct.  Hotchkiss offers to meet us in the sitting room during her normal "office hours" -- 3 AM to 6 AM.  It's 2:30 PM in my playthrough, so it's a good time to use the alarm clock to nap until the appointed hour.  The professor tells us she is a scholar of French history, looking for evidence here -- she gives Nancy permission to look in her room, handing her a pass key, apparently thinking Nancy can be a useful research assistant.  We have to be out by 5:59 AM when she returns to work, however.  It seems that Professor Hotchkiss wants to rehabilitate Marie Antoinette's "let them eat cake" image, whether the facts align with her "theory" or not.

Entering #214, we find some notes that suggest she romanticizes Marie Antoinette a bit.  We can steal her camcorder battery... or better yet, replace it and watch her P.O.V. video exploring the round room.  We confirm that a portrait on the wall is of Marie Antoinette, and then the camera pans down a bit as Professor Hotchkiss gasps -- before the playback stops.  The battery has run down, so we can put it on the charger nearby -- but it will take a while to recharge, 24 hours if I'm interpreting the label correctly from a distance, so we'll have to come back here later.  We also find a letter in the dresser from some distant Marie A. relatives in Germany to the professor -- it mentions a medallion and a stained glass window.  Interesting.

A trip back to the round room turns up nothing obviously gasp-worthy.  But now can we climb the elevator shaft?  Yes -- when the elevator is on the first floor we have access to a landing, and can use the ladder to climb up and navigate past the open vent cover through the shaft to... the library!

Nancy can climb out of the shaft, but it isn't long before we hear keys in the door -- hiding again behind the library-end vent cover, we see Dexter come in and enter a code to turn off the alarm, muttering something about "the old man" before leaving again.  We can climb down and look around -- there are a number of books strewn about which provide some clues and background information.  The Diary of Hans Axel von Fersen indicates that Marie Antoinette's jewels were confiscated by Le Boeuf before she was beheaded.  A book by Professor Hotchkiss waxes rhapsodic over Marie Antoinette's love of the color purple, and mentions four values she allegedly held dear -- loyalty, dignity, wisdom and truth.

A sign above what looks like an erstwhile fireplace reads, "A sly rabbit will have three openings to its den."  It covers a sextant puzzle, but it seems we'll need some information to set the values correctly.  A book on famous portraits describes a certain painting of M.A., painted in the tower transplanted to Wickford Castle... and that painting turns up here, in the library!  It's on the floor, and the hole in the wall Dexter mentioned earlier appears to have been punched behind its hanging place, though we can't see anything interesting about the hole.

An atlas opens to a page locating Wisconsin at 90 degrees west longitude, and we can pick up some dust from below the hole in the wall using the paintbrush.  Great -- we dust the access keypad, determining that the code is 372 -- no wait, actually, 3*72, I hadn't dusted the bottom row.  We can enter any code we like while the alarm isn't going off, confirming that the right one is APPROVED by the system.

A globe has a longitude dial at the north pole, currently set to 60 degrees.  We move it to 90 degrees west, and the globe can be opened with the handle on top, providing a clue to the sextant puzzle.  It's easy enough -- we set the sextant to -15, 10, and -5 degrees, pressing a button between each setting like the combination lock earlier, and a creaking noise is heard.  We have to look around a bit, but there's a secret panel now open, near the vent entrance on the library's second level.

Nancy finds a lighter on the desk in the secret room, which we can use to light a candle and remove a key from the melting wax.  There are some insects mounted in frames on the wall, and a couple of scrapbooks about.. Dexter Egan?  They appear to have been kept by Ezra Wickford, who... we now learn... was Dexter's adoptive father!  It seems like Dexter became a bit of a juvenile delinquent, then a petty criminal, and was cut out of his father's will later on, which is why Christi inherited the castle instead of him.  The plot thickens!

Returning to the elevator, we notice a lever behind us on the landing -- one of those odd navigational contrivances, we couldn't really turn to look at it until we're facing this way at the foot of the ladder.  The lever is stuck but can be oiled, opening a passage down to... well, it's blocked by the elevator right now.  So how do we handle this?  A sign in the elevator indicates its maximum load is 640 pounds, but that doesn't seem useful right now.  Can we use the alarm or stop buttons to halt the elevator partway, so we can still open the basement door and get into the passage?   Nope.

Oh, of course!  We can go through the library now that we have the code, moving the elevator up out of the way and then coming back in through the vent to reach the passage again.  We hear some coughing during our travels -- I think it's just Dexter at his desk, making noise so we can notice him earlier in the game -- and manage to make it to the area behind where the elevator was, in the basement.  There are counterweights here -- we can mess with them, but Nancy can get crushed by the descending elevator if we're not careful.  A door nearby exits back out to the basement -- it's just the elevator exit, and it's a one-way trip, so I had to make the whole roundabout journey back to this point again.

When we press the red button near the counterweights, they rise up out of the way and we have a limited time to solve the puzzle behind them before the elevator kills us.  It's a simple puzzle -- we have to pull 6 bars in the right order, and after one bar sticks in place we can find the second bar, then with two stuck find the third, etc. -- but we have to do it fast to make it through a secret panel before the elevator comes all the way down.  It took me a few tries -- what I should have done was park the elevator on the first floor instead of the second, so the weights would just have been out of the way, but I was able to do it the hard way.  The combination changes each time, but it's easier to solve it in future trips with the counterweights safely above and not moving.

In this passage, we hear the sound of sawing and discover Jacques hacking at some metal bars.  He says he's doing it for his family honor -- looking for a historical French document his great-grandfather found but left in the tower shortly before it was dismantled to move to Wisconsin.  Jacques has a medallion in his locker, and gives Nancy the combination, planning to meet her there.  A tunnel takes us back to one of the "dead ends" in the first floor hallway -- we can see the faint outline of the secret door now, but still can't open it from this side.  Going to the locker room, Nancy is able to open Jacques' locker -- but just before she examines the medallion, someone knocks her out from behind!

We wake up in our room to the sound of the phone ringing -- Jacques is calling to see how Nancy is doing, and is dismayed to learn the medallion is not in her possession.  Nancy also has a few voice mails from Dexter and Professor Hotchkiss; Dexter asks about the red dirt on Nancy's shoes when he found her, and Hotchkiss says her room is in disarray again.  Going downstairs to the sitting room, Nancy talks to Lisa, who somehow knows that Nancy has been in the library; she also mentions that Hotchkiss is not well respected by her historian peers.

Returning to the Queen's Tower area where we saw Jacques earlier, we find that our old key from Ezra's secret room doesn't work to open the gate; there's a dungeon area nearby, but nothing much we can interact with despite the chains and portcullis trappings about.  We can't light the old torches on the walls, but we can take a spike from the top of a halberd held by a suit of armor.  We can also see the partial cut in the bar Jacques was working on, though we can't break or cut the bar either.

We haven't talked to Dexter in a while -- Nancy confesses that she found a passage to the tower, and Dexter reveals he already knows about it.  He says that the storm has passed, and Nancy has earned the right to explore some more -- he tells her there is a skeleton key in the maintenance shed that will open the gate, though we have to be careful about the cold when we go out there.  On the way to the basement door to the outside, we can visit Jacques -- he is working, still upset, and doesn't have much to say.

It's definitely possible to freeze to death on the way to the shed -- or in the shed -- or on the way back -- so we'll ignore a few puzzles in here, opting to just grab the key once we've found it and run.  The key does open the grate, so Dexter wasn't trying to undermine us.

The tower's first obstacle is a bit pit -- some shackles on the wall nearby have to be pulled until they match the inverted "V" pattern on the opposite wall, and it's one of those largely trial-and-error puzzles as most of the chains are interconnected.  Once that's done, a row of large stones rotate into place and Nancy can traverse the pit.

Next, we arrive at a prison cell -- a game board here challenges us to slide four marked discs into their matching slots.  We can only slide a disc in four directions, and the disc will keep moving until it hits a barrier.  It takes some creative use of the layout to find the right ordering and get everything into place -- only one disc can be moved successfully into its spot without using at least one other disc to help steer it into place.  Once this is done, we hear a grinding noise, and we can travel up a long circular stone staircase to the royal tower!

A stone switch by the tower door removes and restores a section of staircase -- we have no reason to cut off our own path, but it might be useful if we need to keep someone from chasing Nancy up here later on.  This looks like the place, with a portrait of Marie Antoinette dominating the view (this screenshot is from later in the game, but the location looks the same):


There are a few puzzles in the tower -- some symbols on the floor appear to align with Professor Hotchkiss' work, presenting 3 symbols flanked by purple griffons with a square keyholein the center.  There's also a tile puzzle on the wall, requiring us to lay out square pieces in the correct position -- it took me a while before I realized the pieces can be rotated, which made it a lot easier, though the feathered, brown-and-gold pattern is still tricky to work with.  It's easiest to line up all the border pieces before getting the 8 interior ones aligned and placed.  After this is done, the panel opens up, revealing a book -- most likely the journal Jacques' great-grandfather had run across many decades ago.

We get some special music when the journal is found, but clearly the game is not over yet.  We can't open the journal to read it, and I wonder if we need the medallion to go into the keyhole.  But I have no real information, so we have to go back to the castle and see what's what.

Dexter knows about the floor puzzle but asks Nancy to call him about it later -- which may be difficult as we don't know his phone number and the Wickford Castle brochure has no front desk contact information either (that can't be good for business!)  The camcorder battery is charged, and we can see the rest of Hotchkiss' video -- she mentions that she has a medallion which fits into the wall in the round room, where a peephole provides a glimpse of a stained glass window.  We saw a corner of this window while climbing the tower, but couldn't get a good look at it due to the navigational system in that section, so we may need to use the peephole as well.

Doing so, we can see the stained glass window in full -- it appears to reference Truth, with a symbol of a crown?  Dexter's to-do list indicates he has changed the library access code, but he must have changed it before we found it so our access is still good.  We can't use the lighter to see into the hole in the wall, but we can still open Jacques' locker to find a note from his fiancee begging for a tangible symbol of his love, probably an engagement ring judging from the diamond flyer also in his locker.  He's also received a warning letter from the United States immigration authorities, as his visitor's visa will soon expire.

We'll wait for Hotchkiss' 3 AM office hours, to learn that a diamond tiara Marie Antoinette received (but refused to wear for the portrait mentioned in the book we found earlier) disappeared shortly before the Revolution.  The journal excites her -- she agrees to translate it for Nancy if she can have it to publish.  She agrees to translate it by this time tomorrow, so we'll use Nancy's alarm clock to do the time warp again.


The next night, Hotchkiss has completed the translation and found Marie Antoinette's long lost decoder, but she doesn't give Nancy either item or provide much more information.  We have to visit her room again to find the translation, which indicates the soon-to-be-ex-queen had the tiara dismantled and the stones fashioned into three medallions corresponding to her values: blue for Honor, red for Courage, and green for Loyalty.  We know Hotchkiss has a medallion, or had one, but she won't talk about it.

So, it seems we have to find these medallions.  The blue one is easy, as further poking around finds it under a pillow on the sofa in Hotchkiss' room.  Dexter's not at his desk yet, so we'll go look at the puzzles in the shed -- except Nancy won't go out there at night, so we'll go to sleep for a bit.

At 9:00 AM, Dexter is on duty, but he still won't talk about anything new, and Jacques won't either.  We'll go out to the shed again -- solving a lever puzzle here turns on the lift, which earns Nancy nothing but an angry dressing down from Dexter.  But does anything change in the shed after we do this?  Not that I can see, and we can still freeze to death.  Poking around the shed does show us another machine, but there aren't any features we can interact with visible.

Lisa's back in the sitting room, but has nothing to say.  Nancy has no new voice mails.  We can call George and Bess, and asking for a hint gets a suggestion that we need to do some more reading in library's secret room.  Aha!  Ezra wrote a poem, a farewell message that Dexter never received, in which he forgives his estranged adopted son and mentions secreting a "luck charm" for Dexter "in the back of my old troubled head."  

Now Dexter will talk about the secret garden -- he tells Nancy to look for a wrought-iron gate concealed by foliage, and now we can click on a "No Trespassing" sign near the maintenance shed to access a new path.  Rotating an arrow sculpture turns a bust of Ezra Wickford around, we pull a lever in the back of his head and use the key from the secret room to open a box concealed in the base -- we now have the red medallion!

What about the green medallion?  Well, after much poking around, Nancy finds a voice message from Lisa, of all people, and we can talk to her in person to learn that she saw Dexter going to the shed with a "green ornament thing."  We go to the shed and find it on the machine we couldn't do anything with earlier -- this time, an animated rat wanders through to draw our attention to its location.  So we have all three medallions now... but Nancy is locked out of the castle when we try to return!  We can turn the ski lift on to summon help before freezing to death, and Dexter isn't angry as this second infraction was an S.O.S.

Now we're ready to go back to the tower!  We have to re-solve the elevator and pit puzzles to reach the peak, and now we can place the medallions into the floor -- per color/value coding, I guess, if we knew what the symbols meant.  There are really only six possibilities for arranging the three medallions, but none of them seem to produce any interesting results, and we're still missing the square center key.  Hmmmm.  Back to the castle, I guess.

Talking to Hotchkiss one more time indicates that she had the green medallion originally, so things have been swapped around a bit it seems, but that's all she'll say.  But looking around her room once again, I find the decoder she mentioned earlier -- it's just a list of symbols and words, and we can't take it with us so I'll manually note the Loyalty, Honor and Courage symbols.

Returning to the tower, we place the symbols correctly, but... still nothing happens?  I really needed a hint here, but even the walkthroughs I found online weren't very helpful -- everyone suggests that we should be able to interact with the painting of Marie Antoinette in the tower at this point, but it doesn't show up as clickable for me.  So I began a long series of experiments, punctuated by tedious trips back to the tower, as I attempted to achieve whatever it was the game wanted so that we could continue.  I tried to:

  • Re-read the book on famous portraits in the library
  • Re-view the stained glass window through the peephole
  • View the stained glass window with each of the three medallions installed as color filters
  • Re-solve the sliding disc puzzle (it appears to reset when revisited)

But nothing worked... until I went back to Hotchkiss' room and looked at the decoder again, after having looked at the stained glass window through the medallions.  Nancy's brain apparently works in only one direction, or she took poor notes on the decoder originally, but now, at long last, our heroine gets it!

The rest of the game wraps up fairly quickly -- we examine the tiled portrait on the wall, seeing that we can break away the purple rose tiles (valuable historical artwork? Bah!) with the spike from the halberd, to retrieve a square key.  Inserting it into the center of the floor lock brings up a gigantic diamond on a plinth.  Victory is Nancy's!

But, of course, a final confrontation with a villain is still at hand!  Lisa, who we were seriously beginning to suspect, shows up and sprays Nancy with nasty pepper spray!  Nancy is still able to choke out a few questions, confirming Lisa's general villainy as a greedy jewel thief.  (Why she didn't just steal the priceless antique books and paintings lying all over Wickford Castle, instead of waiting around hoping Nancy Drew would uncover a possibly mythical diamond, remains a mystery!)

Lisa finishes her soliloquy and flees the tower with the diamond, but not before Nancy hits the stone switch near the door, removing part of the stairway again and dumping Lisa into the small prison cell at the tower's base.  Lisa is arrested, Christi Lane makes Dexter her business partner, Hotchkiss publishes the journal to great acclaim, and Jacques and his fiancee elope, his good name restored by his part in the discovery.  And Nancy gets another headline for her scrapbook, though I'm sure she's getting sick of this "girl sleuth" business:


Whew!  Unfortunately, Treasure in the Royal Tower proved to be my least favorite Nancy Drew adventure to date -- perhaps because it's the earliest game I've played in the series, or perhaps because it was based on a book, it all feels a bit linear.  The story isn't very player-driven, and many events have non-obvious triggers that mean the player has to wander around re-poking at everyone and everything until something changes.  Many of the puzzles succumb to trial and error or just finding the right clue, which makes them less interesting than they might have been, and we have to spend a lot of time just finding our way around the castle.  I was good and ready for this one to be over with, and I'm hoping for a better Nancy Drew adventure next time I check in on the series.

Tuesday, April 22, 2014

Adventure of the Week: Vampire Castle (198?)

I've written and podcasted about Aardvark Software in the past -- the firm was one of the earliest microcomputer software companies and produced a number of adventure games.  But some of the company's products have not survived, most likely because the quality was not always up to commercial standards.  A case in point is this week's adventure, Vampire Castle for the Commodore 64, written by M. Basman and (I believe) ported from an earlier OSI/Compukit version.  I'm running it using the VICE emulator.


We're not given any introductory text, but presumably we'll be exploring a castle and dealing with a vampire at some point.  The BASIC program borrows from the Scott Adams style, tersely presenting the location, visible objects, and obvious exits, though it does not use a windowed display so the text simply scrolls up the screen. INV is the inventory verb, the traditional I shorthand does not work; more annoying is that we have to type GO EAST, for example, as there are no N/S/E/W shortcuts.

I can't really recommend playing Vampire Castle, because while the game itself isn't difficult, getting it to run to completion was a serious meta-adventure that soon became an extended exercise in frustration.  I had to find some bug fixes online, and create a couple myself, just to get through the game!  So I'm happy to spare others the headache by documenting my playthrough experience below, despite the inevitable...

***** SPOILERS AHEAD! *****


We begin in the Entrance Hall (presumably of the Vampire Castle) with nothing in inventory.  There's a timepiece here, and a sign reading "THE VAMPIRE WAKES AT MIDNIGHT," so there's a bit of time pressure on us -- we can TAKE TIMEPIECE and READ TIMEPIECE to see that (in my playthrough) it's already 8 : 7, which I'll interpret to mean 8:07.

Heading east takes us to a library where a scroll and a bookcase are visible.  The scroll reads, "NOT ALL EXITS ARE OBVIOUS," which we kind of inferred from the OBVIOUS EXITS ARE display.  But we can take a hint and PUSH BOOKCASE to open up a downward passage.

There seems to be some glitching here in the text of the tape image I found online -- we find ourselves in a HIDDEN C.RID. -- maybe a HIDDEN CORRIDOR, with exits leading N.TH and UP.  There's also a rope here, which we can take, and oddly, when we try to GO NORTH the parser snippily responds CAN'T.

I suspect we're cruising for a crash here, as it seems all instances of OR are being represented by a graphics character -- east of the library is the ARM.Y, for example.  We'll take the axe here, anyway -- are we setting up for a game of Clue? 

East of the armory is a... .WER?  A Tower maybe?  There's a sledgehammer here, and some visible parapets.  We can try to GO PARAPETS, but YOU FELL AND DIED, ending the game.

Hmmmm.  Let's do some more mapping before we try to solve that one.  West of the entrance hall we find a study, with a fire in the brick fireplace.  GO FIREPLACE is an obvious though fatal thing to try, as YOU BURNED TO DEATH and the game is over again.  We can't EXTINGUISH FIRE or PUT OUT FIRE on a retry, so it looks like we have to do a little bit of puzzle-solving work here.

I suspect the character glitch is what's preventing us from going north downstairs from the library -- I think the corrupted N.TH word displayed may also be used by the parser.  But before we go looking for bugs, let's try to TIE ROPE -- TO WHAT? -- TO PARAPETS so maybe we can climb more safely... nope.  Can we GO ROPE instead of trying to GO PARAPETS?  No, apparently.  We can try to TIE ROPE ... TO ME as well, and the parser seems to accept it, but we still fall and die.

So what's going on here?  Well, fortunately the CASA Solution Archive informs us that a user named ogreid at GameBase 64 has provided several bug fixes to the BASIC code.  Replacing lines 580, 1020, 1070 and 1130 with his or her recommendations allows us to get rolling again.  But I'm still seeing the same typo on the directions?  Retyping line 162 where the string constants are defined seems to fix the problem.

Now we can GO NORTH from the hidden basement corridor, finding an Alchemist's Lab containing a flask of oil.  North again is a store room, with a crate and a bucket and another passage leading up, taking us on a one-way journey back to the study with the fireplace.

Can we get some water in the bucket?  Well, we can't POUR OIL on the fire, so it seems we should try to find some other liquid at least.  We can't OPEN CRATE, but we can BREAK CRATE -- WITH WHAT? -- WITH AXE... no, WITH SLEDGEHAMMER... no.  Man, that's a tough crate!  READ CRATE tells us DON'T HAVE IT, even if we do, apparently because it can't be read.

Now when I try to GO PARAPET, I get... a syntax error in 580?  Ack.  Maybe I should just re-download this file from a different source -- like GameBase64.  This version seems much more complete, with a completely different opening.  Strange!


At least now we have some idea about the object of the game -- there are ten treasures we're supposed to find.  But as we continue, we realize that this is a completely different Vampire Castle game!  That certainly accounts for the differences, but this isn't the game we're supposed to be playing.

So we'll have to go back to the Aardvark version I found, and see if we can get through it somehow.  I start by re-correcting line 580 to:

    580 IFT$="PA"THENL=6:GOTO250

Now I can climb up to the parapets -- but I had to look at a walkthrough to learn that I should not have responded to "TO WHAT?" with TO PARAPETS, but just PARAPETS when tying the rope.  That's why I was still dying after I thought I had fastened the rope safely in place!

Okay, let's hope we're in better shape with the code now.  Now we can reach the lower tower -- we could pick up the oar here, if not for the seven-item inventory limit we're now running up against.

So we'll explore to the south, finding a chapel, where we see a key and some holy water.  Somehow, if we GO UP from the chapel, we find ourselves back in the armory downstairs?  Ah, the parapets are apparently somewhere below the main floor, which is why we go from the tower to the lower tower.

The holy water must be in a non-portable container of some kind, as we must TAKE WATER -- IN WHAT? -- BUCKET to carry it along.  Can we put out the fire with it?  EXTINGUISH FIRE, PUT OUT FIRE, THROW BUCKET, THROW WATER, POUR WATER and EMPTY BUCKET all fail, but we can DROP WATER to put the fire out, turning it to ashes.

Inside the fireplace is a torch, or a .RCH actually, which we could take if we weren't also having problems with TO being turned into a graphics character.  Retyping the associated data line 184 for the torch seems to clear that problem up.  It doesn't seem we can take the ashes from the fireplace.

What else can we do?  Well, we can try to BREAK FIREPLACE -- NOTHING HAPPENED.  Hmmmm.  But if we go inside the fireplace, then we can BREAK FIREPLACE -- WITH WHAT? -- SLEDGEHAMMER to open a secret passage to the north.  (The parser seems to treat a lot of these more complex commands situationally -- if we don't have the right object, or at least a plausible one, we don't get the further prompts and nothing happens.)  The passage leads to an underground lake, with a boat -- probably what that oar is for, and we should also bring the key from the chapel, one suspects.

Now we'll GO BOAT, and ROW BOAT to arrive at a gallery.  After we get out, the boat drifts away -- trying to TIE ROPE to the BOAT before going anywhere doesn't seem to help, so this is apparently a one-way trip.  We can try to GET TAPESTRY here, if we drop something first -- I'll drop the oar and the crate for now.

The tapestry is nailed to an overhang when we try to GET it, however, so we'll have to GO OVERHANG and then GET NAILS to free it up.  Except we don't have a hammer?  Hmmmm.  Ah -- while we couldn't BREAK CRATE -- WITH WHAT? -- WITH AXE, we can BREAK CRATE -- WITH WHAT? -- AXE!  Now we have some wooden stakes, but still no hammer.

We also note that, now that the crate is broken, we can't GO OVERHANG -- it's too high, we must have been using it to climb up earlier.  Oh, and maybe the sledgehammer will work as a nail-pulling hammer too, though that usually isn't the case.  So it's necessary to backtrack a bit... and yes, the sledgehammer allows us to GET NAILS and drop the tapestry.

Oddly, even though the tapestry drops, we don't see anything new until we GET TAPESTRY, revealing a passage north.  This leads to an antechamber with a rusty door -- or a rusty DO. thanks to another item text problem.  Aaargh!  Well, we can still try to OPEN DOOR -- but NOTHING HAPPENED.  Another data statement update is called for, and we have to restart and play back through to this point again.

Now we can OPEN DOOR... wait, no, we still can't?  UNLOCK DOOR, maybe?  Oh, it's rusty -- can we EMPTY FLASKDROP OIL?  Nope, but we can OIL DOOR to open it.

We are now in the Vampire's Tomb (well, actually, the VAMPIRE'S .MB), with a closed coffin at hand.  We have a sledgehammer, some nails, and some stakes, so it seems we're somewhat prepared to deal with the fiend.

Let's try to OPEN COFFIN -- we can now see the vampire in the coffin, though there's not enough description provided to know if we're dealing with a bald Max Schreck/Reggie Nalder Nosferatu, or a handsome Bela Lugosi/Frank Langella lord of the undead.  He's just a VAMPIRE IN COFFIN.  But no matter, we'll just -- well, we can't STAKE VAMPIRE, or HAMMER STAKE, and INSERT STAKE just produces an inventory listing.  But we can KILL VAMPIRE -- WITH WHAT? -- STAKES -- and abruptly, and disappointingly tersely, victory is ours!


I wasn't sure if we'd actually made use of a few of the objects, so I went back and left some things behind -- without the torch, we can't see anything in the dark Vampire's Tomb, and we need the key to open the vampire's coffin.  I presume that if we're too slow about our business, the vampire wakes up and kills us at midnight, but I didn't feel up to verifying it; with all the restarting and replaying, I'd only burned about an hour of game time when I got to the end, so it's not like the timing is very tight.

I don't think the byte code problems I ran into were Aardvark's fault -- most likely some corruption in the archives over the years -- but the other bugs are real and the parser's somewhat cryptic assumptions are annoying in many situations.  It was definitely a challenge getting through Vampire Castle, but for all the wrong reasons, and it'll probably be a while before I take on another Aardvark adventure.

Tuesday, April 15, 2014

Adventure of the Week: Invincible Island (1983)

This week we're returning to the substantial adventure game library of the Sinclair Spectrum ZX, tackling Pete Cooke's Invincible Island, published in 1983 by Richard Shepherd Software.  Mr. Cooke was recently profiled in Retro Gamer magazine, and while he's best remembered for his action games, he wrote several text adventures early in his career.  The Speccy was a terrific platform for adventure games, with 48K of standard memory and flexible handling of text and graphics.


Cooke's engine uses vector-and-fill illustrations, which take some time to draw, and the parser isn't particularly speedy either, so I'm running Invincible Island using the ZXSpin emulator, with the CPU speed artificially cranked up to 14 MHz (though this also makes typing rhythm on the emulated keyboard a little unpredictable.)  The parser is unusual in that it demands full-word entries, and won't accept abbreviations of verbs or nouns, though there is an I command for inventory and the usual navigational shortcuts are supported.  The graphics system is also a little bit unusual -- it does some color shifting, occasionally drawing a fill in one color and then changing it to another using the ZX's attribute-based hardware, and draws some more detailed objects and characters using bitmaps overlaid on the background.

Invincible Island features a very traditional adventure plot -- per the intro, we are cast as an explorer stranded on the remotest island of the XARO.  We are seeking treasure, based on a letter from a Dr. Chumley, and have arrived in a small boat; the goal is to find the treasure and escape alive.  It's not quite clear why we're "stranded," since we have a boat, but for the sake of drama we'll assume we can't simply go back the way we came.

As always, interested readers are encouraged to visit Invincible Island firsthand before reading my comments below.  It's not too difficult, though I did need a few hints along the way, and my notes are intended to describe my playthrough experience in as much detail as I can manage.  In other words, there are...

***** SPOILERS AHEAD! *****


As the game begins, we find ourselves in a small cove with our small boat anchored nearby.  We can't GO BOAT or ENTER BOAT or EXAMINE BOAT to any effect, though it looks suspiciously sail-less in the illustration.  And we have nothing in inventory, so it seems we're remarkably ill-prepared for this expedition.

North of the cove is an open plain, prominently featuring a large, rusty chest.  It is, of course, locked, and no other details suggest themselves.  Further north is the edge of a large forest (a maze, perhaps?) -- we can acquire an axe here (GET AXE fails but TAKE AXE works), and there's a sign which we can't READ, though we can EXAMINE SIGN to learn that the strange writing is unreadable.

We can travel north again to find the late Dr. Chumley's camp -- we can't enter the dilapidated tents, but we can pick up an anorak (a winterized jacket) and a spade.  North of the camp (the map seems fairly large, so I'm just exploring in one direction for now) we encounter a native resident of the island, watching you suspiciously.  Our intrepid looting may encounter some opposition, then, but he allows us to proceed past him to a hill overlooking a valley, with a deep pit in the ground.  North of this point, at last, we encounter a strong wall, possibly the northern boundary of the map.

We'll probably regret this, but we can try entering the pit -- and it leads to a lush green valley, from which we can readily return by going U, so we don't regret it at all.  Oh, no, wait -- that's what happens when we travel D from the hilltop, entering the pit is immediately fatal as we drown in the cold, murky water at its bottom!

Restoring and heading east from the valley, we find the foothills of a mountain range, and a tatty old MAP.  We can't READ the map -- or anything, it seems, as the verb is unrecognized -- but examination reveals it's a map of the surrounding waters, which may come in handy later.

We can go U into the mountains, but first we'll examine an ornate Asian pagoda lying to the east.  The door is locked, and there's no KNOCK verb, so we'll probably need to come back here.  Heading up into the mountains, you feel cold, so it's a good time to WEAR ANORAK so we can reach the peak and recover a parchment there.  Examining it reveals a cryptic message:

    ?L
    KMLE
    TQRMP

Neither a reverse-alphabet or a shifted-alphabet try (assuming L = I, E or R) seems to translate it, and there's no TRANSLATE verb.  Hmmmm.  The native wants nothing do with the parchment, so we'll probably have to look elsewhere for help.

Returning to the strong wall, we head east and find we can go north again, to a door in the stockade wall.  It's not locked, actually, though the description claims it's blocking our path; we can just ENTER DOOR to find ourselves in the courtyard of a temple; heading E takes us back out.  We can climb the temple's heavy stone steps by heading U, discovering a jewel encrusted altar (with completely unreadable writing) and a red key.

Heading back south, we travel west of the native's location to find a desert area with three pillars and a torch we can take with us.  Going west again takes us into a dead and silent plain, and further west is a barren and deserted land, with a portable skull.

From the skull's location, we head north and (via the customary vagaries of adventure game geography) abruptly find ourselves at the edge of a clear blue lake.  We can't take the footpump here, so we'll probably need to bring a raft or something to this area later on.

We can walk further north along the edge of the lake, then head west to a winding river.  South of the river is desert again, with a deep pit in the sand -- this one turns out to be a dried up old well, containing another parchment.  And now we see how this works -- as we acquire various bits of parchment, EXAMINE PARCHMENT reveals more of the original message. It still seems to be encrypted, but maybe it will succumb as we have more text to work with.  (It seems we're not supposed to be able to move until we LEAVE the PIT, but it has no illustration and is treated as a sub-room -- if we LOOK again, we're returned to the area outside the pit.)

North of the river lies an obviously rickety bridge -- and trying to CROSS BRIDGE despite the warning leads to death via great fall and cracked-open skull.  We can't REPAIR or FIX it after a restore, so we'll have to come back to this puzzle.  On the way back, I discover that the "you can't carry it" response doesn't mean that the footpump is not portable, only that we've filled the eight available inventory slots, so I am able to DROP ANORAK and TAKE FOOTPUMP.

Hmmmm... as I pass by the native again, you see a swarm of natives brandishing swords and spears in the distance.  That can't be good.  West of the forest's edge is a cliff base with a caged yellow canary sitting handily nearby.  While I'm trying to figure out what do with the poor bird, the natives now appear to be closing in.  I try to escape to the west, unfortunately walking into a dark cave maze where I can see nothing in the dark -- except for the approaching natives, who must be sporting phosphorescent body paint as they arrive shortly to catch you and stab you to death.

So there is a time limit, or maybe I should avoid bothering the one native too often.  At any rate, I'm going to start over and continue mapping -- so far the puzzles don't seem too difficult, we just need to find the right objects and learn our way around the island.

East of the starting point is a sandy plain, with a pit which we can ENTER to once again slip and fall on the ladder and drown in seconds.  So that was a bad idea!  Past that point, after a restart, is more beach, with a pile of stones.  EXAMINE STONES when we don't have them suggests that "you don't have some STONES" -- gee, thanks -- but we can safely TAKE them and note nothing special about them.  (I never did find a use for them.)

Travel to the east again reveals yet more beach; we can DIG without any special tools, but we don't make any headway scrabbling with our bare hands.  This seems to be the southeast corner of the map; heading north from here discovers a small hut, which we can quasi-enter to find a jewelled necklace.  We can't seem to WEAR it, though.

West of the starting point is some green land, with a rusty key available -- we can use it to UNLOCK the rusty CHEST to the north, but a large coiled snake leaps out when we open it, and we immediately feel dizzy, then very dizzy, and then nothing, because we're dead.  It seems like most of the danger is right around the starting point!

North of the green land is a native hut, with some food nearby.  We can ENTER HUT to discover a bubbling green potion, apparently in some sort of portable form so we can carry it along.  North again leads to some rolling hills, and north once more brings us back to the canary and the cave maze entrance.

It seems appropriate to fetch the torch and map out the maze, and to bring the canary along in case of poisonous gas.  The canary collapses in the southeast corner of the cave; we can't breathe a little bit later, and eventually we die from lack of oxygen.  Trying again, we find the cave's exit in the northwest corner, a one-way passage leading out to the foot of the cliff near the desert.  If we're quick about it (or careful, as it seems like some locations are more oxygenated than others) we can pick up a sword and a parchment piece in the cave, then make our escape.

Next, we'll head into the forest.  A well-lit east-west path borders dark, foreboding areas to the north and south, where you see a pair of eyes watching you through the treesDROP FOOD doesn't distract this entity; eventually it leaps out from the trees and smashes you on the head, fatally so.  If we stick to the brighter path, we can reach its end and find a box in an area to the south.  It's too strong to open, however.

The green potion seems to cure the snake venom; there's another parchment piece in the chest, but that's all.  So we'll have to exercise the adventure gamer's woeful prerogative, and dig everywhere we can with the spade... but that's not getting me anywhere either, so far.  Does the red key from the temple unlock the pagoda door?  Yes!


Inside the pagoda is a circular room, occupied by an old wizened native.  We can KILL NATIVE WITH SWORD, and he drops something we can't see.  But this is not only senselessly cruel but stupid, as he is immediately replaced by another elderly citizen, and the murderous mob appears within a few turns to dispatch us.  We can't GIVE him anything to make peace, either, it seems.

It feels like we're on the wrong track here.  Can we drop the stones on the box to open it?  Nope.  Decode the parchment maybe?  With the pieces we have, there are a few short words visible -- TRT, FT, RT, RFT.  Hmmmm... the font used for the parchment is kind of stylized, maybe those T's are actually C's.  If we assume RFC is THE, then we have a simple two-character shifted code -- A = C, B = D, et cetera.  It looks like we have ? and % and @ characters in the mix too, perhaps around the ends of the alphabet.  And there's the word CRC, which would be ETE -- not really very compelling.  But keeping in mind that the parchment remains incomplete, it does look we're onto something... the fragments we have now read something like this, if we treat % as ', @ as B, and ? as A:

... PAGE IS ... ETE
... ND YOU'LL F...
... F THE SUN AN ... HE...
... ENT TE.... MONGST THE
... BONES OF O... ESTORS

So it looks like we're getting somewhere with cracking the code!  But it doesn't really give us anything specific to try.

Can we open the box with the axe?  OPEN BOX WITH AXE is understood, it seems, but the box is still too strong.  CUT BOX WITH AXE isn't recognized.  But BREAK BOX WITH AXE works, yielding a yellow parchment.  Now we have more of the message:

WHEN THE PAGE IS ... ETE
LOOK AND YOU'LL F...
WEST OF THE SUN AN ... HE...
ANCIENT TE.... MONGST THE
BONES OF O... ESTORS

It looks like we need at least one more piece of parchment to complete the page.

At this point, I got stuck, and I needed to consult John Barnsley and Andrew Barker's walkthrough at the CASA Solution Archive -- dang, I was doing so well! -- to learn that I was being misled by the parser.  GIVE FOOD in the presence of the native indicates that the native doesn't want it, but a more explicit GIVE FOOD TO NATIVE garners a more positive response, and earns us a phrasebook in exchange!

Now we can read the sign near the forest, which just indicates that we should stick to the way laid out for you, which we've already figured out, and the altar in the temple, which advises us to search the high and low places but beware of the ancient land for none may follow.  Hmmmm... these ancient messages aren't very clear.

Can we GIVE NECKLACE TO the elderly NATIVE, now that we know how this works?  Maybe the unfindable items being dropped by the natives when we try to kill them are parchment fragments.  And yes, now we have another parchment piece -- and with the phrasebook in hand, we don't have to hand translate the content, we just have to find the last piece.

What about the rickety bridge?  Maybe it's a matter of weight.  We can DROP ALL -- which still keeps the parchment in hand -- and CROSS BRIDGE successfully to find a wooden package on the beach.  It contains an inflatable dingy [sic], and to the east we find a calm blue lake with a small island in the distance.  Looks like we should have brought the footpump here!  Fortunately, we can cross the bridge with that small bit of weight, and with both items in hand (counter-intuitively, as it seems the footpump should be foot-activated) we can INFLATE DINGY WITH FOOTPUMP.

Now we can DROP DINGY and SET SAIL for the island -- but no, that doesn't work.  USE DINGYENTER DINGY? SAIL DINGYFLOAT DINGY?  Ah, we have to CROSS LAKE, and on the island we find the last bit of the parchment!  And this is interesting -- the parchment has reverted to encrypted form, but that's probably because we had to leave the phrasebook on the other side of the bridge.  Yes!  After we reacquire it, we can fill in the remaining blanks -- somewhere west of the sun (by the three pillars, based on the illustration) and the temple, we should LOOK AND YOU'LL FIND.

LOOK where we found the skull doesn't seem to do anything, but DIGging in the desert east of that location (also meeting the specified criteria) yields a pile of GOLD!  As soon as we take it, though, the mob of angry natives materializes in the distance, so we'd better get going!  It's hard to escape in time -- they close in within three or four turns, and we need the navigational map to escape.  Might they be triggered by digging up the gold, not taking it?  No, it's the TAKE GOLD that does it.  I just didn't have the skull in hand, as suggested by the walkthrough, so I had no magical protection from the natives -- that's what the BONES OF OUR ANCESTORS bit must be about.

I hurry back to the boat, SET SAIL, and... we get a black screen with no text and no closure?  Is this the intended climax of the game?  Nothing changes if we DROP SKULL, except that the native mob again appears.  This seems to be a technical glitch, as if we drop everything but the gold, we strike out to sea only to die a lingering death from exposure, because we dropped the map before departing!  If we leave with just the gold and the map in inventory, we get the proper victory ending.  Vincimus!


Invincible Island proves entirely vincible in the end, and it's not too difficult aside from a couple of quirks and specific parser interactions required.  This one was fun, and I look forward to playing more of Pete Cooke's several text adventures in the future.

Tuesday, April 8, 2014

Adventure of the Week: Robin of Sherwood (1985)

This week, we're tackling Brian Howarth's Robin of Sherwood, one of his later games, released in 1985 after his popular Mysterious Adventures series had run its course.  It uses the Scott Adams engine, as usual for Mr. Howarth, and was published by Adventure Soft UK under license based on the BBC TV series of the same name airing at the time.  (It also aired in the US as Robin Hood.)  The show had a strong cast and high production values, though what I find most notable about it as I write this in 2014 is that Rocky Horror Show creator Richard O' Brien appeared as the wizard Gulnar in several episodes, and Jeremy "Boba Fett" Bulloch also showed up on occasion. 

I'm playing using Hein Pragt's modern Scott Adams adventure interpreter, though it presumes to start every location with "I'm in a" and the game seems to be coded for a variation where "I'm" is the only standard text, so the screenshots are slightly glitchy.


As always, interested readers are encouraged to become Robin of Sherwood for a few hours before reading my detailed playthrough notes below, but I will suggest keeping Solution Archive founder J. Gunness' own walkthrough handy, as there are a couple of puzzles whose solutions are very well hidden indeed.  Beyond this point, dear adventurer, beware -- in the interest of documenting history, there are certain to be...


***** SPOILERS AHEAD! *****

The story begins as we find ourselves (as Robin, naturally) locked in a dark Dungeon, with Much, Will Scarlet, and some other undistinguished Prisoners nearby.  We have nothing in inventory, but that Locked grating looks promising... though a closer look reveals that it's twelve feet off the floor.  We can't CLIMB MUCH or GET WILL to help, and we can't JUMP to reach it on our own, or STACK WILL or LIFT WILL or TALK MUCH.  (Well, obviously, I can, but not in the game.)

Hmmmm.  We're off to an unusually slow start here!  SHOUTing and SAYing things doesn't seem to get us anywhere.  But we're Robin Hood -- shouldn't we be able to do something athletic?  CLIMB GRATING, maybe?  No.  But we can CLIMB PRISONERS to end up standing on somebody's shoulders, where we can EXAMINE the GRATING more closely, to observe a guard standing on top of the grating.  He moves periodically between a stool about ten feet away and the grating.  We can try to GRAB GUARD, but the prisoners have gotten tired and we all collapse into a heap.

Trying again, we can't TICKLE GUARD or PUSH GUARD or POKE GUARD.  I'm guessing we want to get him to drop a key, or something; we can't KILL GUARD or GET GUARD through the grating, obviously.  But we can GET FOOT -- The guard falls over and is winded.  But if we can't figure out what to do next quickly enough, he recovers, raises the alarm, fetches Sir Guy, and ends our adventure.

We can't readily KILL GUARD or GET THROAT or GET LEG, and we only have a little bit of time.  I was on the right track, actually, but just didn't trust the limited parser enough -- it turns out that we can in fact STRANGLE GUARD, and The guard chokes to death.  We couldn't see the guard's sword while he was alive, for some reason, but now we can GET SWORD, PULL BOLT to unlock the grating (the bolt also becoming visible now that we have a tool to assist), and GO GRATING to escape the dungeon.

Now we're in the Guardroom -- and we can hear running soldiers, just as we accidentally lose our sword into the bowels of the Dungeon.  There's a Door here, though, so we might as well just GO DOOR into the castle courtyard.

Here we find two more Doors, some Battlements, and Main Gates with Portcullis up.  The doors aren't visibly distinguished -- we have to try to GO DOOR to learn that we can GO LEFT or GO RIGHT.  Heading left takes us through the door we haven't yet been through, to the Great Hall, but the Sheriff of Nottingham is here, and we're overpowered by the guards.  Game over!

Restoring, we try to GO GATES -- the portcullis is lowered now, but our flight is blocked by soldiers, though Much and Will manage to escape.  We can GO BATTLEMENTS, about the only available option, and GO DOOR to reach a stone staircase heading up and down, with two more doors available.

The left door takes us into a bedroom, with a Locked Treasure Chest, a Window and a Bed.  The chest is too heavy to carry, and it's locked, of course.  Through the window we can see the soldier-infested guardroom below, so we won't be going back that way any time soon.

The right door takes us to another bedroom, where The Lady Marion waits for us to TALK to her -- she informs us that her father is Sir Richard at the Lea, and she lives at Leaford Grange, so perhaps we are not yet acquainted.  This bedroom's window overlooks a fifteen-foot drop, but we can successfully GO WINDOW to escape the palace.  (We also note that when we try to GO BED in other bedrooms, we're told it's no time for sleeping, but if we try to GO BED in Marion's room, it's Not allowed!)

Before continuing, it seems a good idea to backtrack a little bit and check the rest of the staircase out -- above Marion's level is a single, empty bedroom, and below is the Great Hall where the Sheriff is stationed, so the window does seem to be our best option.

Now Herne the Hunter appears, to tell us: "find six Touchstones of Rhiannon and return them to their rightful home."  I knew we'd get around to some more traditional adventuring eventually!  We find ourselves in Sherwood Forest now, where most of the game will take place, with travel possible in the four cardinal directions.

It's hard to map the forest out, as we have nothing in inventory, but we can wander around a bit and eventually run into John Little, bewitched slave of Belleme, who threatens us with his quarterstaff, though we can pick up a spare one nearby.

North of Little John's location is a waterfall, and as is almost always the case in adventure games, we can GO WATERFALL, in this case to discover Herne the Hunter's cave.  Herne just repeats his earlier message, but we can pick up our long bow and a quiver with arrows here, as well as Albion, one of the seven swords of Wayland.

North of the waterfall is the outlaws camp, where Much and Will have arrived after escaping the castle in Nottingham.  The forest is large, but not hard to map -- there are some boundary loops where we hit the end of its range, but standard N/S/E/W navigation works as expected.  Most of the significant areas lie around the edges of the forest, so we just have to spend some time mapping it out.

In the northwest corner of the forest, we find the Templars Camp -- they have a touchstone, but will only exchange it for their stolen Holy Crest.  The northeastern area leads us to Kirklee Abbey and Leaford Grange.

On the east, we find a sand flat leading to the Castle de Belleme.  We can enter the courtyard, where a Statue of Azeal stands in front of the door.  Trying to GO DOOR is a bad idea, as A mighty wind blows you back.  You are in the grip of the forces of Azael the Evil One.  There is no escape!  Darn that Little Mermaid!

Elsewhere in the forest we meet Gregory the tax collector -- though he wanders off on his own before we can really interact with him, so we'll have to track him down again later.  On the western edge of the forest we can find a stone circle, and a couple of areas near a stream.

It feels like we've explored the area pretty well, so let's check out the puzzle possibilities.  Trying to GO GRANGE at Leaford is fatal, as there are numerous soldiers around, but we can KNOCK DOOR at Kirklees Abbey to meet a Nun, who says she will exchange the Abbey's Touchstone for four hundred gold pieces.

Okay, so we have a lead on a couple of Touchstones, but we gotta pay the Nun.  Can we ROB GREGORY?  Not directly.  (What if his name was Rich?)  We can't TAKE TAXES either.

I had to resort to the classic J. Gunness walkthrough to learn that we can SAY FOLLOW to get our Merry Men to tag along, and that if we ATTACK JOHN with the quarterstaff we can break the spell.  With our gang of four, we are able to intercept Gregory and... no, no, we're not.  Hmmm... okay, what else am I missing?  Apparently (thanks, J!) if we hang around the outlaw camp for a while, a messenger will arrive.... and yes, A messenger enters and tells of an archery contest at Nottingham with a silver arrow as first prize.

Off to Nottingham we go (we can GO NOTTINGHAM from the spot in the forest where we can see it in the distance).  The contest is already in progress, and all we have to do is SHOOT ARROW, easily winning the contest, but falling into the Sheriff's trap!  Trying to escape again via the Battlements isn't successful.  We can't SHOOT SHERIFF, or SHOOT DEPUTY for that matter, because we can only SHOOT ARROW as far as the parser is concerned, but we can GRAB SHERIFF and use him as a hostage while we GO GATES, then DROP SHERIFF after we're safely back in the forest.  Fortunately, he runs off and the guards break off their pursuit.

The silver arrow is valuable, presumably, but what do we do with it?  Trying to find my way back to the outlaw camp, we run into Friar Tuck and SAY FOLLOW to get our band up to five -- except he won't follow, it seems.  TALK FRIAR does reveal that Marion is now a captive of Simon de Belleme -- so we'll have to go deal with that evil castle now.

We can enter the Castle de Belleme, but when we try to SHOOT ARROW, its master uses magic to burn up Robin's bow.  Ah, but we can just KILL BELLEME and stab him with the Silver Arrow!  We have to reclaim the silver arrow from his body after he dies, but we also find our first of the six Touchstones!  We should also UNTIE MARION, and she tags along.

We can CLIMB the STATUE in the courtyard safely now, and EXAMINE its hollow EYES to find One hundred Gold Coins!  And what function does Marion serve?  Well, without the walkthrough, I don't think I would have ever found out that we need to EXAMINE BUSHES in the spot just south of Leaford Grange to let her show us a hidden cave, as the bushes aren't specifically mentioned as an available object!

Marion leads us into a passage underneath the Grange, avoiding the heavily armed surface patrols, to a cellar, where Siward the Thief resides.  Siward is nervous and shy, apparently, as he cowers from conversation, and he won't respond to SAY FOLLOW, but we can GET SIWARD and carry him around like luggage.

In the forest, we encounter a serf driving a horse and cart -- we can STOP CART and the serf runs away, making this a clear predecessor to the current Grand Theft Auto series.  We can't DRIVE CART, but we can GO CART -- the horse runs out of control but still leaves us neatly parked inside Nottingham Castle.  It's not a good idea to LEAVE CART, as we will be overpowered by guards, but if we WAIT until nightfall, then we can DROP SIWARD to get the thief to unlock that treasure chest across from Marion's room.  We can liberate the Templars' Holy Crest, another Touchstone, and another hundred gold coins this way... but we have to work fast, as the guards will arrive as soon as dawn breaks.  We have to get all three items and escape through Marion's bedroom window again -- she's been along for the ride this whole time.

We can GIVE CREST to the Templars -- we now have three of the touchstones.  But we only have one hundred gold coins to give to the nun at Kirklees Abbey.  Hey, shouldn't we have two hundred now?  It seems we have to KILL SIWARD as soon as he opens the chest, or he manages to ill-get some of our own ill-gotten gains.  Having restored to an earlier save and done that, it's time to take on the tax collector -- with some walkthrough help to know that we have to EXAMINE SACKS to find the coins he's carrying (again, the sacks aren't directly visible, and Gregory and his cart move on before we can examine anything else in detail, so this is hard to figure out!)  Now we have two hundred additional coins, and can GIVE COINS to the Nun, yielding a fourth touchstone.

Okay, we have four of the six touchstones, but not a lot of obvious puzzles remaining.  Any place we've missed on the map?  Well, I learn that we need to avoid returning to the Templars -- they surround and overpower us if we wander into their enclosure a second time.  But I do find the village of Wickham, to the west of the north side of the stream -- I hadn't quite realized there were two sides to the stream on the map.  There's a notably Large Tree off to the west; EXAMINE TREE suggests that The tree is Holy to Herne the Hunter, though only if we examine it from the village; standing at its foot, this is not discernible.  We can CLIMB TREE and EXAMINE it from a closer perspective to find one more Touchstone.

Okay -- what about that stone circle?  It seems like a safe place to drop the Touchstones; at least we can get rid of them for now in case we need the inventory space.  There's no SCORE command, so I can't tell if this is the right thing to do, and nothing else suggests that this is something we ought to do here.  Maybe I should be dropping the mystical sword Albion here instead?  Or the silver arrow as well?

Um... okay, I guess now that we've dropped the arrow, the game is over!  After we drop it, see, Herne magically appears and magically turns it into the sixth Touchstone -- why didn't he just say we needed to find five Touchstones of Rhianna and a silver arrow?   Or even four, since the fifth one was in his own holy tree?  Anyway, that's it -- chances are Mr. Howarth was running short on memory, so this will suffice.  The game is over, and victory is ours!


I enjoy these early adventure games in large part because they leave so much to the player's imagination -- there's quite a lot that happens in this game, communicated by the briefest of text.  But Robin of Sherwood also exemplifies the limitations of these early games -- several of its puzzles are extremely well-hidden, and with a more sophisticated parser and more room for descriptive text, the designer's intent might have been much more clearly hinted at.  As it stands, there's a little more game here than the technical constraints can support, and without a walkthrough I imagine many adventurers got hopelessly stuck deep i' th' Hood.

Tuesday, April 1, 2014

Adventure of the Week: Freddi Fish and the Case of the Missing Kelp Seeds (1994)

This week, we're playing through Freddi Fish and the Case of the Missing Kelp Seeds, published in 1994 as the first of another long-running children's adventure series from Ron Gilbert's Humongous Entertainment.  It stars young Freddi Fish (the name and voice, one suspects, is intentionally androgynous) and a colorful cast of fishy characters.


Freddi Fish 1 runs on the upgraded SCUMM engine licensed from Lucasarts -- it runs in 640 x 480 resolution, with full voice acting augmented by large-print onscreen text for early readers, great CD music by George "The Fatman" Sanger, beautiful backgrounds and plenty of high-quality animation with little repetition.  These games were still in production years after mainstream publishers began to shy away from point-and-click adventures for adults, and the cartoon audiovisuals still hold up well twenty years on.

I can easily recommend playing through Freddi Fish and the Case of the Missing Kelp Seeds -- it's not particularly challenging, but it is entertaining and well-produced, and there are a couple of smart gags along the way.  I'll be describing my playthrough experience in detail below, so as always there will be...

***** SPOILERS AHEAD! *****

The story begins with an animated intro in which Freddi delivers flowers obtained from the surface, courtesy of a friendly pelican named Sam, to many of his/her friends -- but when Freddi arrives at Grandma Grouper's house, she is extremely distraught.


Someone has absconded with her treasure chest of kelp seeds, meaning no harvest for the local residents.  This is pretty dire by children's adventure standards, and as Grandma is clearly in no shape to take action, Freddi sets off to locate the missing seed cache.

As always in a Humongous game, we're free to click on lots of things on every screen, some of which advance the story or place an item in Freddi's inventory, many of which trigger funny little incidental animations.  When we get tired of playing around outside Grandma's house, we can exit stage left to  encounters Freddi's friend Luther, who is trying to figure out how to swim a loop-de-loop -- Freddi demonstrates, but Luther can't quite manage it; he does, however, manage to bump his head on a rock formation, dislodging a bottle with a note in it.  The note suggests that Grandma Grouper's treasure can be found by going to the old whale bones.  Luther volunteers to help, though Freddi has to dash his greedy dreams by reminding him that the seeds aren't his to cash in -- and Freddi minces no words: "If we don't find them soon, all the fish are going to die!"

After our heroes exit, a couple of gangster sharks named Spongehead and (apparently) Boss show up -- apparently the bottle Luther found was meant to be a bread crumb, and now they're going to be in trouble with the Squidfather.  On the way to the bones, our heroes encounter Mrs. Halibut, who is trying to rescue her guppy Gabby from an undersea grotto -- the entrance gap in the rocks is too narrow for her to swim through, and she's gotten herself stuck.  Freddi and Luther struggle to pull her out, giving rise to my favorite line in the whole game:


Entering the grotto, we find little Gabby stuck under a rock, trying to push it away with a board he's found.  Freddi declares that a bigger board is needed, and we can acquire a purple conch shell while we're here.  As in Gilbert's Putt-Putt series, and, to be honest, most adventure games, Freddi's progress depends primarily on solving puzzles using inventory items found in his travels; they're not usually hard to find, as most are lying around in plain sight and we just have to explore the world thoroughly, taking anything that's not nailed down.

Heading east, we find a larger board, but might as well visit the old whale bones nearby since we're in the neighborhood.  We find another bottle suggesting that we go to the deep canyon -- we will be chasing a series of these clues, it seems.  We can also acquire one remarkably human-looking, unsuitable-for-scrimshaw bone -- some other bones nearby just dance around a bit, so it's important to click on just the right one.  Nearby, Freddi and Luther can also talk to Ray (a manta ray, naturally) who offers a SuperDuperDookaBookaPolyGizmo gadget that can provide access to a beautiful pearl protected by a net, if we can bring him a clock, and we can pick up a small silver key lying by a rock.

Freeing Gabby with the large board earns us a purple sea urchin from the grateful Mrs. Halibut (who, though unsuccessful, seems a more responsible parent than some of the adults in the early Putt-Putt games).  We can visit the King's castle, though at the moment there isn't anything much we can do here except admire his collection of pearls and shiny things while he jabbers on about how happy he is to be King.  On the way there, we encounter Herman, a hermit crab with an old-school Yiddish accent who is trying vainly to sleep in a glowing shell -- we can give him the purple shell, and he moves (with suitcases!) into the new digs, giving Freddi and Luther the glowing shell in exchange.

We can also swim up to the surface, where Fiddler Crab is locked in a cage -- he gives us his fishing pole if we free him using the key we found earlier.  Mr. Crab plays his claws like a violin to accompany his own singing, though his lyrics tend to be short of inspired, along the lines of, "Thanks for unlocking the cage!  I will give you my fishing pole."

It's entirely possible to have puzzles solved before we even encounter them, giving the game's open structure, and the fishing pole ends up to be important at the deep canyon to the west of our starting point, where Luther tries to grab the bottle and knocks it down into a deep, scary hole where it hits a deep-sea phosphorescent angler fish on the head.  Freddi is brave enough to swim down, but the angry fish keeps scaring him off -- fortunately, the fishing pole can be used to retrieve the bottle, pointing to another clue waiting at the King's castle.  (Apparently organized crime has some connections with the royal authorities, as nobody on the King's staff seems to have objected.)

Of course, the King won't give up the bottle without a pearl in exchange, so we have to solve that puzzle.  Ray suggested we look at the junkyard -- on the way there, we can play an optional math mini-game where a starfish instructor challenges us to solve multiple-choice math problems.  This is the only situation where the game's intended audience becomes really obvious -- the "ADVANCED" problems only involve 2-digit numbers -- but the game implements a workable solution for spoken numbers, with characters capable of saying, for example, "forty" (pause) "five" to cover all the values from 1 to 100.

There are a couple of other optional activities -- we can play a shooting (actually feeding) game where Freddi tries to throw food into the mouths of approaching turtles.  We can also collect purple sea urchins from various locations to weigh down a bucket enough to open the gate to the volcano-based Clamshell Theatre, where a frog tap dances briefly before getting yanked offstage and we can read some gag announcements for other, unseen, acts.

Getting back on task, we head to the junkyard.  A junkyard dogfish blocks the way, but he'll leave with a heartfelt "Thanks!" if we give him the "whale" bone we picked up earlier.  Salvaging a dashboard clock from a wrecked car (I thought it was an odometer at first, but it has clock-like numbers on its face), we deliver it to Ray, whose gizmo can be used to make a temporary gap in the net by spreading its strands apart.  We have to win the pearl by playing a round of Find-the-Lady with the talking oysters responsible for hiding the pearl:


We can play multiple times, but we can only earn one pearl per customer (and Luther apparently doesn't count.)

Taking the pearl back to the King's castle, we obtain the final bottle.  This last clue mentions a sunken ship, which we haven't visited yet, but Freddi knows where it is, and we shortly find ourselves there -- after a cutscene informs us that Spongehead has also finally remembered where he hid the treasure chest.  A pegleg pirate fish using a mandolin for a crutch wishes us luck, and we're off to explore the ship before we think to ask why a fish would be so severely disabled with one caudal fin missing.

Aboard the ship, Freddi can see Grandma Grouper's treasure chest in a large windowed room, but the window is too heavy to open and there's no crank on the rope mechanism meant for the purpose.  Searching for a crank in the ship's hold, we encounter one Fineas McFinn, a pirate captain who sings The Aaaarggh Song (I might not have the spelling right) with an... an organ-grinder's instrument, I guess one might call it, until it breaks.  He'll give Freddi the useless crank handle if we can come up with a substitute instrument.  Searching the ship, we find a crutch, and can trigger a dancing skeleton briefly reminiscent of Ron Gilbert's classic Monkey Island games.

Heading outside the ship -- we can't go back to the main map, so the solution must be around here somewhere -- we can trade the crutch to the pirate outside.  Fineas accepts the mandolin and gladly gives Freddi and Luther the crank handle in exchange, though we have to sit through another uninterruptible rendition of The Aarrgggh Song before we can continue.  Now we can access the ship's interior to find Grandma Grouper's missing kelp seed treasure chest!


Unfortunately, the subplot has thickened, and the bad guys also arrive to claim the treasure!  But this is a kids' game, and Freddi suggests that everyone can share the kelp seeds with no need for violence.  The sharks resolve to take this idea to the Squidfather, whose entire criminal organization seems to have no concept of how agriculture works.  Our heroes trail kelp seeds from the leaky treasure chest all the way back to Grandma's house, with kelp springing up instantly in their wake, so why these seeds are so hard to find in the first place remains the game's biggest mystery.

But all's well -- even if that little green jerk Luther tries to steal the credit -- and victory is ours!


There's not much challenge to any of the Humongous Entertainment games, but they do have a suitably Gilbertian sense of humor, and it's interesting to see what can happen when most of an adventure game's budget goes into artwork and animation rather than complex design.  Freddi Fish and the Case of the Missing Kelp Seeds is a fine example of children's interactive entertainment -- there's plenty to do, a story that's easy to follow with plenty of signposting (literally and vocally) to keep the player on track, and a colorful world to explore.  And I can't help thinking that the current resurgence in commercial point-and-click adventuring owes something to all the kids who grew up with Putt-Putt, Freddi Fish and friends in the 1990s.