
Cooke's engine uses vector-and-fill illustrations, which take some time to draw, and the parser isn't particularly speedy either, so I'm running Invincible Island using the ZXSpin emulator, with the CPU speed artificially cranked up to 14 MHz (though this also makes typing rhythm on the emulated keyboard a little unpredictable.) The parser is unusual in that it demands full-word entries, and won't accept abbreviations of verbs or nouns, though there is an I command for inventory and the usual navigational shortcuts are supported. The graphics system is also a little bit unusual -- it does some color shifting, occasionally drawing a fill in one color and then changing it to another using the ZX's attribute-based hardware, and draws some more detailed objects and characters using bitmaps overlaid on the background.
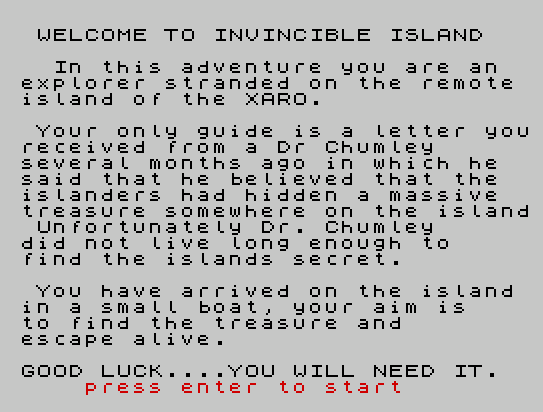
Invincible Island features a very traditional adventure plot -- per the intro, we are cast as an explorer stranded on the remotest island of the XARO. We are seeking treasure, based on a letter from a Dr. Chumley, and have arrived in a small boat; the goal is to find the treasure and escape alive. It's not quite clear why we're "stranded," since we have a boat, but for the sake of drama we'll assume we can't simply go back the way we came.
As always, interested readers are encouraged to visit Invincible Island firsthand before reading my comments below. It's not too difficult, though I did need a few hints along the way, and my notes are intended to describe my playthrough experience in as much detail as I can manage. In other words, there are...
***** SPOILERS AHEAD! *****

As the game begins, we find ourselves in a small cove with our small boat anchored nearby. We can't GO BOAT or ENTER BOAT or EXAMINE BOAT to any effect, though it looks suspiciously sail-less in the illustration. And we have nothing in inventory, so it seems we're remarkably ill-prepared for this expedition.
North of the cove is an open plain, prominently featuring a large, rusty chest. It is, of course, locked, and no other details suggest themselves. Further north is the edge of a large forest (a maze, perhaps?) -- we can acquire an axe here (GET AXE fails but TAKE AXE works), and there's a sign which we can't READ, though we can EXAMINE SIGN to learn that the strange writing is unreadable.
We can travel north again to find the late Dr. Chumley's camp -- we can't enter the dilapidated tents, but we can pick up an anorak (a winterized jacket) and a spade. North of the camp (the map seems fairly large, so I'm just exploring in one direction for now) we encounter a native resident of the island, watching you suspiciously. Our intrepid looting may encounter some opposition, then, but he allows us to proceed past him to a hill overlooking a valley, with a deep pit in the ground. North of this point, at last, we encounter a strong wall, possibly the northern boundary of the map.
We'll probably regret this, but we can try entering the pit -- and it leads to a lush green valley, from which we can readily return by going U, so we don't regret it at all. Oh, no, wait -- that's what happens when we travel D from the hilltop, entering the pit is immediately fatal as we drown in the cold, murky water at its bottom!
Restoring and heading east from the valley, we find the foothills of a mountain range, and a tatty old MAP. We can't READ the map -- or anything, it seems, as the verb is unrecognized -- but examination reveals it's a map of the surrounding waters, which may come in handy later.
We can go U into the mountains, but first we'll examine an ornate Asian pagoda lying to the east. The door is locked, and there's no KNOCK verb, so we'll probably need to come back here. Heading up into the mountains, you feel cold, so it's a good time to WEAR ANORAK so we can reach the peak and recover a parchment there. Examining it reveals a cryptic message:
?L
KMLE
TQRMP
Neither a reverse-alphabet or a shifted-alphabet try (assuming L = I, E or R) seems to translate it, and there's no TRANSLATE verb. Hmmmm. The native wants nothing do with the parchment, so we'll probably have to look elsewhere for help.
Returning to the strong wall, we head east and find we can go north again, to a door in the stockade wall. It's not locked, actually, though the description claims it's blocking our path; we can just ENTER DOOR to find ourselves in the courtyard of a temple; heading E takes us back out. We can climb the temple's heavy stone steps by heading U, discovering a jewel encrusted altar (with completely unreadable writing) and a red key.
Heading back south, we travel west of the native's location to find a desert area with three pillars and a torch we can take with us. Going west again takes us into a dead and silent plain, and further west is a barren and deserted land, with a portable skull.
From the skull's location, we head north and (via the customary vagaries of adventure game geography) abruptly find ourselves at the edge of a clear blue lake. We can't take the footpump here, so we'll probably need to bring a raft or something to this area later on.
We can walk further north along the edge of the lake, then head west to a winding river. South of the river is desert again, with a deep pit in the sand -- this one turns out to be a dried up old well, containing another parchment. And now we see how this works -- as we acquire various bits of parchment, EXAMINE PARCHMENT reveals more of the original message. It still seems to be encrypted, but maybe it will succumb as we have more text to work with. (It seems we're not supposed to be able to move until we LEAVE the PIT, but it has no illustration and is treated as a sub-room -- if we LOOK again, we're returned to the area outside the pit.)
North of the river lies an obviously rickety bridge -- and trying to CROSS BRIDGE despite the warning leads to death via great fall and cracked-open skull. We can't REPAIR or FIX it after a restore, so we'll have to come back to this puzzle. On the way back, I discover that the "you can't carry it" response doesn't mean that the footpump is not portable, only that we've filled the eight available inventory slots, so I am able to DROP ANORAK and TAKE FOOTPUMP.
Hmmmm... as I pass by the native again, you see a swarm of natives brandishing swords and spears in the distance. That can't be good. West of the forest's edge is a cliff base with a caged yellow canary sitting handily nearby. While I'm trying to figure out what do with the poor bird, the natives now appear to be closing in. I try to escape to the west, unfortunately walking into a dark cave maze where I can see nothing in the dark -- except for the approaching natives, who must be sporting phosphorescent body paint as they arrive shortly to catch you and stab you to death.
So there is a time limit, or maybe I should avoid bothering the one native too often. At any rate, I'm going to start over and continue mapping -- so far the puzzles don't seem too difficult, we just need to find the right objects and learn our way around the island.
East of the starting point is a sandy plain, with a pit which we can ENTER to once again slip and fall on the ladder and drown in seconds. So that was a bad idea! Past that point, after a restart, is more beach, with a pile of stones. EXAMINE STONES when we don't have them suggests that "you don't have some STONES" -- gee, thanks -- but we can safely TAKE them and note nothing special about them. (I never did find a use for them.)
Travel to the east again reveals yet more beach; we can DIG without any special tools, but we don't make any headway scrabbling with our bare hands. This seems to be the southeast corner of the map; heading north from here discovers a small hut, which we can quasi-enter to find a jewelled necklace. We can't seem to WEAR it, though.
West of the starting point is some green land, with a rusty key available -- we can use it to UNLOCK the rusty CHEST to the north, but a large coiled snake leaps out when we open it, and we immediately feel dizzy, then very dizzy, and then nothing, because we're dead. It seems like most of the danger is right around the starting point!
North of the green land is a native hut, with some food nearby. We can ENTER HUT to discover a bubbling green potion, apparently in some sort of portable form so we can carry it along. North again leads to some rolling hills, and north once more brings us back to the canary and the cave maze entrance.
It seems appropriate to fetch the torch and map out the maze, and to bring the canary along in case of poisonous gas. The canary collapses in the southeast corner of the cave; we can't breathe a little bit later, and eventually we die from lack of oxygen. Trying again, we find the cave's exit in the northwest corner, a one-way passage leading out to the foot of the cliff near the desert. If we're quick about it (or careful, as it seems like some locations are more oxygenated than others) we can pick up a sword and a parchment piece in the cave, then make our escape.
Next, we'll head into the forest. A well-lit east-west path borders dark, foreboding areas to the north and south, where you see a pair of eyes watching you through the trees. DROP FOOD doesn't distract this entity; eventually it leaps out from the trees and smashes you on the head, fatally so. If we stick to the brighter path, we can reach its end and find a box in an area to the south. It's too strong to open, however.
The green potion seems to cure the snake venom; there's another parchment piece in the chest, but that's all. So we'll have to exercise the adventure gamer's woeful prerogative, and dig everywhere we can with the spade... but that's not getting me anywhere either, so far. Does the red key from the temple unlock the pagoda door? Yes!

Inside the pagoda is a circular room, occupied by an old wizened native. We can KILL NATIVE WITH SWORD, and he drops something we can't see. But this is not only senselessly cruel but stupid, as he is immediately replaced by another elderly citizen, and the murderous mob appears within a few turns to dispatch us. We can't GIVE him anything to make peace, either, it seems.
It feels like we're on the wrong track here. Can we drop the stones on the box to open it? Nope. Decode the parchment maybe? With the pieces we have, there are a few short words visible -- TRT, FT, RT, RFT. Hmmmm... the font used for the parchment is kind of stylized, maybe those T's are actually C's. If we assume RFC is THE, then we have a simple two-character shifted code -- A = C, B = D, et cetera. It looks like we have ? and % and @ characters in the mix too, perhaps around the ends of the alphabet. And there's the word CRC, which would be ETE -- not really very compelling. But keeping in mind that the parchment remains incomplete, it does look we're onto something... the fragments we have now read something like this, if we treat % as ', @ as B, and ? as A:
... PAGE IS ... ETE
... ND YOU'LL F...
... F THE SUN AN ... HE...
... ENT TE.... MONGST THE
... BONES OF O... ESTORS
So it looks like we're getting somewhere with cracking the code! But it doesn't really give us anything specific to try.
Can we open the box with the axe? OPEN BOX WITH AXE is understood, it seems, but the box is still too strong. CUT BOX WITH AXE isn't recognized. But BREAK BOX WITH AXE works, yielding a yellow parchment. Now we have more of the message:
WHEN THE PAGE IS ... ETE
LOOK AND YOU'LL F...
WEST OF THE SUN AN ... HE...
ANCIENT TE.... MONGST THE
BONES OF O... ESTORS
It looks like we need at least one more piece of parchment to complete the page.
At this point, I got stuck, and I needed to consult John Barnsley and Andrew Barker's walkthrough at the CASA Solution Archive -- dang, I was doing so well! -- to learn that I was being misled by the parser. GIVE FOOD in the presence of the native indicates that the native doesn't want it, but a more explicit GIVE FOOD TO NATIVE garners a more positive response, and earns us a phrasebook in exchange!
Now we can read the sign near the forest, which just indicates that we should stick to the way laid out for you, which we've already figured out, and the altar in the temple, which advises us to search the high and low places but beware of the ancient land for none may follow. Hmmmm... these ancient messages aren't very clear.
Can we GIVE NECKLACE TO the elderly NATIVE, now that we know how this works? Maybe the unfindable items being dropped by the natives when we try to kill them are parchment fragments. And yes, now we have another parchment piece -- and with the phrasebook in hand, we don't have to hand translate the content, we just have to find the last piece.
What about the rickety bridge? Maybe it's a matter of weight. We can DROP ALL -- which still keeps the parchment in hand -- and CROSS BRIDGE successfully to find a wooden package on the beach. It contains an inflatable dingy [sic], and to the east we find a calm blue lake with a small island in the distance. Looks like we should have brought the footpump here! Fortunately, we can cross the bridge with that small bit of weight, and with both items in hand (counter-intuitively, as it seems the footpump should be foot-activated) we can INFLATE DINGY WITH FOOTPUMP.
Now we can DROP DINGY and SET SAIL for the island -- but no, that doesn't work. USE DINGY? ENTER DINGY? SAIL DINGY? FLOAT DINGY? Ah, we have to CROSS LAKE, and on the island we find the last bit of the parchment! And this is interesting -- the parchment has reverted to encrypted form, but that's probably because we had to leave the phrasebook on the other side of the bridge. Yes! After we reacquire it, we can fill in the remaining blanks -- somewhere west of the sun (by the three pillars, based on the illustration) and the temple, we should LOOK AND YOU'LL FIND.
LOOK where we found the skull doesn't seem to do anything, but DIGging in the desert east of that location (also meeting the specified criteria) yields a pile of GOLD! As soon as we take it, though, the mob of angry natives materializes in the distance, so we'd better get going! It's hard to escape in time -- they close in within three or four turns, and we need the navigational map to escape. Might they be triggered by digging up the gold, not taking it? No, it's the TAKE GOLD that does it. I just didn't have the skull in hand, as suggested by the walkthrough, so I had no magical protection from the natives -- that's what the BONES OF OUR ANCESTORS bit must be about.
I hurry back to the boat, SET SAIL, and... we get a black screen with no text and no closure? Is this the intended climax of the game? Nothing changes if we DROP SKULL, except that the native mob again appears. This seems to be a technical glitch, as if we drop everything but the gold, we strike out to sea only to die a lingering death from exposure, because we dropped the map before departing! If we leave with just the gold and the map in inventory, we get the proper victory ending. Vincimus!

Invincible Island proves entirely vincible in the end, and it's not too difficult aside from a couple of quirks and specific parser interactions required. This one was fun, and I look forward to playing more of Pete Cooke's several text adventures in the future.


I have an Atari 800XL and have recently dabbled with some text adventure games. A lot of the games I've tried use custom fonts that are nearly un-readable, though the Infocom games use the default Atari font and are therefore completely okay.
ReplyDeleteWhat really strikes me is the amount of patience needed for the things. Transitioning from one room to another in Zork, even using the SIO2PC USB interface, is a wait of at least five seconds, sometimes more. It adds up!
It really makes the anemic 8086 system I had as a kid seem like a powerhouse in comparison.
Anyway, I guess I just chose this post to rant at you, but I am absolutely loving the subject matter you're covering and I'm really enjoying your blog. Thank you for it!