Tuesday, July 28, 2015

Adventure of the Week: Wizard's Revenge (1981)

This week's subject, Wizard's Revenge, is another of an informal series of text adventures published by the Atari Program eXchange for Atari's 8-bit home computers, and the only one I hadn't yet tackled in my recent posts about these games.  Wizard's Revenge was written by Max Manowski circa 1981, and does not appear to use the same parser as the other adventure games in the APX library.  It also has a few role playing game-style elements, so it may present some different challenges.


The plot is fairly standard early-adventure material -- the player has been banished to a strange land by a powerful wizard, though this setup does more than most adventure games bother to do, in explaining why the player starts out in an unfamiliar place with no possessions to speak of.  The game also handles illumination in a more sophisticated way than most adventures of its era, and the structure is very open-ended -- there aren't many required puzzles, there are a lot of red herrings and atmospheric optional locations to visit, and the player is given a lot of freedom to explore.


Interested readers are of course encouraged to spoil the Wizard's Revenge before reading about my experience here -- but be warned that the game is a little buggy and there are lots of fatal scenarios, and no built-in SAVE facility, so I highly recommend using a modern emulator with machine state save capabilities, as I don't think I would have persevered for very long without that technical assist.  I also found that the game seems to work better under an (emulated) Atari 800 OS-B configuration than on an XL platform, though even then I found a number of situations that just hang the game.  So feel free to avoid some annoying non-game issues and learn what this one is all about in the...


***** SPOILERS AHEAD! *****


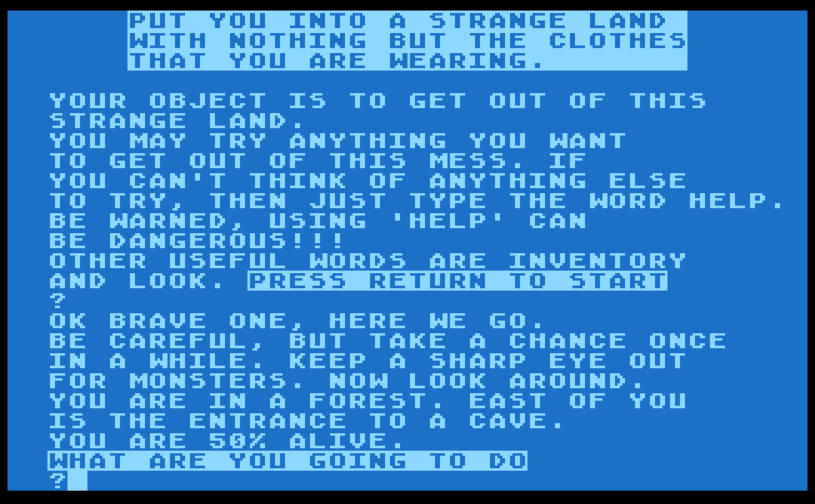
As the game begins, we find ourselves in a Forest.  YOU ARE 50% ALIVE, we're informed, suggesting that there is a role playing game concept of the player's health involved here.  There's a cave to the east, but I'm going to do a little exploring and mapping first.

My initial attempt to head North meets with resistance, as the parser informs us that I DO NOT ACCEPT ABBREVIATIONSNORTH is more successful, leading to a clearing in the woods with a green pole stuck in the ground.  I try to EXAMINE POLE, and the parser's visual response suggests it's only really recognizing POLE -- but just the same, the ground trembles, and we fall through a newly-opened crack before it closes above us. 

We are now in a Dimly Lit Room, with passages west, east, and south.  Heading SOUTH, we pass through a room with a little light visible to the south, into a Very Narrow Passage -- I thought the game had gotten hung up here, but there's just a pause as we find a sword, get stuck, and struggle back into the room to the north. 

Just out of curiosity, I try this again -- and on the second try, I get attacked by vampire bats and my health drops to 37%.  This happens again on subsequent tries, until I'm dead, so I guess we're only supposed to find one object here.  What's interesting is that after I restart and make another attempt, I acquire a silver button instead of the sword.  Curious, I start again and pick up a potion.  So it seems this is a way to acquire only non-critical items.

From the room with little light, I discover we can go EAST into a room with walls that feel covered with moss, and we hear strange sounds from the east.  We can't go north -- the room descriptions don't always list the available exits, so we have to make attempts in all possible directions, though at least UP and DOWN don't seem to be recognized so I think we only have to worry about four possibilities.  Heading south leads us into a Room that feels Damp (this game's text doesn't always name rooms formally, so my capitalization is going to be rather inconsistent here also.)

Here, we can only go back north, or west into a Dry Room with a torch on the wall.  I try to TAKE TORCH, based on my recent experience with APX adventures, but we can only GET TORCH... no, that doesn't work either... ah, my mistake.  I'd gone back to the damp room, and instead of telling me the torch wasn't available, the parser was just saying HUH? in response to GET TORCH and WHAT? for TAKE TORCH.  This suggests the nouns are treated according to situation or location, and maybe given priority over the verbs; the parser actually underlines the words it recognizes with up-arrows after we enter a command, giving us some hints as to how the game "thinks."

In the dry room, I do successfully TAKE TORCH -- and it's already lit, saving us hunting for matches and such.  The passage mentioned leading north turns out to be too narrow to enter, but the torch's light reveals that it seems to run on for quite a distance.  The only other apparent option is to head WEST, which leads us back to our starting point.

I still have some areas to explore inside the cave, but let's check out the map above ground now that we're back here.  Heading west from the forest leads to a Small Stream, flowing north to south.  DRINK WATER here proves refreshing, but doesn't seem to improve our health, which remains at 50%. 

I head NORTH again and find the source of the stream at the mouth of a small cave.  I DRINK WATER once and feel stronger -- but health stays where it is, and when I try to drink again, I die of an overdose!  After a restore (there is no SAVE GAME command, so I'm glad I'm playing under the Atari800Win emulator) I drink just once, and confirm that we can't go north or west here, and EAST returns us to the clearing with the green pole, though it's no longer here after I disturbed it earlier.

In the interest of mapping, I follow the small stream south this time, to the point where it flows into a small crack in a large rock.  Trying to go west from here leads into an area where The Ground Here Is Very Swampy, and the game appears to hang.  So I have to restore again, and hope this doesn't happen too often; the same thing repeats when I try again, so it might be a bug or an intentional dead end.  I'll steer clear of it for now.

South of the forest is an area with many trees, and ONE OF THEM IS VERY TALL.  We can't go UP, but we can CLIMB to see a deep valley far to the east.  I try to go NORTH, and subsequently fall from the tree, knocking my health down by 9%.  CLIMB does not bring us back down, but DOWN works here.  Just to be thorough, I learn that trying to head EAST from the treetop is fatal, but the player's character is somehow wiser about heading south or west.  So maybe under some circumstances yet to arise, we will be able to head east?

I head south of the tall tree to find more trees and a large hole in the ground.  The game seems to hang up again if I try to go WEST of this point, and we can't go DOWN into the hole, at least not that way.  EXAMINE HOLE proves unintentionally effective, as we find the edge of the hole slippery and fall into it.

This leads us back to the room where we felt moss earlier, but with the torch in hand, we can now see it much more clearly.  It has mossy walls and passages leading east, south, and west.  This is a really nice way to handle illumination -- we were able to explore in the darkness before we had a proper torch, which is a more natural solution than the usual it's-so-dark-you'll-break-your-neck-just-by-walking-around situation these games often present.

With this insight, I travel back to the dimly lit room we visited earlier, which is now just a room with passages to the west, east and south.  I haven't been west yet -- this leads to a room with a Musty Smell, and we can continue west to a small room with a door on the west wall.  I try to EXAMINE DOOR, and end up wounded somehow, though the game suggests we might be able to push harder.  This seems misleading, as another attempt produces a click, and a dart is stuck in my neck, costing some health as I pull it out.  PUSH DOOR produces a similar result, and with my health dropping again I opt to restore to a previous save state.

Heading back to the east, I see some strange powder near the north wall.  We can't TAKE POWDER, or PUSH WALL to look for dust-disturbing secret panels, but if we try to go NORTH, a spark from the torch lands in the powder, and it explodes!  We don't seem to suffer much damage, but the torch is now useless.  I try to DROP TORCH after a restore, but DROP is not even a recognized verb, so we'll do some more mapping before we try to push through this area.  I do discover that if we let the torch be blown up, and try to go NORTH, we're told that it's too dark to see anything -- but if we type LOOK, we can learn that we're still in the musty room despite the lack of a light source.

We have some more mapping to do, so I'll head east of the formerly dimly-lit room into a dead end -- but when I try to turn back, a bright flash occurs, we move through the air, and find ourselves in a small cave with a poisonous snake approaching.  I try go SOUTH but fail to escape a deadly bite.  After yet another restore, I attempt to KILL SNAKE, and to my surprise I'm able to do so even though I don't have an obvious weapon in hand.  But the game hangs again here, and I'm starting to wonder if I'm even going to be able to play this one to completion.

What next?  Let's check out the strange sound to the east of the mossy room.  The passage turns north into a Very Large Room with water blocking the way north and a large, apparently friendly bird.  I try to EXAMINE BIRD and SING BIRD and PET BIRD, but only get strange looks and more chirping.  CLIMB doesn't work -- he's not that large -- nor does RIDE BIRD.  I try to EXAMINE POTION, in case it might be helpful here, but the parser assumes I want to imbibe it, and I find myself back at 100% health... just before the game hangs again.

What is going on?  I set up my emulator to run as an Atari 800 with OS-B instead of as an Atari XL, reboot, and now the game seems to be slightly more cooperative.  My quick test, heading into the swampy ground west of the trees, leads to a pearl and a hang-free prompt.  I opt to head north into knee-deep water, where I get bitten by a water moccasin and die.  Restarting, I go to the bird room, and trying to go NORTH reveals that we must either WADE or SWIMSWIM is not great, as a large fish bites us and we're wounded.  WADE has the same effect.  Dang it!

Entering the narrow passage, luck grants me a book this time.  READ BOOK reveals a single page of writing: "TO LEAVE THE CASTLE, KEEP GOING EAST."  That will probably be useful advice.  Next, I try to KILL SNAKE in the small cave again, but this still seems to hang the game.  I restart and pick up a worm in the narrow passage, which enables me to GIVE WORM and get the bird to fly me across the water.  This game seems to depend on random events to a startling degree!

We enter a small passage here, crawling to discover a key before we have to back out.  The passage caves in, but another passage north takes us to a Round Room with passages west and south.  Writing over the south passage reads: "WHEN SMILED AT ALWAYS SMILE BACK," but then the writing fades away.

We might as well head south, then, to a dead end where a rock SEEMS TO STICK OUT IN AN UNNATURAL WAY.  I TOUCH ROCK and fall through a trap door, landing fatally on some spikes.  So we'll restore and avoid doing that.

Instead, we'll go west into a room with passages to the south and west.  THE NORTH WALL LOOKS STRANGE, but we can't walk through it or otherwise interact with it.  The south passage leads to a room with walls that sparkle, and no obvious exits.  SMILE and SMILE WALL aren't productive, but I TOUCH WALLS, and we find ourselves at the west end of a valley with steep sides and a western sparkling wall, presumably way to return.

Heading east, I pass some bushes, and reach an area where the walls are not as steep.  CLIMB still fails, but we're not hurt after sliding down from about halfway up, and we can continue east to an intersection of two valleys.

A partially readable sign suggests, "TO EXIT GO .O.TH," which means it's a good time to save state for the umpteenth time -- and also suggests that Mr. Manowski's game must have felt a little sadistic in its original, unSAVEable form!  I opt not to decide yet, and check out the east end of the valley, where some rocks are starting to fall.  EXAMINE ROCKS proves fatal, though, as they crush our health turn by turn, and we can't escape by heading back to the WEST -- all we can do here, in fact, is suffer wave upon wave of falling rocks until we're dead.

Restoring and heading north instead, I find some bushes at the north end of the valley, and go west into a small room with a passage west and a small gem in the wall.  Going west leads us to the small cave with the poisonous snake we earlier reached by another route, and again the game hangs up.

I'll restore and try going south at the intersection -- this leads to a stairway in the south wall.  The steps are tiring, we're told, but we are able to climb them and arrive at a clearing.  To the west is a tall tree -- similar to but not the same as the earlier one -- where we can see a valley to the north and a river to the east.  Further west is a clearing with some bushes bearing yellow berries, which I'll ignore for safety's sake at the moment.

This game's map is fairly large, though there aren't a lot of inventory items or puzzles to deal with.  I'm going to go back to the east for now, discovering a castle near a river with an open door.  GO DOOR is not recognized, EAST causes us to drown in the river, and GO CASTLE is also unproductive.  It finally dawns on me that, with the castle's door on its east wall, we've probably just come through that door -- which suggests we're making progress escaping said castle.

I try going SOUTH from here, finding a log across the river that DOESN'T LOOK SAFE TO CROSS.  But with the luxury of a save state to back me up, I try to CROSS LOG anyway... and to my surprise, victory is ours!


The game still feels a little bit unfinished, with lots of loose ends, so I restore to my pre-log crossing situation and wander around this area a little bit more.  I meet a smiling man in the woods to the west, and SMILE gets him to tell us that "IT'S SAFE TO CROSS THE LOG," which we'd already figured out.  I find a flute in a grove of willow trees, but can't PLAY FLUTE to do anything with the poisonous snake.  I get the impression that certain random events, especially the discovery of one of multiple possible objects in the narrow passage early on, allow Wizard's Revenge to have multiple solutions, but I'll stop here, satisfied to have found one of them at least.

Wizard's Revenge is certainly not a standard adventure game -- it's got some odd behaviors and a few bugs, but as what I surmise is an attempt to produce a more RPG-like, loosely-structured experience, it's not bad.  The map is very large and I have to think that other paths to the ending are available -- at the least, the design presents a greater illusion of choice than most text adventures of its time.  As far as I can determine, this is the only game Max Manowski ever published, so we don't have any other examples of his approach to the genre to compare to this one.  But I enjoyed wandering through this expansive, if largely plot-free, adventure game.

Tuesday, July 21, 2015

Adventure of the Week: Castle (1981)

Castle is another escape-the-castle adventure involving a wizard's curse, written by Robert Zdybel and published by the Atari Program Exchange for the company's 8-bit computers, circa 1981.  (All of these games start up with the same COPYRIGHT ATARI 1981 notice, and I'm starting to wonder if it's really just the engine's built-in notice and these games were released over a longer period of time.) 


Castle uses the standard Atari Program eXchange engine written in-house at Atari, with all the attendant quirks I've been noting while working my way through these games in recent weeks.


Interested readers are, of course, encouraged to escape the Castle before reading about my experience below.  The game isn't overly difficult, but figuring out how some of the pieces are supposed to fit together isn't always straightforward, and the APX parser's approach gets in the way here and there -- the player tends to have to hunt for the location where an object can be used as intended.  In any case, be advised that if you have any interest in experiencing this adventure firsthand, you may want to go away and do that, as there will surely be...

***** SPOILERS AHEAD! *****


We begin in a large open courtyard -- our imprisonment being rather informal, it seems -- near a beautiful fountain.  There's quite a bit of detailed, evocative text in this game, which suggests the map may not be very large.  We have nothing in inventory, so we'll explore the large stone arches in all directions.

Heading North leads us into a Banquet Hall, where moldy remains of the last dinner served suggest a hasty departure.  There is a parchment lunch sack lying here, and we're told that it has a grease spot in one corner.  I try to TAKE SACK and TAKE LUNCH SACK, unsuccessfully, but TAKE LUNCH works.  OPEN LUNCH reveals a tuna sandwich, a banana, and a liverwurst cookie.

East of the banquet hall is the Scullery, where we see a large, half-full bottle of water that looks potable.  Zdybel's text in this game works around the engine's lack of a typical EXAMINE verb, so it pays to read the room descriptions in detail while the objects are in situ to pick up important details. 

South of the scullery is the Ladies Quarters, where cobweb-covered feather beds once hosted the castle's female staff.  We can return to the courtyard to the west, but I'll continue south into the Bunk Room, apparently abandoned by the Royal Guard.  An Elven steel sword here suggests that the author had recently played ZORK, what with the lunch sack we found earlier and the blue glow we see before us.  We'll TAKE SWORD too.

West of the bunk room is the Great Gate, where a thick drawbridge secures the castle.  An iron crank probably controls the great drawbridge, but we'll keep exploring, confirming that we can return to the courtyard to the north.  The map is straightforward so far, and geographically consistent -- it appears the courtyard is surrounded by a ring of 9 rooms, all connected in the expected fashion.

Continuing West of the Great Gate, we find a Guardhouse containing a brass oil lamp, so we'll TAKE LAMP as custom dictates.  A forbidding staircase leads into unknown territory below, so we'll keep ZORK in mind and continue exploring to pick up any other worthwhile adventuring accessories before we go down there.

A Small Grate secured by a heavy, padlocked iron chain lies to the north of the guardhouse, west of the courtyard.  It appears we could go west if the chain was removed, but for now we'll have to go north to what should be the last room in this area.  This is the Great Staircase, leading upward, but we're warned that The ageing [sic] stairs are showing signs of neglect and just might not hold your weight

I'll take the risk and head Up to the Chapel, where we see a broken-down pipe organ and a wall of stained glass.  PLAY ORGAN isn't recognized by the parser, so that's probably not something we need to pursue. 

This upper floor seems similar to the first, with the chapel in the northeast corner.  I'll tour in clockwise direction again to visit the Council Chambers, with a wrought-iron grating covering a window cut from the stone; the King's Chamber, with a moldy mattress and a passage upward that's currently blocked for some unstated reason; and a Sitting Room with a potted plant crying for "Water" -- another clear influence, this time from Crowther and Woods' Colossal Cave.  In the southeast corner of this floor is the Queen's Chamber, with a magically fresh-looking blueberry and raisin cupcake on hand (though we must TAKE CAKE, TAKE CUPCAKE doesn't work) and a route up to the Lookout, a breathtaking view with no other exits.  West of the Queen's Chamber is the Sewing Room, and in the southwest corner is a Small Stairwell with a staircase leading up into unfathomable mist, so we can't climb it at the moment.  (I later discover that the sewing room seems to exist solely to allow for a joke about early computing hardware logic gate technology -- HINT here suggests that the new Enchanted Castle Limited (ECL for short) represents a major improvement over the TTL series.)  There's also a Great Hall connecting the small stairwell to the chapel, and we can go up from the chapel into the Bell Tower to acquire a small sack of birdseed if we TAKE BIRDSEED, TAKE SACK and TAKE SEED don't work.  We can't RING BELL either.

Before I go down into the darkness below the guardhouse, I try to TURN CRANK at the great gate, to no avail as it's rusted in place.  I try to OIL CRANK with the oil from the lamp, also unsuccessfully, and I also fail to USE OIL and OPEN LAMP.

So we'll continue mapping -- I head down into the darkness, TURNON LAMP (a verb peculiar to the APX engine) and find myself in the Gaol, where a grinning, armed, presumably animated skeleton blocks our way and guards the tempting ring of keys lying on the floor.  I try to KILL SKELETON and ATTACK SKELETON, but USE SWORD is the only way to dispatch him as the blow smashes the dancing skeleton into a hundred small pieces.  We can't TAKE KEYS or TAKE RING, so the ring of keys on the floor appears to be strictly decorative in nature.

The gaol lies to the south of the Dungeon proper, with torture implements, strange Elven runes on the wall and a suspiciously less-dusty eastern wall.  I try to READ RUNES but YOU HAVEN'T DONE SOMETHING ELSE YET, and trying to go east suggests something is in the way.  The map down here does not resemble the upper floors -- so far, we can only reach the gaol and the dungeon.

So our map is complete for the moment, and now we can start solving some puzzles.  My first thought proves lucky, as I EAT CAKE and feel a strange Elvish feeling come over you, allowing us to READ RUNES: "SPEAK AND THEN ENTER."  But no magic words I try seem to work, so we probably need to discover the word somehow.

I try to THROW BIRDSEED and OPEN BIRDSEED at the lookout tower, but nothing seems to work.  We can DRINK BOTTLE and EAT LUNCH, for refreshment, but no other results manifest... and I probably should have watered that plant, shouldn't I?  There's no SAVE GAME supported, so I'll have to return to an earlier emulator save state.

WATER PLANT causes the plant to grow to the ceiling, just as we expected, but this seems to have no real impact on the story -- it now bellows for water, but we can observe this only at the moment we water it; otherwise, the plant seems to have disappeared from the world.  Our bottle is also gone, so there appears to be no way to refill it; I'll just restore again and ignore the plant's entreaties for now.

In the King's Chamber, we can LIFT MATTRESS to find a golden amulet with a strange inscription: "You rule the toads of the Short Forest and every newt in Idaho."  There's a Royal Seal on the ceiling, in gold; I try to WEAR AMULET, OPEN AMULET, WAVE AMULET and OPEN SEAL, but the parser doesn't recognize any of these concepts.

In the bell tower, requesting a HINT suggests that the bishop used to feed a flock of birds here.  So I try to SCATTER BIRDSEED, which as I expected doesn't work, and DROP BIRDSEED, which does but not the way I wanted it to.  We can EAT BIRDSEED, which does nothing beyond leaving a bad taste in our mouth and consuming the birdseed, and FEED BIRDS isn't recognized.  It finally dawns on me that I found the birdseed here originally, so the hint is just descriptive.

I'll play some more with the amulet -- the fact we can READ it in the King's Chamber but nowhere else suggests whatever we can do with it must be done there.  LIFT AMULET does nothing to open the seal, but INSERT AMULET does, causing a small step-ladder to extend down from the ceiling.  This leads us to the conveniently located King's Mistress' Chamber, where a yellow canary looks hungry.  I try to FEED CANARY and DROP BIRDSEED, but only FEED BIRD works -- the little bird says, "ARJAYZEE."  That sounds like the author's initials, and likely a magic word. 

SAY ARJAYZEE doesn't work on the dungeon door, but it does thin out the mist in the small stairwell, allowing us to reach the Wizard's Tower.  A thin black spellbook is here, but we can't READ BOOK in this location, so we'll just TAKE BOOK for now.

We can't read it in the dungeon either.  Just for fun, I try taking the "SPEAK AND THEN ENTER" clue literally and SAY AND -- and lo and behold, the wall fades into a thinning mist!  Now we can enter the Potion Room, with a gigantic vault door to the north.  There's a flask of blue fluid here with a faded label, but I have to leave and reenter the room to learn that the parser calls this a POTION, not a FLASK or a FLUID

READ POTION suggests it's called "OLD IRONBENDERS STRENGTH EXTRACT," and DRINK POTION suggests it lives up to its name.  With our newly acquired power we can OPEN VAULT and enter the King's Vault.  There's a note here, reading: "... under my mattress, simply insert it into the ceiling and the secret room will appear."  So... wow, that was a lot of work for something we've already learned.  And our new strength doesn't allow us to BEND BARS in the council chamber or BREAK CHAIN at the small grate to create a new exit.

So where can we READ BOOK?  In the Potion Room, we get a different response -- YOU HAVEN'T DONE SOMETHING ELSE YET.  It turns out this is very much like the black-light puzzle in Wizard's Gold -- we have to TURNOFF LAMP before we can read fiery script revealing another magic word: "XANADU."  We can SAY XANADU right here, as luck would have it, and the potion room's eastern wall disappears.

Now we can reach the Wizard's Treasure Room, where a small silver key is encrusted with gems and inscribed in gold.  This is partially a gag, as the key says, "Harvard" rather than the more common "Yale."   But the key itself should be useful, and proves to be as we return to the Small Grate, UNLOCK CHAIN here, and open up a passage to the west, out of the castle.  Victory is ours!


Castle is clearly derivative of some classic adventure games that preceded it, but after borrowing quite a bit of their flavor it goes off in its own direction.  The puzzles are nested a little bit too linearly, especially at the end, but there are a few interesting red herrings designed to raise questions in the player's mind and trip up the experienced adventurer, and Mr. Zdybel wrote some nicely atmospheric text.  I think this is the last of the APX games to use this engine, and I've enjoyed working my way through these adventures on summer afternoons.

Tuesday, July 14, 2015

Adventure of the Week: Chinese Puzzle (1981)

This week, we're looking at another Atari Program eXchange adventure game: Chinese Puzzle, written by Dennis Koble (later to co-found Imagic) and published in 1981, using the same engine as most of the other APX adventures for the Atari 8-bit computers.


(A technical note: we have to RUN "D:CHINA" at the Atari BASIC READY prompt to fire this one up, as there's no autostart on the commonly available disk image.) 

According to the title screen, we've been drugged by a Chinese madman and locked in a suite of rooms; our only objective is to escape.  This game is unusual in that the environment is explicitly constructed as a puzzle, with no attempt to create a realistic atmosphere or establish an adventurous plot.  It's just a conundrum in need of solving.

Interested adventurers are of course encouraged to work out this Chinese Puzzle independently, but I'll warn you that it's brief yet much more difficult than the other APX adventures I've played to date.  Most annoying is that the final sequence is either buggy or intentionally illogical; I had to decipher the APX engine's data format to figure out the exact sequence of actions required.  So feel free to skip the aggravation and sail casually on into the...

***** SPOILERS AHEAD! *****


We begin in the 3-Room, deathly silent, paneled with teak and rosewood.  "The magic number is 3. Remember that," we are advised, but SAY 3 doesn't do anything, nor is the noun 3 recognized.  We have nothing in inventory, so we'll start trying to map the place out.

The map is highly schematic.  North is the Red Room; East the Blue Room; South the Yellow Room; and West the Green Room.  We can also climb Up to the Grey Room, but we can't go Down yet; SOMETHING IS IN YOUR WAY.  So we probably have to do something to open that passage.

Expanding our exploration, we find the Orange Room north of the Red Room, where a faceted crystal prism breaks the incoming light into a cascading shower of rainbows.  We can TAKE CRYSTAL here, and it seems color is going to be a key part of this puzzle.

Heading north of the Orange Room returns us to the Yellow Room -- so the map wraps around on itself.  Does the same thing happen when we explore east-to-west?  Yes, west of the Green Room is the Purple Room -- with a Chinese ideogram written on parchment lying on the floor -- and the map wraps around back to the Blue Room here.

READ IDEOGRAM produces no effect in the Purple Room -- but this suggests it will do something more interesting elsewhere, so we'll take it along as we continue to explore.  Above the Grey Room is the White Room, and above that the Black Room.  We can climb Up from the Black Room to return to the 3-Room, but can't return the way we came, as we noted earlier.

It seems there aren't a lot of items to work with here, and no obvious uses, so we'll have to start experimenting.  I try to READ IDEOGRAM in every room -- it's written on white parchment, but it doesn't seem to be readable in the White or Black rooms.  In the Yellow Room, however, we're told that YOU NEED TO HAVE SOMETHING TO DO THAT.  So there must be another object available somewhere.

HELP suggests that TURNOVER is an accepted verb, but I don't seem to have any luck with it anywhere here.  LIFT CRYSTAL suggests that an effect may occur somewhere -- and in the Black Room, instead of THAT HAS NO EFFECT HERE, the parser responds: YOU CAN'T LIFT A CRYSTAL.  Is it sensitive to CRYSTAL?  I DROP CRYSTAL, and The crystal rolls across the floor into a corner.  Interesting; we can't seem to do anything with the corner, though, as it's not recognized by the parser.

Aha!  Mysteriously, now there's a lacquered Chinese box in the White Room.  I try to OPEN BOX, but YOU HAVEN'T DONE SOMETHING ELSE YET. We still can't READ IDEOGRAM in the Yellow Room.  The box doesn't respond much at all anywhere but the White Room, so it seems whatever's going to happen with it has to happen there.

Oh, wait -- with the box in hand and the crystal as well, I can finally READ IDEOGRAM in the Yellow Room.  It resembles the word "CHINA," we're told, and SAY CHINA is recognized -- but is it effective anywhere?  Yes, in the Red Room apparently, though nothing is happening yet when we do so.

If we DROP CRYSTAL in the Black Room again, the box returns to the White Room -- one of those easy-to-miss bugs in early adventure games.  I notice that DROP IDEOGRAM often returns THAT HAS NO EFFECT HERE -- so is it supposed to do something, somewhere?  Ah -- in the Yellow Room, The paper flutters to the floor.  This has no apparent effect but the mention seems to imply something special has occurred.

Now that we have relocated the ideogram -- for reasons that never become clear at all -- we can TURNOVER BOX in the White Room, and learn that Written on the bottom of the box is the word RUSSIA.  Okay, we're starting to see a pattern here.  Now we can SAY CHINA in the Red Room -- Ah yes.  One of the big 3.  So we may be on to something now! 

SAY RUSSIA has no effect here, but in the Blue Room it's recognized, though not effective at the moment.  Hmmmmm.

I restart and poke around some more, and somehow, without ever SAYing CHINA or discovering the magic word RUSSIA, I've gotten myself into a state where the next step of the solution appears to work.  We SAY RUSSIA in the Blue Room and it's recognized as The second of the Big 3.  But if I SAY CHINA first, it seems I can't SAY RUSSIA again after that point.  And SAY USA doesn't seem to work anywhere, until I discover that SAY U.S.A. should work, potentially in the Green Room.

There's definitely some weirdness afoot here -- we can either TURNOVER BOX to learn about RUSSIA, or OPEN BOX to learn about U.S.A., but we can't seem to do both.  And somehow I accidentally stumble onto the endgame by skipping SAY CHINA altogether and jumping ahead to SAY RUSSIA and SAY U.S.A. in the appropriate locations, which isn't very satisfying as it feels like I've short-circuited the intended solution.  I'm not even sure the room colors have anything to do with the puzzle at this point.


So I finally break down and decipher the game's data file to figure out how these pieces are supposed to fit together.  It turns out that a series of actions have to be taken in a precise and counterintuitive order, due to the game's use of what I'll call "flag 4" to track status.  In some cases, if we do something and then re-do it, the flag gets reset and breaks (or supports) the expected sequence, and we have to repeat certain actions to make other actions possible.  The solution makes very little sense, but below I've listed what has to be done.  (You may notice that steps 1 through 5 are technically optional but are required to learn all the magic words; as I had discovered accidentally, the game can be finished very quickly by starting this sequence at step 6!)  Here's the sequence:

1. DROP IDEOGRAM in the Yellow Room (sets flag 4:1)
2. TURNOVER BOX in the White Room (requires 4:1, sets 4:2)
3. SAY CHINA in the Red Room (requires 4:2, sets 3:1 which is never required)
4. TAKE IDEOGRAM and DROP IDEOGRAM in the Yellow Room again (resets to 4:1)
5. OPEN BOX in the White Room (requires 4:1, sets 4:4)
6. READ IDEOGRAM in the Yellow Room (requires box in hand, sets 4:3)
7. SAY RUSSIA in the Blue Room (requires 4:3, sets 4:6)
8. SAY U.S.A. in the Green Room (requires 4:6, sets 2:1)

Finally, a secret panel in the floor lies open in the 3-Room, though we won't actually see this unless we Look in that room to see the open passage added to the description.  All we have to do now is go Down -- we've reached The Way Out, and victory is ours!


Examination of the data file verifies that there's no more effective way to finish this Chinese Puzzle, so this is indeed the desired solution.  There are a few more of these APX adventures in the archives; I really feel like I should branch out a bit, but I seem to be addicted to these odd little games.  So I'll just have to see what comes up next next time around!

Tuesday, July 7, 2015

Adventure of the Week: Wizard's Gold (1981)

I intended to play something more substantial while I was on vacation, but instead I've spent my time with another Atari Program eXchange adventure circa 1981, author uncredited, called Wizard's Gold.  Our goal is to find a hidden bar of gold and return it to "its rightful place," presumably the other thing we'll have to find. 


This game uses the idiosyncratic Atari BASIC text adventure engine, and a lot of the text is misformatted with line breaks in strange places.  It seems to have been written in-house, perhaps by Dennis Koble, given a number of references to internal Atari code names of the time.

Interested adventurers are encouraged to retrieve the Wizard's Gold firsthand before reading my notes below; it's not a difficult game at all, though I lucked out by guessing the right verbs the parser expects in a few spots.  As always, my goal here is to document these games for the record, and there are sure to be...

****** SPOILERS AHEAD! *****


We begin in the bedroom of a wizard's house -- it isn't clear how we got here or gained entry, and that may be better left unspoken, but we're apparently following up on rumors concerning a hidden bar of gold hidden in the catacombs below.  The APX games don't generally list available exits, so we'll have to use some trial and error to discover that we can go West to the Kitchen or Up to the Rooftop Garden.

The kitchen contains a bubbling pot and some spell ingredients, but we can't interact with any of these items.  We can travel south to the Living Room, or up to the rooftop garden, from here.

We might as well check out the rooftop garden, then -- there's a book here, but if we try to READ BOOK, THAT HAS NO EFFECT HERE, which past experience with this engine suggests means we need to read the book in a particular location in order to make use of it.  We can explore in all directions within the rooftop garden, but everything loops back to the same location, except for Down which takes us back to the bedroom.

Continuing our mapping, we discover that heading down the stairs in the living room leads to a dark area requiring illumination, so we'll head east into the Observatory instead, where we conveniently find a battery-operated lamp.  We'll TAKE LAMP (the traditional GET LAMP doesn't work due to the limited parser dictionary) and since there are no more viable exits here, we'll head down from the living room again and TURNON LAMP (the game's built-in HELP is useful here, spelling out this non-standard command used by most of the APX games.)

The light reveals that we are in one corner of a Large Room.  This is a bit of a puzzle, although it doesn't take long to figure out that we've entered in the southwest corner of a 4 x 4 area, making every room a corner.  The only new exit is one heading down from the southeast corner, to the Misty Room where fog blocks most detail but a downward path appears to be available.  However, SOMETHING IS IN YOUR WAY if we try to move in that direction, so we'll have to see whether there are any other exits here.

North of the misty room is a Chemical Storage Room filled with empty, broken bottles.  Below is the Blank Room, intentionally left blank in the classic IBM manual tradition.  The map is pretty linear so far -- the only available exit from this point leads west into the Armor Closet, where we find a slightly used magic broom we'll take along.

We can travel up or down from the armor closet -- below is the Magic Broom Repair Shop, where the parser won't grasp the meaning of FIX BROOM or REPAIR BROOM, so we'll hope it's in good working order.  Above the closet is a Mushroom Garden, where we can acquire an ugly black mushroom.

Continuing south of the mushroom garden, we find the Library, where an empty stand reads, "This Book Holds the Secret Words."  We can READ the BOOK we found earlier here, revealing cryptic letters: "STELLA" (surely a reference to the working name for Atari's popular 2600 videogame console.)

I try to SAY STELLA, and to my surprise it works right here -- a magic wand appears and we're advised we can Use it to go where fog leads, probably a reference to the misty room.

Before leaving the library, I explore downward to find the Egg Room, filled with rotten eggs as a voice says, "GLEEK."  I try to SAY GLEEK, and am greeted with a vintage 1981 pop culture reference as Mork from Ork leaps out of a large egg saying "NANOO-NANOO," and here in 2015 I am sadly reminded of the untimely departure of Robin Williams.  But this event seems to have no bearing on the plot, so we'll assume it's just a semi-literal easter egg.

We can continue downward from the egg room into the Wizard's Psychedelic Room.  There's a black light poster here which we can't TAKE or initially READ -- it isn't until I TURNOFF LAMP that we can make out the word "COLLEEN" (code name for the Atari 800 computer) using the ultraviolet illumination that remains.  SAY COLLEEN has no effect here, however.  (We can also note that the Wizard's cultural era probably parallels the author's -- the other posters on the walls are for Jefferson Airplane and the Grateful Dead, in the days when the tiny computer game industry freely cited brands and intellectual property from the real world, with nary a thought or worry about approval or licensing.)

We can't go back up to the egg room, and the only available exit seems to be further down, into the Boiler Room.  From here, we can go north into the Computer Room, with an ATARI 800 on display.  We can travel one-way Up from here to return to the Magic Broom Repair Shop, so we're not forever stuck down here, though I'll make my way back here for now.

East of the computer room is the wizard's Wine Cellar, with one available exit, to the Crossbow Firing Range above.  A sign reads, "No Crossing on Foot," which is probably why we have the broom -- and yes, while we can't walk south, we can RIDE BROOM to reach the southern end of the range (actually, this action just opens up the southern exit of the room -- the implementation is an artifact of the parser's approach to map puzzles.)

Now we can visit the Aquarium Room, where a fish tank full of hungry piranha dominates the view.  The piranha appear to block a downward path, and DROP MUSHROOM doesn't feed, poison or otherwise satisfy them, though the item isn't lost either and we can just pick it up again.

So let's check out the misty room again -- as expected, WAVE WAND dispels the fog, and now we can visit the Art Gallery and acquire a large rusty key.  There are no other exits from this location, and we're told that all the art on display is counterfeit and valueless.

What about the piranha, then?  The puzzles up to this point have been very straightforward.  SAY COLLEEN does nothing here or in the computer room.  But the game's HINT command comes to my rescue -- it gives us rather more of a nudge than we really need, however, as it gives away most of the rest of the game, suggesting that we need to eat to be strong to move the tank, and then we'll need a key to unlock the trap door.  So we're probably close to the end here.

And yes... EAT MUSHROOM improves our strength, MOVE TANK now works, and then UNLOCK DOOR reveals yet another downward passage leading to the Treasure Room.  Skeletons strewn about the room suggest there may be a trap here, but we'll try to OPEN the treasure CHEST anyway.  That fails, but not fatally -- It will take more than a simple word to open this chest -- which is a bit of a misnomer, as a simple SAY COLLEEN works, revealing a glittering bar of gold.  We can't TAKE BAR, but we can TAKE GOLD.

Mission nearly accomplished!  Now where are we supposed to store it?  I return to our starting point in the Wizard's bedroom, per established tradition, and HINT here confirms that we're on the right track as it reveals a table with a sign, not otherwise visible, reading: "GOLD to be put here."  We DROP GOLD, and victory is ours!


Wizard's Gold seems to have been intended as an introductory text adventure -- there aren't actually many puzzles, red herrings are few, and the map is neither particularly large nor very convoluted.  But it provided a pleasant, brief excursion into the Atari archives, perfect for a summer afternoon's adventuring.