Showing posts with label adventure games. Show all posts

Sunday, February 6, 2022

Adventure: Broken Sword 1: The Shadow of the Templars (2010 Director's Cut)

Thanks to everyone who took time to welcome me back!  I'm still going through a backlog of comments and sorting out the bitcoin/gambling spam from the genuinely meaningful and informative comments the system has been gathering while I've been away, but I do hope to write a new post now and then.

(As to where my time has been going these past several years, I've been doing quite a bit of acting in various projects, which I may or may not owe to becoming more comfortable on camera doing my video podcasts here.  The pandemic has forced/encouraged me to do less live theatre and more film and television work; if you want to know more, here's my IMDb page.)

Anyway, as time has gone on, I've realized this age of "Let's Play" videos makes the type of post I often write about my detailed experiences playing a specific game less relevant.  I'll still write about obscure games that aren't likely to be covered elsewhere, but there are definitely games that are very well documented at this point.

So this post will be an attempt at a lighter approach, and honestly one that gives me a little more freedom to enjoy the ride without having to take detailed notes and capture screenshots.  I've recently played through Revolution Software's classic Broken Sword 1 - The Shadow of the Templars: Director's Cut, a more seriously-styled point-and-click adventure originally released in 1992.  I played the 2010 Director's Cut edition simply because that's the version I had picked up on Steam at some point; it adds some additional story and puzzles fleshing out Nico's story, but many people prefer the 1992 version as some content was changed/cut and puzzles simplified in this version.

One historical note I'd like to make is that Revolution Software founder and Broken Sword creator Charles Cecil did his initial adventure game work on text adventures for Artic Computing and eventually became director of the company.  I haven't been able to confirm this independently, but MobyGames credits him as the designer (which in 1982 likely also meant programmer) of Artic Adventures B - Inca Curse, C - Ship of Doom, and D - Espionage Island, which I've covered here in the past.  As head of Revolution Software he pioneered the company's Virtual Theatre engine, which has hosted many notable games including the early Broken Sword titles and the classic Beneath A Steel Sky,  an excellent sci-fi adventure that is now on my shortlist to tackle sometime.

I'll also note that while I never played Broken Sword 1 on PC back in the day, I did take a run at the Game Boy Advance cartridge version a decade or two back.  I never finished it or even got very far into the story -- the game's beautiful high-resolution background art was compromised on the GBA's limited-resolution screen, and there was insufficient ROM space for the well-acted spoken dialogue to be heard.  While I was very happy to see a proper adventure game released on the GBA, in practical terms it didn't fully engage me at the time.

With this new approach I'm trying, there are likely to be *** NO MAJOR SPOILERS AHEAD ***, just so you know.

Here's the obligatory title screen shot:


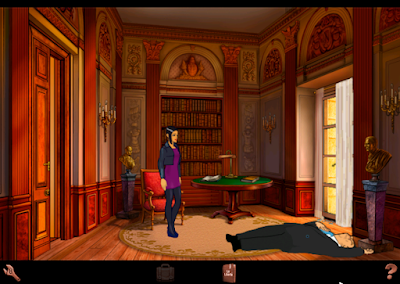
And here's the beginning of gameplay, a moment unseen in the 1992 version, as a prologue to the original narrative confronts Nico with the murder of a family friend.  The visual style of Broken Sword 1 is impressive and the Director's Cut release increases color depth a little, so even though the game isn't in full HD resolution the lighting and details look great in every scene.


I really enjoyed this game -- I knew it by reputation and that reputation proves well-deserved.  It definitely contains plenty of humor borne out of the many eccentric characters our hero George Stobbart encounters, but it's generally serious in tone with some dark story elements and well-plotted twists and turns.  The plot has to do with the Knights Templar, or so it seems, and a trail of obscure clues and puzzles that the player must follow to reach the story's satisfying conclusion.  The game features traditional point-and-click inventory puzzles and conversation-driven progress, but also has some visual puzzles involving decoding simple ciphers and positioning mechanical elements to unlock or engage a mechanism.  I appreciated these tactile puzzles -- they bring something new to the adventure genre beyond audiovisuals, and they break up the action while also raising the stakes a little with fresh challenges.

I won't go into detail on the plot, but will note that the story sprawls across multiple countries and continents.  Each region is well-contained and it isn't difficult to focus on what's of practical value within each sub-section.  Inventory is also nicely managed by the game design, leaving items behind once they've been used appropriately and reducing the number of "apply random object to random object" experiments a stuck adventurer has to attempt before a better idea emerges.

The Virtual Theatre engine Revolution Software developed and used in many of its 2-D games is a little different technically from the Sierra AGI/SCI engine and Lucasarts' SCUMM, in that it doesn't seem to support a fully "3-D" layering effect in the same way.  There is often a foreground mask element that scrolls in parallax with the background in wider scenes and covers up the background and characters if they're behind it, but within a scene, the background is generally structured so the "floor" is completely open and there's never a need to place characters behind a part of the background.  It's an interesting tradeoff -- it's more memory-efficient than Sierra's approach, avoiding the need to keep a background mask in unseen memory, and likely frees up CPU cycles for sprite scaling and managing multiple characters onscreen at once.  I don't know the technical underpinnings in any detail, but there are definitely glitchy moments when George's character sprite covers part of the background that should be in front of him, and when animated characters overlap the one that is smaller/farther back sometimes appears on top of the one in the foreground.  There are also no maneuvering puzzles -- all pathing is automatic, and the game saves time by going straight to the fadeout when an exit is selected.  Honestly, I don't miss those particular engine features -- the Virtual Theatre approach forces cleaner visual design and makes gameplay a little bit more efficient, especially when the player is stuck and trying everything possible in a given area.

What else?  The game took me about 18 hours to finish, and I did have to look up a playthrough to get myself unstuck at one point; as often happens in these games, I had the right idea but I hadn't quite followed the intended sequence of actions.  And I very much enjoyed the journey and the genuinely exciting climax, even though player choices are a bit limited toward the very end and, as this is a player-death-free adventure game, the only available actions are the game-winning ones at a few key points.  The animation is fluid and the characters' visuals and voices are full of personality.  

Bottom line, I definitely have Broken Sword 2 - The Smoking Mirror: Remastered on my to-play list now, though I'll likely tackle something else in the meanwhile.  Please feel free to comment about this type of post -- I'm hoping I can cover games that are still in circulation like this one in a way that isn't redundant with the rest of the online universe, but still brings some readable observations to the table.


Saturday, January 8, 2022

Adventure: 4 Mile Island Adventure (1983)

It's been a while... quite a while... nearly two years!

But I had a little free time this week to dive into a nostalgic rabbit hole, and I discovered a few adventure games for the TRS-80 Color Computer that I had seen advertised but never played back in the days when I was an avid CoCo user.  Thanks to The Color Computer Archive for keeping these vintage titles accessible!

In this post I'm going to explore 4 Mile Island Adventure, a 1983 release by Owl's Nest Software written in Extended BASIC for Color Computers with at least 16K of RAM.  The game operates entirely in memory and was originally available on tape and disk formats.  It performs pretty well for a BASIC game, in part because after some initial variable population it handles almost everything with branching logic rather than implementing a "proper" text adventure engine.  The presentation mimics the classic Scott Adams style, though it doesn't implement a real location/item "window" at the top of the screen -- text printed below will scroll it off the display like any other output text, with a new room or a LOOK restoring the top section.  Another quirk is that I is not treated as INVENTORY, we have to type at least three characters -- all single-character inputs are interpreted as directional commands.

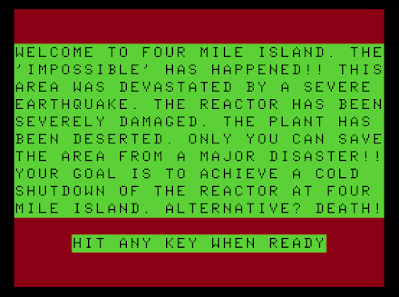
The startup screen confirms the title's implications - our goal is to stop an impending nuclear meltdown:


Can we stop it?  Maybe, but there are certain to be...


**** SPOILERS AHEAD! ****


We start out at a locked security gate, whose only purpose seems to be to suggest that we've got no way out but to deal with the problem at hand.  The map is tightly designed, consisting primarily of two long criss-crossing corridors and a few smaller sub-areas, and I didn't feel the need to draw a map to cope with this pleasantly maze-free experience.

Time is of the essence, measured in turns and temperature -- as we muddle about trying to find a solution, the reactor continues to heat up, and the game ends with a massive meltdown if we are not successful at cooling it down before it hits 750 degrees.  It took me a number of unsuccessful tries before I started to find the most efficient path, but in the classic adventure game tradition it is possible to pare  out some informational steps on subsequent attempts, and on my final run I had no problem finishing the game well before the meltdown threshold.

Exploring the office area south and east of the security gate, we find a secretary's desk, though it's called a TABLE for the sake of the parser's inability to distinguish this one from another desk to the south.  If we LOOK TABLE, we're informed THERE IS A SHEET OF PAPER.  READ PAPER yields "ENJOY THE ADVENTURE," so this is an unnecessary task and feels somehow snarky in context.

South of the secretary's desk table we find a BIG DESK (for the big boss?), and LOOK DESK reveals a drawer.  We can UNLOCK DRAWER with the key we have in our starting inventory, whether or not we know we have it, so that's not really a factor in the puzzle.  OPEN DRAWER produces a useful BADGE, gaining us access to CLASS 'B' CLEARANCE.

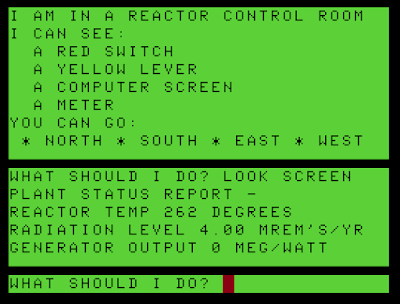
There's a securely-locked steel cabinet in an area down an adjoining corridor to the east, but for now we'll focus on the are north of the offices, where having the badge in our possession allows us to travel north of the 'B' SECURITY ROOM to access the REACTOR CONTROL ROOM, core of this adventure.

READ SCREEN here indicates THERE IS NOTHING WRITTEN ON IT, but that's just a parser quirk - LOOK SCREEN gives us critical status information on the state of the reactor, though at this point we don't yet know what the maximum tolerable temperature is.


Here's where I got stuck for a bit -- I explored the facility as well as I could, learning I could reset the power breakers in the area east of the control room and observing that the generator to the west started turning after I PULLed the red SWITCH.  But I couldn't operate the yellow lever to turn on the pumps, as suggested by READ LEVER:  IT SAYS - COOLING PUMPS.

I explored the non-functional Security Station near the offices and tried various unsuccessful commands to open the steel cabinet.  Fortunately, this is a BASIC language game, and in examining the code I discovered that, while it is not mentioned onscreen or in the game's single-page manual, we are allowed to LOOK WALL, LOOK FLOOR and LOOK CEILING.  (I also discovered that the game is aware of potential player frustration and will chide the player for employing three-letter versions of several popular four-letter words!)

Armed with this new ability, I found a slot in the wall of the control room, and INSERT BADGE opened up a staircase to the lower level.  Here I found a crowbar, wrench and rod, although only the crowbar serves a useful purpose -- honestly, I like these kinds of red herrings, because they make the world seem a little more fully realized, as if another character in a different situation would have some options I just didn't need.

LOOK FLOOR in another room reveals a loose tile -- it's too heavy to pick up, but MOVE TILE produces an ID that grants CLASS 'A' CLEARANCE.  This allows us to enter the actual nuclear reactor, and while there's some spooky buzzing and a lethal-looking green glow about, the game doesn't track any game-ending cumulative radiation metrics.  So we're free to go down to the actual vat area and GET the SPANNER inconveniently stored there.  (Incidentally, I'm accustomed to seeing American text adventures with wrenches, and UK games with spanners -- this is a rare occasion where both items exist in the same story, perhaps as a means of humoring the parser.)

We've seen a few valves along the way -- three to be precise -- and armed with these tools, specifically both the crowbar and spanner, we can open the valve to the right of Security 'B' to... dump all the cooling water outside of the plant and end the game with a huge meltdown.  So that's not what we want to do.

A valve west of the control room is open and can't be closed.  But the third, east of Control, can be, and this opens the cooling valve, though not to any immediate effect.

Returning to the control room, we can PULL SWITCH once to get generator output up to 1 megawatt.  A second PULL SWITCH gets to 2 megawatts, and a third sets off an alarm and trips the breakers, which we then have to go reset.

I should pause here to note that it's possible to figure all this out by trial and error, but if we take the crowbar back to the aforementioned steel cabinet, we can PRY CABINET to reveal an OPERATIONS MANUAL, which we can OPEN and READ to learn a few technical details.  But it's not strictly necessary, as it contains no passwords or other critical puzzle-solving content.  I was fairly successful just messing around with the highly sensitive and dangerous nuclear reactor equipment, so that's a good life lesson to take away from this game.  Along with any cancer stimulus we may have picked up inside the highly insecure reactor.

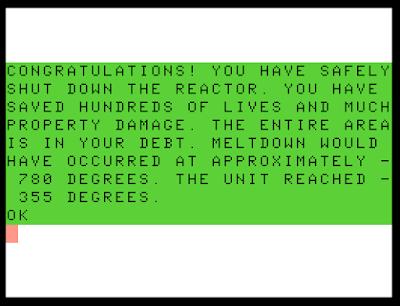
Anyway, with the generator back at 1 megawatt of output (not 2, mind!) we can PULL LEVER to activate the cooling system.  A display shows the reactor temperature gradually coming down, line by line, and it's actually a pretty effective suspense technique, counting down as we cross our fingers and hope we didn't miss a puzzle somewhere along the way.  Fortunately if we have gotten to this point, victory is ours!


I enjoyed 4 Mile Island Adventure -- it only took two or three hours to complete, and it was a well-constructed little adventure game that managed to get good mileage out of a small map and a few puzzles that seemed fairly obvious but interlocked in interesting, mechanically satisfying ways.

Here's my walkthrough, should anyone want a speedy trip through the game (note that my solution here ignores a lot of discovery details, I was trying to find the most efficient route under the mistaken impression that time was a lot tighter than it really is):

S, E, E, S, S

LOOK DESK

UNLOCK DRAWER

OPEN DRAWER

GET BADGE

N, N, N, N

LOOK WALL

INSERT BADGE

D, W

DROP KEY

GET CROWBAR

E, U, S, E

LOOK FLOOR

MOVE TILE

TAKE ID

W, N, E, N, N

PUSH BREAKER

S

PUSH BREAKER

S, W, N, N

D

GET SPANNER

U, S, S, E

OPEN VALVE

W

PULL SWITCH

PULL LEVER

(And that's the end!)

Friday, January 10, 2020

Adventure: Castle of Terror (1984)

I've had a little bit of adventuring time available in recent weeks, and I ended up tackling Beam Software's Castle of Terror, published in 1984 for the Commodore 64 and Spectrum ZX computers.  It's an illustrated text adventure with a parser (of sorts), room illustrations (that take considerable time to draw), and a design that inspired legendary frustration in its day.

I played Castle of Terror via the Antstream game service that launched last year -- recently the company has been adding a nice selection of obscure Commodore 64 and Spectrum ZX text adventures to supplement its growing selection of vintage arcade games and Megadrive titles.  When I started this blog I honestly had no clue how many hundreds of text adventures had been created for the early home computers, and I appreciate the curation-by-default Anstream provides.  Sometimes a smaller selection makes for an easier decision, especially now that the platform has added a save game feature.


I'm playing the Commodore 64 version, and the title screen shows off a design technique that was somewhat specific to the U.K. approach, probably because the more color-limited Spectrum ZX was so popular there.  This title screen uses relatively high-resolution outlines, with blockier color underneath -- the ZX had to make do with relatively blocky color tiles, but the C-64 version is able to apply color at half resolution, making for a strikingly detailed image by 8-bit standards.

As always, I'm going to share my experience in full detail... and while normally I warn fellow adventurers away from the inevitable spoilers, this is one title you might want to know more about for the sake of adjusting your expectations.  So consider this a half-hearted warning of...

**** SPOILERS AHEAD! ****

After we hit ENTER on the title screen, we find ourselves in a field where workers toil away with a few pixels' worth of incidental animation, and pleasant background music, atmospheric though no touch on the SID-powered C64's best.


I decide to head South to the location of the Duck Inn; just trying to get my bearings, I continue S to the old church grounds, and S again to a fresh grave.  EXAMINE GRAVE reveals a bit of bone, and EXAMINE BONE reveals it seems to be a bit of skull.  I'll take it along just in case, per tradition.

I wander around a bit -- we can see a foreboding castle along the north-south road from the village, and can enter a mill where there's a grindstone that might come in handy.  The map isn't very consistent geographically -- there are lots of approximate connections along the cardinal directions, and interiors seem to allow any direction as an exit, though it's entirely consistent and mappable.

I enter the mill and try to GRIND BONE or PUT BONE ON GRINDSTONE, but the parser doesn't grasp my intent.  There's a ladder onscreen, but trying to CLIMB LADDER only causes me to fall off, and EXAMINE LADDER reveals the bottom rung is broken.  We can't FIX RUNG or REPAIR RUNG but we can TAKE RUNG -- it might come in handy as a stake, now that I think of it, or rather that I allow my brain to remain preoccupied by the game's title screen.  But EXAMINE RUNG suggests it's the same size as a stay from the dray (wagon) parked outside the Duck Inn.

I haven't been inside the Inn yet, so let's go check it out.  There are some villagers grouped in a cluster of mobbish, limited interactivity, and the text also calls our attention to an old man.  Unfortunately, the parser will not allow us to TALK MAN, but if we try to TALK it asks us to whom we wish to speak... MAN doesn't yield a response, but TALK TO MAN allows him to ask us to buy him a tankard of ale.  Of course, we discover that You have no money with which to buy ale,  should we foolishly try to BUY ALE.

Wandering around some more, I find a small cottage north of the mill and enter, TAKEing a KNIFE from the kitchen table (though it is only revealed after we EXAMINE TABLE.)  Can we do anything with the dray outside the inn?  We can't LOCK DRAY (using the rung as a locking pin) or PULL DRAY or TAKE DRAY (It is too big!)

We can't ENTER CHURCH or GO CHURCH but if we EXAMINE CHURCH we find a dusty cross, always good to have on hand when these sorts of title screens are about.  Though EXAMINE CROSS reveals it is made of gold, so if we have to collect treasures it may be handy on that count as well.

There's a gatehouse (apparently near the castle?) with a WHEEL we can TURN to... lower the drawbridge, rather reducing its effectiveness as a security measure.  But trying to enter the castle by going N at this point results in our immediate demise, as an iron gate crashes down and sends pieces of our body hurtling down the cliff into the river below!  So it's a good thing I saved right before trying that!


The parser doesn't recognize THROW, so my ideas about triggering the trap somehow are for nought.  We can't GO RIVER or GO MOAT, as those destinations are unrecognized.  I can't BUY ALE with the gold cross or SELL CROSS to anyone in the inn.  What else?  Oh, if we HELP VILLAGERS in the field where we started, they thank us and pay us a coin.

Now we can return to the Duck Inn, BUY ALE... except, no, I forgot to TAKE COIN earlier, so I have to go back and get it, which I can do even though the room description never mentions it is just lying there.  (This will later prove to be something I should have paid more attention to.) 

Trying again, we can BUY ALE, but when we TALK TO MAN, he just finishes his drink and bangs his empty tankard on the table... quite a trick, as when we try to TAKE TANKARD it's already in our inventory.  So now we have... a tankard.  EXAMINE TANKARD indicates it's got ale in it.  Oh!  We have to GIVE ALE TO MAN (GIVE ALE doesn't work) to hear his tale of woe regarding his missing daughter.  He concludes by giving us a key that he indicates will help us enter the castle, before returning to his deep, dissolute depression.  Progress!

But how do we use the key?  I can't UNLOCK DOOR or UNLOCK GATE, and merely possessing the key doesn't prevent our death by iron gate.  Ah -- we have to LOCK WHEEL, as it has a place for a locking pin, and this keeps the gate at bay.

To the North of the drawbridge we find a wooden door, and after we UNLOCK DOOR with the key... the game prompts us to enter the MASTER disk for a load.  And on Antstream, this doesn't seem to happen?  Oh.  No, it does -- but it's a faithful emulation of the C64's notoriously sluggish disk drive, and it takes a minute or two (of a streamed black screen) for the game to finish loading and resume.  This is part of the authentic vintage gaming experience I sincerely do not miss.

It seems the game is technically cut into two sections -- while we do retain our inventory from the pre-castle section, the parser's vocabulary actually changes up quite a bit.  We find ourselves inside the castle's entrance hall, with exits east and west apparently guarded by knights.  We can still go East and visit a cobweb-covered banquet hall, and E again to the Gallery, where we can go downstairs to the Armoury.  Here we can TAKE SPEAR, but we can only carry one weapon at a time, so I hope I'm making the right choice by ignoring the axe and sword.  Heading back toward the entrance hall, there are only a few paths to explore -- we can try to go Up from the banquet hall, but eerie footsteps force us to turn back.

Heading W of the entrance hall leads to the Library, where a knight statue really does block progress further west.  Trying to TAKE BOOK reveals the kind of secret passage we were not hoping to find, as a trapdoor opens up in the floor and sends us tumbling into the dungeon.  But we're not immediately dead, so let's keep exploring.

Walking south, we find the skeletal body of another adventurer, clutching a piece of paper with a small dagger near his hand.  READ PAPER yields "Beware the living dead - they never sleep", almost certainly a vampire reference in these pre-Walking Dead days.  We can TAKE DAGGER -- and examination reveals it has some twine threads on it?

The next bit of tunnel as we continue S contains a spider's web -- and trying to TAKE WEB gets us fatally bitten, but at least when we restart we're not all the way back at the beginning of the game, just at the castle entrance (thankfully, to avoid further disk swapping.)  Since we're here, I'll fill in the map a bit -- but there's not really anywhere else to go, as we can't even head north of the entrance hall.  So we're probably working our way toward the game's finale.

We can ignore the spider's web, as it turns out, and just continue south, where we encounter two knights whose crossed swords block our passage through a wooden door back north.  A staircase leads up, but we'll explore to the south and east first to find an impassable pit occupied by the corpse of another failed rescuer. U turns out to lead us back to the banquet hall, though we can't go back down that way so I have no idea how this geography really works.

There don't seem to be a lot of puzzles here.  Can we KILL KNIGHTS?  No, but the parser will let us attempt to KILL KNIGHT -- though they still respond in the plural, and are too strong, beating us back.  What about the knight in the library?  KILL KNIGHT suggests there is no room to use the spear.  Returning to the armory and fetching the axe instead, it develops that we can't control the axe very well at all in close quarters.  One more try with the sword -- well, we're able to engage now, but we get cut badly with no protection.  We can do that repeatedly, though, so perhaps it's not really going to be fatal.

I can't do any better against the knights downstairs with the sword, but revisiting the pit I discover that while we can't JUMP PIT or JUMP EAST, we can LEAP to cross the pit, emerging outdoors near the river.  But we can't go anywhere from here -- SWIM and LEAP are both discouraged though not fatal -- so this is probably more of an endgame escape route.

Back to the knights, then... aha!  We can TAKE SHIELD in the armory, and maybe that will help (these items are not described in the text but are sort of visible onscreen.)  We still can't KILL KNIGHT in the library -- though we don't get cut with the shield in hand, we don't do him any damage either.  We don't fare any better against the knights in the dungeon.

EXAMINE SHIELD suggests it protects the body but not the legs?  Ah, we have to return to the armory, DROP SHIELD and TAKE ARMOUR (using the U.K. spelling.)  We still can't take out the library knight, nor the knights in the dungeon.  Man!  Hmmm... further experimentation establishes that we can't use the axe on the library knight, but it is effective against the guys blocking the gate.  Unfortunately, this only wins us passage back to the spiderweb room, and does nothing to protect us from the spider's deadly venom.  And with the armour on, we're too heavy and can't leap the pit to escape.

So it feels like we can explore a bit more freely, but I don't see any obvious puzzles to deal with.  I might have to look for a solution, as I seem to be a getting a bit stuck.

Well, there's one new discovery... for some reason, successfully attacking the knights in the dungeon seems to allow us to go up the stairs from the banquet room.  Here, at last, we find our beautiful rescuee... and the vampire, who we will assume to be her captor and not just her cousin or lover or Instagram consultant, because it is 1984.  This artwork is also striking in its combination of high-resolution pixels and chunky color.


EXAMINE COUNT indicates that the golden cross we are carrying is keeping him at bay: He sees the golden cross and is paralyzed by its dazzling light.  EXAMINE GIRL gets her to ask us to help her escape, and TAKE GIRL automatically cuts her ropes with the knife (or the dagger, maybe?)  She also suggests that we can escape by the banks of the river.

A quick trip back the dungeon (we can now travel down from the banquet hall) gets us close to the exit.  Previous fatal experimentation suggests we should DROP ARMOUR and DROP AXE before we try to LEAP across the pit again.  But we can't carry the girl across the pit without support?  Like, a girdle or something hernia-related?  Puzzled, I go upstairs and try to see if we can claim the rope we cut away earlier, but it's not available.  We might as well try to KILL COUNT while we're here, but he simply turns into a bat and flees the room.  Maybe we can use the spider web?  Maybe not... TAKE WEB is still fatal.

SHOW (a verb I only discovered when I tried to threaten the vampire with the cross) in the spider's web room indicates that the object on the floor I couldn't quite make out is in fact a club.  I've already dropped the axe, so I TAKE CLUB, then... CLUB WEB?  No, but TAKE WEB works as long as we have the club instead of using our bare hands.  We now have the web, or do we?  It doesn't show up in inventory, or in the room, but I'll see what happens.  I remember to DROP CLUB before attempting the LEAP, but we're still too heavy.  Time to drop everything but the web (if we even have it, but webs can be difficult to see)... and the girl?

We're still getting told we need support for the girl (insert joke here.)  I discover that we can TAKE WEB repeatedly, and if we've dropped the club in the meanwhile, we get fatally bitten by the owner of the already-cleared web.  So that seems to be a non-useful object.  Oh, dang -- maybe I shouldn't have cut the rope earlier?  But UNTIE MAIDEN still cuts the rope.  And the parser doesn't know how to UNTIE ROPE. 

Hmmmm.  I try to leave the dagger and knife behind so I can't cut the rope too hastily, but now I get You have nothing with which to cut the ropes which bind her when I try to UNTIE MAIDEN.  Can we THROW MAIDEN across the pit?  Nope, but we couldn't THROW anything in the first section of the game; now the parser clearly recognizes GET ROPE and THROW ROPE but we don't have any rope nor any apparent way to obtain some.

At this point I decided it was time to break down and consult the amazing solutionarchive.com to see if I can figure out what I'm missing.  #*(#@!  There are actually two mills in the first half of the game -- one of which contains some rope, which is distinct from the rope I'm trying to salvage from the maiden's captivity.

So it's time to restart the game to address my grievous oversight.  The same mill that contains the rung also has the rope, but it's not visible or mentioned unless we request SHOW to get some more details about the room, so I feel decidedly non-guilty about missing it.  I also discover that we have to EXAMINE RUNG to recognize it as a PIN, the two nouns are not interchangeable even if we already know what we need to do with it -- it's a feature or a bug, depending on one's point of view.  A THROW ROPE once we make our way back to the pit immediately takes us back to the jetty by the river, where we still can't SWIM or JUMP, but we can THROW ROPE again to cross the water to victory!


Of course, I've only earned 111 of the possible 290 points -- but Castle of Terror's scoring mechanism is a little strange so I'm not concerned about it.  The solutionarchive.com walkthrough indicates that I missed opportunities to earn points by repeatedly helping the villagers, eating some soup in the cottage, and pressing the skull in the library, among other non-essentials.  I was more interested to learn that I actually lost points by entering the dungeon the way I did instead of taking a more convoluted route past the knight in the Library, requiring a flint I failed to find near one of the mills.  And it turns out that it's actually impossible to kill the Count, nor is that required to finish the game, which I had accidentally fumbled my way through... apparently a subject of some gaming magazine controversy back in the day!  So I'm satisfied to have seen most of what there is to see here, figured out most of the puzzles on my own, and accidentally ignored a few that don't actually have to be solved to complete the story.

Castle of Terror isn't a game I would recommend to modern adventure gamers, honestly -- while I appreciate that the design offers alternatives and red herrings, the design is frustrating in ways that it need not have been, with invisible items, parser oddities and a partially unresolved plot when all is said and done.  It's very much of its era, for better or worse.  But I really do appreciate Antstream's preservation of the text adventure genre, alongside its flashier streaming content.

Monday, December 30, 2019

Adventure: Hugo's House of Horrors / Hugo's Horrific Adventure (1989)

I haven't had much time to sit down and dig into a proper adventure game in a long while,so I was pleased to run across an animated adventure game that only took a few hours to play -- David P. Gray's Hugo's Horrific Adventure (its in-game credit), a.k.a. Hugo's House of Horrors (in old shareware ads if memory serves.)  It was originally published in 1989 with a mouse-supporting update circa 1997.

The design was inspired by the Sierra/Lucasarts 3-D adventure games and the technology is similar, but it's also a bit of a throwback to the bedroom coder days of yore.  It appears Mr. Gray was a one-man team, designing, programming, composing the music and creating the art and animation, so it's a fairly small map and has a homemade feel about it, like an early text adventure with some audiovisuals added.  The game was originally released as a shareware demo, and users were encouraged to purchase the full game, if only to have the manual handy to help answer some questions near the end of the game in the pre-Internet days.

For this post, I'm playing the ScummVM-compatible release available at www.gog.com as the first part of The Hugo Trilogy.  Note that the ScummVM plugin for the Hugo series uses the host emulator's text boxes, rather than the Sierra-style popups used by the original game, so if you want a more authentic experience you may wish to track down the original release and run it in DOSBox.

As always, I'll recount my playing experience in detail here, so if you intend to play this one yourself, be aware that there are comprehensive...

   *** SPOILERS AHEAD! ***

Hugo's Horrific Adventure has no title screen -- we're dropped right into the first gameplay location, a haunted house with eyes peering out and an unCLIMBable fence.  We can't walk offscreen left or right, so clearly our first goal is to get inside the house.  Our hero, Hugo, is the gent in the very 1980s cyan shirt and magenta pants.


The keyboard controls are similar to the early Sierra AGI titles -- we walk Hugo around with the arrow keys, and type to issue commands, with a general requirement that our hero be close to any objects with which we want him to interact.  The animation engine is a little glitchy -- if we repeatedly hit the movement key, Hugo's walking animation resets on each keypress so that he glides across the background.  It looks better if we just tap the key to start and stop his motion.  The music is suitably creepy-slash-jaunty, with a fun shift in tone if we stay in one place for a while.

There's a suspicious-looking pumpkin on the ground by the front door -- we can TAKE PUMPKIN then OPEN PUMPKIN to reveal a key, which falls to the ground, allowing us to TAKE KEY and OPEN DOOR.

Upon entering the main hall, we see a white-haired gentleman in a lab coat walking to the right of the upper level and vanishing through a doorway.  But I'll check out the area a bit before trying to find out what he's up to.

We can TAKE CANDLE from a small round table on the lower level.  We can EXAMINE any of the several PAINTINGs but not MOVE PAINTING or TAKE PAINTING so it appears these are just for decoration.  EXAMINE DOORWAY near the small opening under the staircase is worthwhile, as it yields a penknife and a small silver whistle.  As before, the newfound objects end up on the floor, so we have to TAKE PENKNIFE and TAKE WHISTLE.  And we have 46 of the 200 points already?  Perhaps this will be a brief adventure!

I chose to explore the upstairs bedroom next -- we can LOOK UNDER BED to find nothing, but there's a chiffarobe/wardrobe/whatchamacallit present as well.  We can OPEN WARDROBE to find what looks like a severed HEAD, but is actually a MASK shaped like a monkey's head.  In the process of figuring out what the wardrobe was called, I discovered that if we specify EXAMINE [unrecognized object] we are given a room-level description.  EXAMINE WINDOW reveals the outline of a shed below, in amongst some trees, so we should try to find that at some point.

Next door is a bathroom:


We can't seem to USE TOILET or USE TUB or TAKE BATH or USE WATER CLOSET; EXAMINE WINDOW reveals the same shed seen from the bedroom.  EXAMINE SINK provides no useful information, though EXAMINE MIRROR confirms the 333 text written in lipstick that we can plainly see in the artwork, so we'll make note of that information.

Entering the Professor's room causes us to lose the monkey mask, so at first I thought solving this room might have to do with sneaking it in somehow -- actually, it appears to be a restriction imposed simply to avoid animation complications.  Upon entry, the Professor urges us to get in place to "begin the experiment!" by stepping into a large open box connected to some wires and an imposing control console.  There's another character here, a large green fellow who looks a bit like the Green Yamo from the old Datasoft Bruce Lee game but is actually Igor.  EXAMINE TABLE near the door indicates there's a useful rubber bung here, but we don't seem to be able to TAKE BUNG as the glass door of the experiment booth is blocking our access to the tabletop.

So we might as well step into the box as the Professor asks to see what happens -- Igor mistakenly presses the red button instead of the blue as the mad scientist directs, and our hero is shrunk to about half his usual height.  The Professor departs in frustration, and now that we're smaller we can walk behind the glass door and TAKE BUNG, at least, but now we're too short to reach the unusually high-placed doorknob to exit this room.  So we're going to have to work something out with Igor here.

We can step back into the box and say IGOR, PUSH RED BUTTON -- of course, he pushes the yellow one, and now we're normal size but so discombobulated we can't coordinate ourselves enough to open the door.  Asking IGOR, PUSH YELLOW BUTTON causes the green one to be pushed, creating a pixel-fragmented Hugo that is equally unable to open the door.  It appears Igor tends to push the button to the right of the one we we ask for, so IGOR, PUSH GREEN BUTTON causes him to push the blue button, restoring Hugo to his normal condition, and I decided not to ask for any more button presses.  I also stopped to TAKE MASK again after exiting the room.

Heading north on the lower level leads us into the house's kitchen, where we can try (but fail) to TAKE the BROOM leaning against the wall, which is magically held in place somehow.  There doesn't seem to be anything in the oven or the cupboards, but we hear a feast going on in the room to the right.  We'll go left for now, only to encounter an attack dog, so we'll make a hasty trip back to the kitchen.  Re-entering to try my luck again, I was attacked and (I presume partially) eaten by the dog and had to restore a saved game, but I was able to catch sight of a mousehole on the wall in the dog room that may bear re-examination if we can deal with the angry pooch.

Exiting out the back of the kitchen, we see the fabled backyard shed -- which isn't really camouflaged at all, and we can't leave the path that leads to it so we have no choice but to check it out.  It's locked with a combination lock, and 333 -- surprise? -- is the correct combination for entry.  EXAMINE SHED discloses that the structure is in severe disrepair, but we see an oilcan on a crumbling shelf -- and for a change Hugo automatically adds it to inventory, presumably to avoid having to depict the shed's interior at all.

Returning to the house, we can enter the Feast room, which is populated with the standard Halloween characters -- Frankenstein's Monster and Dracula -- as well as... Gwendolin, Hood, Pea Head and Slime, so no Universal lawyers will be knocking on Mr. Gray's door.


The butler asks, "Care for a chop, sir?" -- answering YES leads to Hugo's swift demise, as the butler chops the interloper's head off with a carving knife.  Answering NO leads to the same conclusion, so we'd best just avoid the butler as he patrols the upper side of the room.  But there doesn't seem to be much else to do here, and it turns out that if we WEAR MASK we can use the disguise to make off with a pork chop from the efficient but easily deceived butler.

Now let's try giving that to the dog... this takes a little coordination of text input versus the animation, because there isn't really enough time to type the whole command before the dog takes Hugo down.  This is the first of several situations in the linear last section of the game where it worked best for me to type the command, enter the next room, and hit ENTER to execute it.  My attempt to GIVE CHOP was unsuccessful despite my clever timing, but following the game's helpful post-death recommendation to THROW CHOP instead worked.  Now we can EXAMINE MOUSEHOLE to find... a pile of squishy mouse droppings.  Hooray!

Hugo refuses to take any, erm, droppings, and attempting to leave and return to the room puts the dog back on dangerous full alert despite the luscious-looking pork chop still lying on the floor.  So why are we here?  EXAMINE RUG suggests a corner near the door looks uneven; moving to that side of the carpet allows us to MOVE RUG and discover a trapdoor.  This feels significant but I hope we have everything we need, because I suspect there's no going back after this point.

Well, perhaps we don't have everything necessary, as the trapdoor is bolted shut.  I try to TAKE BOLTS and OIL BOLTS and OIL TRAPDOOR to no avail.  But OIL BOLT works (there's only one big, rusty bolt) -- but then we can't PULL BOLT or REMOVE BOLT or UNSCREW BOLT or OIL BOLT again?

Ah!  It turns out this is not the nut-and- but the sliding sort of bolt, and OPEN BOLT works, followed by OPEN TRAPDOOR.  Hugo discards the monkey mask automatically, yet again, and we find ourselves in the basement.  117 of 200 points so far!


LISTEN DOOR yields some muffled sobbing so perhaps we are close to rescuing Penelope!  (I only know this is what we're supposed to do because getting killed by the dog suggests that now we'll never accomplish this laudable goal.)  TALK PENELOPE establishes that this is in fact Penelope, but she's gagged so she can't suggest anything.  If we stand around too long, like we're taking blog notes or something, the game starts prompting the player to see if some help is desired, but I'm resisting for the moment.

We can see (by mousing around) that there's an EXIT underneath one of the rocks near the door, but we can't MOVE ROCK or PUSH ROCK successfully.  BLOW WHISTLE produces nothing interesting.  UNLOCK DOOR reveals there's no keyhole or bolts, so it's not clear how we can open it.  PUSH DOOR is not useful either.  And we can't get back upstairs, so it's truly a one-way trip after we pacify the dog.

What to try?  In Hugo's inventory, we currently have a penknife, a bung, a whistle, a candle, a key, and an oilcan.  We can't BURN OILCAN, although we can OIL DOOR, making it an oily door that still won't budge!

OH!  We can maneuver Hugo between the rocks by the door to the Exit to reach a cave, where Hugo immediately gets attacked by some vampire bats, fatally so.  But readying a BLOW WHISTLE for immediate execution confuses the bats' sonar so that we can explore the cave area we're in.

Unfortunately, the next room contains a murderous mummy, so it seems we need to prepare some kind of offense or defense here as well.  I couldn't burn the mummy's bandages or find any other way to attack him, but as he always just makes a beeline for Hugo it appears we can use the onscreen geography to get him trapped behind rocks and navigate past the room, being sure to TAKE TREASURE on the way.

Next, we find ourselves at an underground lake with a passage on the far side, near an old man with a fishing pole.  There's a small boat on the near side -- we can't USE BOAT or BOARD BOAT, but GET IN BOAT reveals a hole in the vessel's bottom, so we have to PLUG HOLE WITH BUNG before we can proceed.  Good thing we've been faithful adventurers, collecting every object along the way!

We can't move the boat yet as it's tied to a post -- we can't UNTIE ROPE (it's too knotted) but we can CUT ROPE with the penknife, then GET back IN the BOAT and PUSH OFF.  We drift over to the other side of the lake, but can't GET OUT because the old man is stubbornly in the way.  TALK MAN reveals that he wishes to help, but he vows to test our adventuring mettle by asking a series of questions, mostly related to popular fantasy literature.

I was able to answer BILBO as the first name of the hero of The Hobbit; NARNIA as the home of Aslan; and BRAM STOKER as the inventor of Count Dracula.  I successfully chose (c) Drink It concerning what one should do with a Pan-Galactic Gargle Blaster.  The final question is a riddle: "What's the name of the only mammal that can't fly that can fly?"  I initially guessed PIG, incorrectly, and was doomed to float forever on the old man's lake, which seems a bit harsh when all he really has to do is move a foot or so.  Fortunately, we can just TALK MAN again to re-take the quiz; I tried SQUIRREL and FLYING SQUIRREL, also unsuccessfully, before successfully arriving at HUMAN -- we can't fly naturally, but we can fly with technology, which seems obvious in retrospect.  Two more questions remain -- "What was the name of Roy Rogers' dog?"  I knew Trigger was his horse, but I had to look up this bit of trivia - BULLET (the Wonder Dog) is the correct answer, and then of course I answered YES as to whether I really want to rescue Penelope.

We now have 179 of 200 points as we venture past the lake into a guard station where a more fleshy-looking version of Igor stands watch over the beloved Penelope's cell.  TALK GUARD yields no meaningful result, nor does BRIBE GUARD, but GIVE GOLD cause Hugo to wisely slip him just one gold coin from our recent looting of the mummy's treasure.  And now Hugo has all 200 points collected!

Once we enter Penelope's cell, therefore, the game wraps up rather hastily -- text informs us we have rescued her and exited the house somehow getting two people past the dog and all other obstacles, and apparently Hugo and Penelope live happily, if not ever after, at least until the second game in the trilogy, presumably.  (Apologies for the obscured screenshot, I wasn't able to grab an image without the wrap-up text overlaid on top!)


Hugo's Horrific Adventure/Hugo's House of Horrors was an entertaining little animated adventure -- it only took a few hours for me to play through it, including taking notes and gathering screenshots, and I appreciated its straightforward simplicity.  Haunted house rescues and escapes were a very common theme back in the text adventure era, and the heavy use of the parser here felt nicely old-fashioned.  I'll likely return to this series in the future.


Friday, December 29, 2017

Adventures in VR: Dead Secret (2016)

Hi-ho!

It's been a long time, more than a year.  But while I haven't been writing much about games of late, I have had time to play a few and to goof around with virtual reality using the HTC Vive platform.  This is exciting stuff, actually, and reminds me a lot of the pioneering days of video games I have so often written about; conventions for movement and interaction are still evolving, the technology is here but has definite room for improvement, and interesting gameplay experiments are happening.  Its immersive qualities are great for adventure games, and while I tend to favor the "theatre of the mind" created by classic text adventures, this technology is taking us to some fascinating new places.

This past fall, I played through Robot Invader's 2016 indie adventure game, Dead Secret.  The game also supports standard PC mouse-and-keyboard play, but I'm going to focus on its virtual reality mode here and what that brings to the experience.  I played it on the Vive; it also supports the Oculus Rift, and a Playstation VR version is expected soon.   

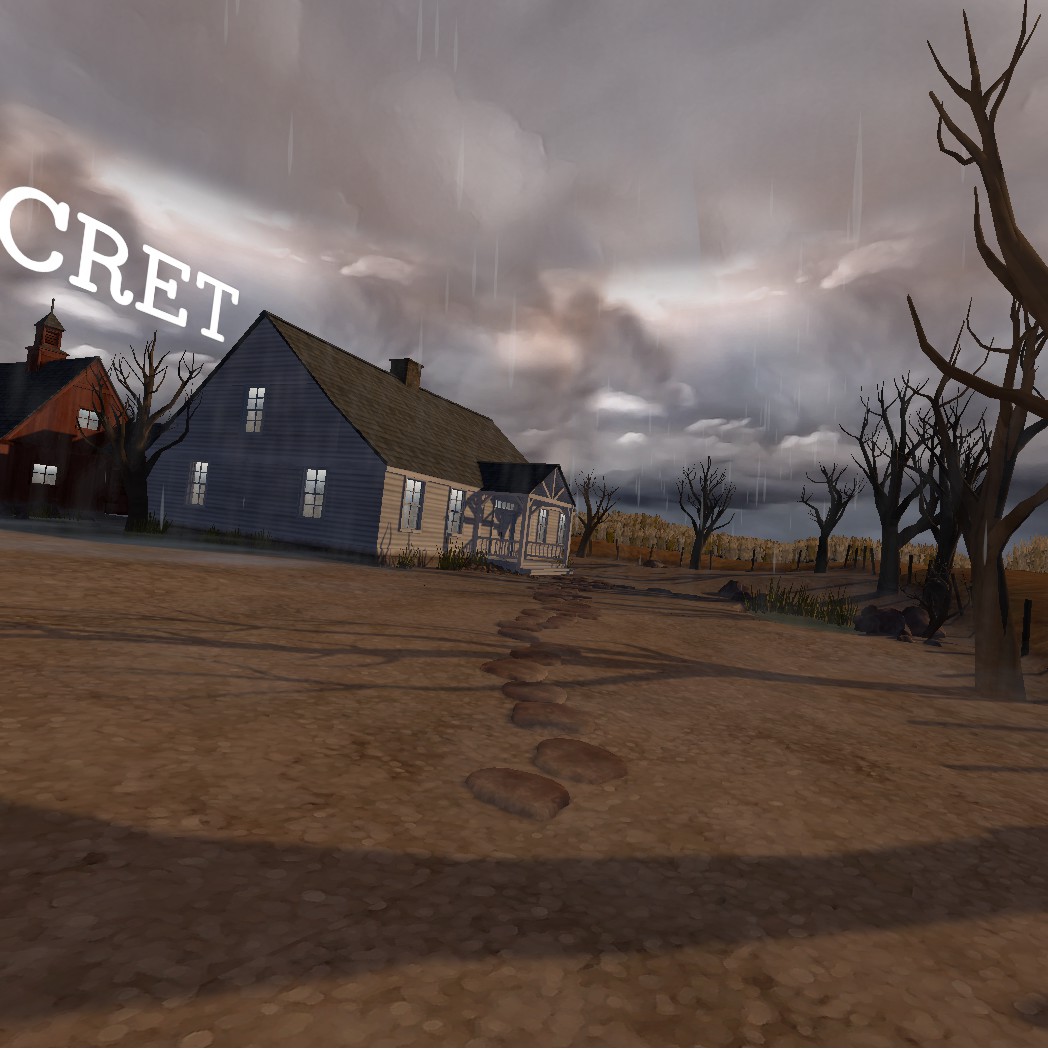
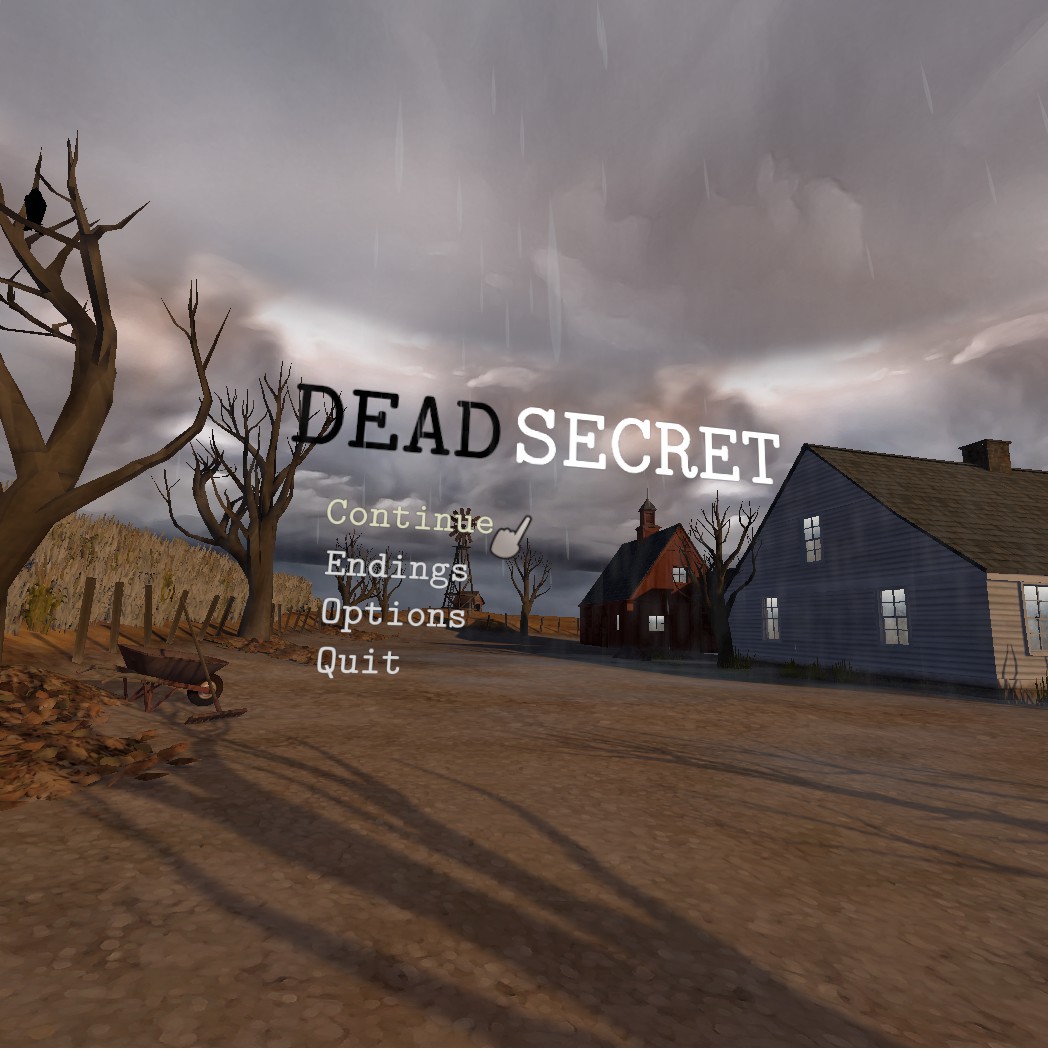
I haven't mastered figured out even started to work out a reliable way to capture decent screenshots from VR games yet -- the projections and distortions applied to the image to make it look "real" in a headset don't translate very well to flat images.  And my attempts so far tend to look a little inebriated at best:


Since this is a recent game, I'm going to do my best not to spoil the plot, which is in many ways this game's best feature.  But I will be citing some specific examples from my experience with this adventure, so there may still be a few...

***** SPOILERS AHEAD *****

Dead Secret is a mystery adventure game set in and around an old house whose owner, a professor, recently died or was perhaps murdered.  As a reporter with one arm stuck in a cast, it's the player's job to explore the area, find clues and evidence, and figure out what really happened.

Let's start by talking about the game's VR interface.  Virtual reality's biggest strength is its ability to put the player inside the game's world, and Dead Secret does a good job of this in the basic sense.  We can look freely around the world, texture resolution is sufficient to avoid obvious pixellation, and items of interest are sometimes hidden in areas we'll only spot if we peer under the furniture or behind a prop.  Locomotion is handled by pointing a cursor at a possible destination, then clicking; we slide slowly to the new area, and are free to look around while we're moving, as if riding on a conveyor belt.  (There is a comfort mode that limits the field of view during motion, for players prone to motion sickness in VR -- I am building a tolerance for it, but my brain still doesn't like it when I seem to be walking or tilting quickly and my body is not doing the same.  I had no problems with Dead Secret's default movement speed.)  Doors and transition points like stairs are identified with icons, and the world fades out and back in at the new location, a VR convention that works well here. 

Text is nicely presented, anchored within the world rather than floating in front of the player's face -- descriptions of items are presented on surfaces nearby, museum-style, and the many printed clues we find are rendered as folders we can hold in our hand and read.  I was happy to see that the font handling supports up-close viewing, so everything is clearly readable and there are no obvious bitmaps visible.  And when something scary is happening, being "there" definitely heightens the impact.

Unfortunately, the interface betrays its non-VR origins in a lot of ways, probably due to the game's support for both desktop and headset play.  The game is running on a point-and-click engine, which means that even though we feel very present in the environment, we can't simply pick up and manipulate objects at will -- we have to click on a limited set of movable items, using a floating pointer rather than an in-game hand, and the inventory system takes us out of the game world into a menu system where we have to point and click the old-fashioned way.  (Other VR adventures I have played use a backpack or a belt to provide a more "realistic" approach to inventory handling, though scale is always a little weird when we can SEE that we're carrying all this stuff with us.  Text adventures had their awkward conventions too!) 

Using an object where interaction is supported also feels artificial; we have to access the item in inventory, then point at the intended location and click, at which time a scripted animation plays out.  We don't get to really fit things into place, turn keys or open drawers directly, and Dead Secret's approach robs the game of some of the immediacy important to VR.  In the most egregious case, when we are tasked with solving a puzzle involving weighted bottles and a scale, it feels like we are manipulating icons rather than really weighing bottles on a scale.  We want to lift and drop bottles and shuffle them around in real time, even with only one workable hand (a limitation that serves the game's drama well at times), but we're only able to "click" them into predetermined slots, severely breaking the reality for the duration of that puzzle.

The game's plotting is well handled -- there are moments that might be paranormal in nature, or might not be, and the story behind the professor's death is revealed in small, interesting revelations as we discover clues.  Seeing our character in a mirror early in the game was surprisingly effective -- I'm so used to being anonymous in adventure games that I thought this would seem like an imposition, but in a world that feels this real it was satisfying to inhabit a character with defined limitations, goals and (as we discover during the game) dreams and emotions.  There are a number of scary surprises, mostly involving a masked, robed figure that lurks and attacks at key moments in the story, and much of the game's drama comes from the rush of desperate escape and concealment.  VR and horror are remarkably effective in combination -- without the distance that a screen provides, even simple "jump scares" can be unsettling.  Dead Secret uses the medium very well in this regard, with measured pacing to convey approaching menace and jeopardy.  Part of my brain knew it was just a game -- but part of it didn't, and I found my heart pounding and breathing rapid several times along the way.

Multiple endings provide a little bit of extended play value -- one is accessible at the very beginning, if we opt to just leave the house rather than investigating, but the others depend on choices made near the very end, and the game generously allows us to restart just before that point to discover the alternatives.  I was so involved in experiencing the environment and events of the story that I didn't do a great job of finding and making sense of all the clues, so I wasn't at all sure about my factual determinations, and this design concession to the player hours invested up to this point was greatly appreciated.

Dead Secret is not a perfect adventure game, and its VR implementation misses some opportunities.  But the experience stuck with me -- not just the eerie moments, but the discoveries of new spaces and clues in a virtually real environment.  Immersion to this degree is perfect for old-fashioned adventure games, where methodical examination and consideration is of more importance than fast action, and I look forward to seeing what else the nascent VR game industry produces along these lines.

Saturday, July 2, 2016

Adventure: Detective Case and Clown Bot: in Murder in the Hotel Lisbon (2014)

Ed.: As many have noticed, I'm finding it difficult to keep up with my adventuring and blogging of late.  So I'm changing up my approach a little bit -- feedback is welcome!

For several years now I've been doing comprehensive playthroughs and avoiding more recent games -- unnecessarily, as it turns out, since walkthroughs are actually easier to find for modern adventures than the vintage text games I often choose to battle through.  So I'm going to try a lighter approach and see how that works -- I'm going to play a game for fun's sake, capture a few screenshots, and then write about it from recent memory, rather than trying to take detailed notes along the way.  I won't be doing reviews, exactly, and there will still be some spoilers here where I want to comment on or illustrate something notable.  But I'm going to try to focus more on what a particular game brings to the adventure gaming genre, and how it uses or changes its conventions, and break my old habit of narrating every step of the game, at least where more recent titles are concerned.

So, with that said, I've recently been playing Portuguese developer Nerd Monkeys' 2014 point-and-click animated adventure, Detective Case and Clown Bot: in Murder at the Hotel Lisbon.


The adventure game genre never quite died off commercially outside the United States, though I was surprised to see this effort is not implemented using the near-ubiquitous Adventure Game Studio, but Game Maker Studio.  The game is designed by Filipe Duarte Pina and produced by Diogo Vasconcelos, with backgrounds by Luis Bacharel, character design by Nuno Saraiva, a great jazz combo score by Rafael Pina, recorded with live instruments but yet somehow seamlessly looped when necessary.

The story is straightforward -- our hero and avatar, the amoral Detective Case, must solve a murder as well as several supplementary cases with the occasionally helpful assistance of an inherited robot sidekick who wants to be a stand-up comedian.  (Straightforward as adventure games go, anyway.)  The game mechanics are kept simple, and there aren't really any inventory puzzles of the traditional sort -- we do collect items and evidence, but they are used primarily within the victim and suspect interview sequences that provide the bulk of the gameplay.

It's not hard to work one's way through the game using exploration and a little experimentation, and there are walkthroughs available elsewhere, so I'm going to skip the details of the plot other than to say there's a murder afoot and an array of suspects with possible motives.  But I'm going to talk about details of the game's style here, so as always, I'll warn you that beyond this point there are likely to be...

****** SPOILERS AHEAD! ******

Detective Case/Lisbon (for short) has an appealing 2-D low-res European comic-strip look about it, with dialogue popped up in word balloons.  There's not a lot of character or event animation -- mostly walking, idle animations and some funny close-ups during the interrogations.  But the combination of backgrounds and characters (by different artists, no less) works nicely, and there are nice little visual touches like passing traffic and silhouettes used to indicate people who exist in the game's world but aren't available for interaction.  The engine smartly allows itself to cleanly adjust to a variety of vertical resolutions by employing a wider canvas (visible in windowed mode):


The writing is funny, unabashedly bawdy and politically less-than-correct at times, but it's not self-conscious or smarmy.  The translation to English is sometimes grammatically awkward, and there are a few jokes I never was able to grasp, but the characters come through well enough.  The game is not voiced, probably to reduce costs and localization challenges, which I appreciated when trying to click past repetitive dialogue exchanges.

(Speaking of repetition, while the game is generally pretty polished, I did run into one repeatable crash early in the game -- if one clicks on the police station door after entering from the left side without walking farther into the scene, the engine's text positioning calculation fails and causes the game to halt.  But I didn't run into any other showstoppers or gameplay dead-ends.)

The game's visual design is very consistent -- the camera angle never changes, so the same sprites are used everywhere; there's not even any scaling, as all entrances are left, right, or through a doorway that transitions to another location.  This is used creatively to accommodate a raucous foreground audience that treats the early going as a sitcom, and as a happy byproduct, the game's fast-travel taxi can be summoned anywhere, even inside a hotel room, to speed up gameplay.  There aren't many locations in the game, but the excellent score and well-chosen colors and background details keep the visuals interesting.

There's not a lot to actually do in this adventure, beyond pursuing the case at hand by exploring the world, finding connections and interviewing the parties involved to elicit information or confessions.  There are quite a few funny little details to check out and conversations to trigger, but many are optional and unvarying, and there are only a few cases where pixel-hunting becomes necessary to find an important item.  The interface is helpful -- Detective Case can ask Clown Bot for a reminder about the current objective, and we can review the items in inventory to learn additional details that might trigger an investigative path.

The core of the gameplay is the interviewing mechanic, a graphical reinterpretation of the classic ASK [SOMEONE] ABOUT [SOMETHING] text adventure approach, enhanced and/or limited by multiple choices for both questions and objects.  This has always been a problematic approach for me going all the way back to Infocom's The Witness -- each puzzle succumbs to trial and error, of course, but one never feels like much a detective when resorting to that.  Here, we're not allowed to initiate an interview unless we have all the necessary evidence to complete it successfully -- a reasonable design choice that saves us from too many dead ends, but it still doesn't help when we just happened to miss an important item somewhere and wish we could talk to someone to pick up an idea about where to look.  There's an additional layer of complexity here -- we can conduct a given interview as Detective Case or as Clown Bot, and some suspects react very differently to the two characters, leading to different outcomes based on the same evidence.  And the game's finale requires us to interview two different suspects at the same time, switching back and forth through six rounds of questioning instead of the normal three.


Unfortunately, the whole approach is sometimes a little opaque -- two questions may make basically the same point in slightly different ways, with one being successful and the other failing miserably.  Essentially we read the three possible questions, review our current inventory, and select the most productive question paired with supporting evidence.  But sometimes two pieces of evidence that should support the same line of questioning produce very different results, and sometimes a piece of evidence that seems tenuous at best ends up being the one the game wants us to pick.  So there's still some guesswork involved in these interviews, and the finale is especially vexing -- we have to replay the question/answer pairs we know multiple times as we try different combinations for the one we're currently stuck on, and there's no way to save the game mid-interview, leading to a lot of repetition that becomes frustrating the closer we get to finishing the main story.

Still, the game is entertaining, and Detective Case's, um, cases are developed in a light-hearted but logical manner.  And there's some charming retro humor on offer, including a vintage arcade stocked with parody coin-op titles in the Space Quest tradition:


Along the same lines, a thorough tour of the Hotel Lisbon allows us to access the mysterious room 401, which leads... right out of the game and into a vintage operating system:


This last joke is handled particularly nicely -- the game autosaves before we enter this area, as there's no way back in once we've exited, hinting at the frustration of 1980s game crashes and adventuring dead ends without forcing a replay.

There's also a nice nod to the development team, appearing as alley dwellers in an optional area of the game, and the band in a restaurant can be induced to play an entire song complete with vocals.  The music really makes up for a lot of the gameplay's limitations -- there's always a jaunty, promising feel in the air even when the hunt for evidence, suspects and the right combination of interview questions bogs down.

And that's what I have to say about Detective Case and Clown Bot: in Murder at the Hotel Lisbon!  It's not a must-play adventure, but I look forward to seeing what this developer comes up with in the future -- the intentionally limited style seems to be working for Nerd Monkeys, and I appreciate that they aren't biting off more than they can chew like some other indie adventure game devs.  Sometimes a simpler style benefits more from modern technology than an envelope-pushing style the budget can't support.


Saturday, May 7, 2016

Adventure: Dr. Livingston, In Search Of (Softside, 1980)

Thanks to all the longtime readers inquiring as to my whereabouts.  I assure you I am well, just busy with life elsewhere.  I have not written a new post since August of last year, and my old weekly schedule will not be returning any time soon, so I'm going to just start calling these "Adventure" posts instead of "Adventure of the Week."

Anway, I had a little free time this weekend, and so I wandered randomly into the SoftSide disk magazine archives in search of something I haven't played yet.  And I discovered that I had somehow overlooked this TRS-80 text adventure from September of 1980: Dr. Livingston, In Search Of... -- also known as African Adventure: In Search of Dr. Livingston when it was ported to other platforms later on.


It's basically a jungle-themed treasure hunt, without much of a plot to speak of.  Like many of the SoftSide adventures, this BASIC-language game's author is uncredited -- the engine appears similar to other games the company published, which I will probably appreciate if we get stuck along the way.  This game predates the availability of lowercase alphabet display kits for the venerable TRS-80, so the parser will only recognize entries in uppercase.

I've been considering changing my old format for these posts, especially when I'm dealing with animated/modern adventures and well-known games where walkthroughs are commonly available and that level of detail doesn't necessarily add value.  But this adventure is more obscure, so I'm going to stick with my usual approach, detailing my playthrough experience in the following.  In other words, if you plan to search for Dr. Livingston on your own, you may want to stop here.  There are certain to be...

***** SPOILERS AHEAD! *****


We begin where so many other adventures begin, in a bedroom, presumably our own, in pajamas, with a closet, a bed, and some bedcovers that are curiously emphasized in the text as TURNED DOWN.


There's also a TIMEWORN BOOK on hand, so it makes sense to READ BOOK.  Oh, right, YOU DON'T HAVE IT.  I am clearly out of practice!  I GET BOOK -- 'TIS DONE providing a nicely period-appropriate parser response -- and then READ BOOK; TRY READING IN BED.  Um... okay.  I GO BED and now we can finally READ BOOK to discover its title: "AFRICA - LAND OF THE UNKNOWN - BY R.U. REDDE." 

The book seems fairly central to the action here, as we can also OPEN BOOK and READ PASSAGE: "... PLORER NODDED OFF TO SLEEP, HIS THOUGHTS BEGAN TO DRIFT T..."  This seems like a clue, but we're not allowed to SLEEP, GO SLEEP or CLOSE EYES, so I'll GET UP and see what else we can do here.  EXAMINE CLOSET yields no information... and neither does GO CLOSET?  Ah, we have to OPEN CLOSET, adding a faded red knapsack and a pair of hiking boots to the visible items in the room.

I'll GET KNAPSACK and GET BOOTS -- they are automatically worn, it seems.  OPEN KNAPSACK reveals only that it's already open, and I can't seem to PUT BOOK or DROP BOOK in any way that involves the knapsack, so we'll assume it is just here for show or perhaps to increase our carrying capacity.

There appears to be no way to leave the bedroom -- N, W, S, E, U and D all reveal various blocking messages.  I suspect these are randomized for variety, and that the "THAT DIRECTION IS SEALED OFF" text doesn't necessarily mean we can open up a passage there.   We can't seem to do anything with the nightstand, so we'll try going back to bed.

I suspect we need to sleep, but repeated reading of the book doesn't do anything, and I can't PULL BEDCOVERS or COUNT SHEEP.  Ah!  DRIFT OFF is hinted at by the passage in the book... and now we find ourselves DRIFTING IN A ROWBOAT ON A LAKE.  That's a nice transition of a type peculiar to text adventures -- the conceptual pun, if you will.

There's a tiny grey mouse in the boat with us, and we can see a beach on the eastern shoreline.  We can simply GET MOUSE and store him in the knapsack, and go E to arrive on the shoreline with our boat conveniently tied to the dock.

The game does not in most cases tell us which directions are available for travel; going N is unsuccessful, so I'll head S into a grassy plain where a native throws a spear at us.  Fortunately, HE MISSES AND RUNS OFF, and we can now GET the poison-tipped SPEAR.  The grassy plain is a bit of a local maze, and I eventually find my way out to the east, where a trail begins near a tree.

It would not be an outdoor adventure game if we weren't obligated to CLIMB the occasional TREE, and this one hosts a VICIOUS VIPER.  We can't seem to SPEAR VIPER or KILL VIPER, but this snake isn't particularly strike-happy, so I'll climb back Down and head south onto the trail.

We can see cliffs to the east leading to a plateau, but I'll continue south for now to the overgrown end of the trail where we find a sack of coffee beans, which we'll take with us in case they come in handy later on.  We can't go any further south, but we can travel east to see a nearby village.  This would be a good time to SAVE GAME, if this engine sported such a feature; but it does not, so I'll have to live in 2016 and make do with an emulator save state.

As we enter the village, A VOLLEY OF SPEARS FLIES OVER YOUR HEAD!  AN OBVIOUS WARNING!  So we'll take this under advisement as we flee back W... except we can't go back that way!  I stumble S into a hut, where we find a crumpled note that reads: "SWAMI DIAMOND."  Okay, I was hoping for something a little more coherent, but we'll keep the note in case this comes to mean something later on. 

Unfortunately, when I re-emerge from the hut, we're dead, presumably from a native attack, with only 5 of 250 possible points earned -- but to my surprise, this early game actually has a bit of an auto-rewind feature, and we find ourselves drifting in the boat on the lake again.  However, we have none of our inventory... though this turns out to be informative, as when I make a direct return to the native village, people seem much friendlier and one native offers a trinket in trade for something.  I think perhaps we are better received if we're not carrying the spear I picked up earlier... and yes, if I restore my earlier save and DROP SPEAR before going into town, we're safe here.

I can't TRADE KNAPSACK or TRADE MOUSE, so let's do some more exploring.  I find a jungle south of the trail's end, where we meet a wild dog who is not friendly.  Fleeing at random, I find some quicksand -- we can't travel north across the quicksand, it seems, though we can see that a trail continues beyond.  I can't seem to find a way out of the jungle, either, so we'll restore again and check out the cliffs alongside the trail we saw earlier.

A FIERCE BLACK LEOPARD BARS THE WAY to an opening in the cliffside, and we can't THROW SPEAR (it just hits the ground) or KILL LEOPARD (THAT'S TOO DANGEROUS.)  So I'd better map this area out more thoroughly and make sure I'm not missing some important inventory items.  Oh, wait -- I didn't try to TRADE the coffee BEANS to the friendly natives, and that works -- now we have a GOLDEN NOSE RING in inventory and 20 points in our SCORE.

I try to JUMP QUICKSAND when I run across it again, and the game asks, "DO YOU REALLY EXPECT TO JUMP OVER 30 FEET?"  To my surprise, when I answer YES, the game displays a short bit of vintage TRS-80 animation as we leap over the quicksand with a satisfying "TA DA" at the end!


Safely on the opposite side, we can acquire some sugar cane.  I wander around some more, and apparently we've been whittling as we walk, as suddenly we're informed that we've converted the sugar cane into a CHARMING LITTLE FLUTE.  I also discover that if we DROP MOUSE by the plateau opening, the leopard is startled into flight and we can now go U into the opening, where we find a SPARKLING DIAMOND, worth another 20 points it appears.

I discover we can enter the cave to the east, finding a cavern and a pearl-handled dagger -- but our load is getting too heavy, and there's an occasional unsettling voice heard uttering the word "SWAMI," so I'd better decide what to do with some of this stuff.  I can't seem to PLAY FLUTE, but I can CHARM VIPER with it, and take the LETHARGIC VIPER along.  We can DROP VIPER near the wild dog in the jungle -- the two fight and both disappear into the quicksand, and a DEEP-BLUE SAPPHIRE appears sparkling in the grass.

There doesn't seem to be much of a plot in this adventure.  Can we stash these treasures back in our bedroom?  Yes, if we return to the boat and DRIFT again, we find ourselves back home.  And now we have 102 points, suggesting that this is indeed what we're meant to do with the treasures.  I also discover that we can only DRIFT at home when we have the book in inventory, but it does not travel with us to the rowboat.

I return to the caverns and acquire the pear-handled dagger, then find a passage heading east to a valley.  A trading post here offers a silver chain in exchange for something... there are ears of corn in a field to the south, but they aren't in demand it seems.  I find two shrunken heads on a sign to the west -- apparently headhunter territory.  I also find some groundnuts near a squirrel running by, with a sign suggesting this is also a trading post of some kind, although it may just refer to the nearby hut we visited earlier.  To my surprise, I can TRADE GROUNDNUTS for the silver chain.  Time for a trip home to drop off some treasures, and we're at 137 points now.

Exploring some more, I find a hungry alligator lurking in the marshes but am unable to escape being eaten by him.  I stumble into the UJIJI VILLAGE, land of the shrunken-head artistans, and in a pit to the south I actually find Dr. Livingston!  I can't GET LIVINGSTON -- or can I?  The parser responds, DR. LIVINGSTON?, and when I guess successfully by typing the "magic words" I PRESUME, 'TIS DONE, and now we have him in inventory!

We can take Dr. Livingston back to our room and drop him there, and now we're at 187 points.  So it feels like we've finished the story, but we must have at least a few more random treasures to acquire.   What haven't we done yet?  We can THROW SPEAR to kill the alligator, though the result is randomized and it took me a few tries and fatalities before I succeeded.  This doesn't seem to accomplish anything new, though, and eventually the DEAD ALLIGATOR is replaced by another HUNGRY ALLIGATOR with nary a treasure or other substantial change in sight.

What was the meaning of the note in the hut?  Are we supposed to bring the SWAMI DIAMOND there?  I try that, and nothing happens in the game or score-wise. So I think this is the best ending I can come up with:


Looking at the code, I don't see any other treasures or events I haven't seen.  It turns out that we get points for dropping ANY of sixteen inventory items in the bedroom, not just the treasures -- and in fact, it looks like we are better off keeping some of the mundane items than going for the treasures in trade, although there are some other specific scoring events that award points so it's not strictly a matter of treasure hoarding.  We've seen what there is to see here, it appears, and I'm not motivated to track down the perfect combination of actions to earn all 250 points, so I'll leave that as an exercise for more obsessive adventurers than I.

So I think that's it for the oddly named Dr. Livingston, In Search Of!  And I hope to be back, if not next week, at least relatively soon with another post.  Thanks for reading, and for your patience of late!